Sync Your Lightroom Presets to Multiple Macs using ChronoSync and DropBox
One of the things that I often find frustrating when working in Lightroom on both a laptop and a desktop, is keeping my presets in sync. I often have presets on my desktop, which I will use quite often, and then when I switch to my Laptop and I try to find them, I realise I don't have them. I've been thinking for a while about ways to help alleviate this problems, and I've come up with a solution. This won't be for everyone and I'm sure there are lots of other ways to do this, but it should you an idea of at least one way to go about keeping your presets in sync.
For this technique, I'm using two tools. The first is Drop Box. If you don't use Drop Box you can probably use Apple's iCloud drive, or Google Drive either and this will still work. The second is a great little piece of software called ChronoSync. ChronoSync is a syncing utility that will let you sync files between two folders, or drives. It allows you to sync both ways, and it has tools for resolving conflicts etc.
Please note - this isn't a complete step by step tutorial. I'm just showing you in broad terms how to do this. I suggest you familiarise yourself with the application before you attempt this!
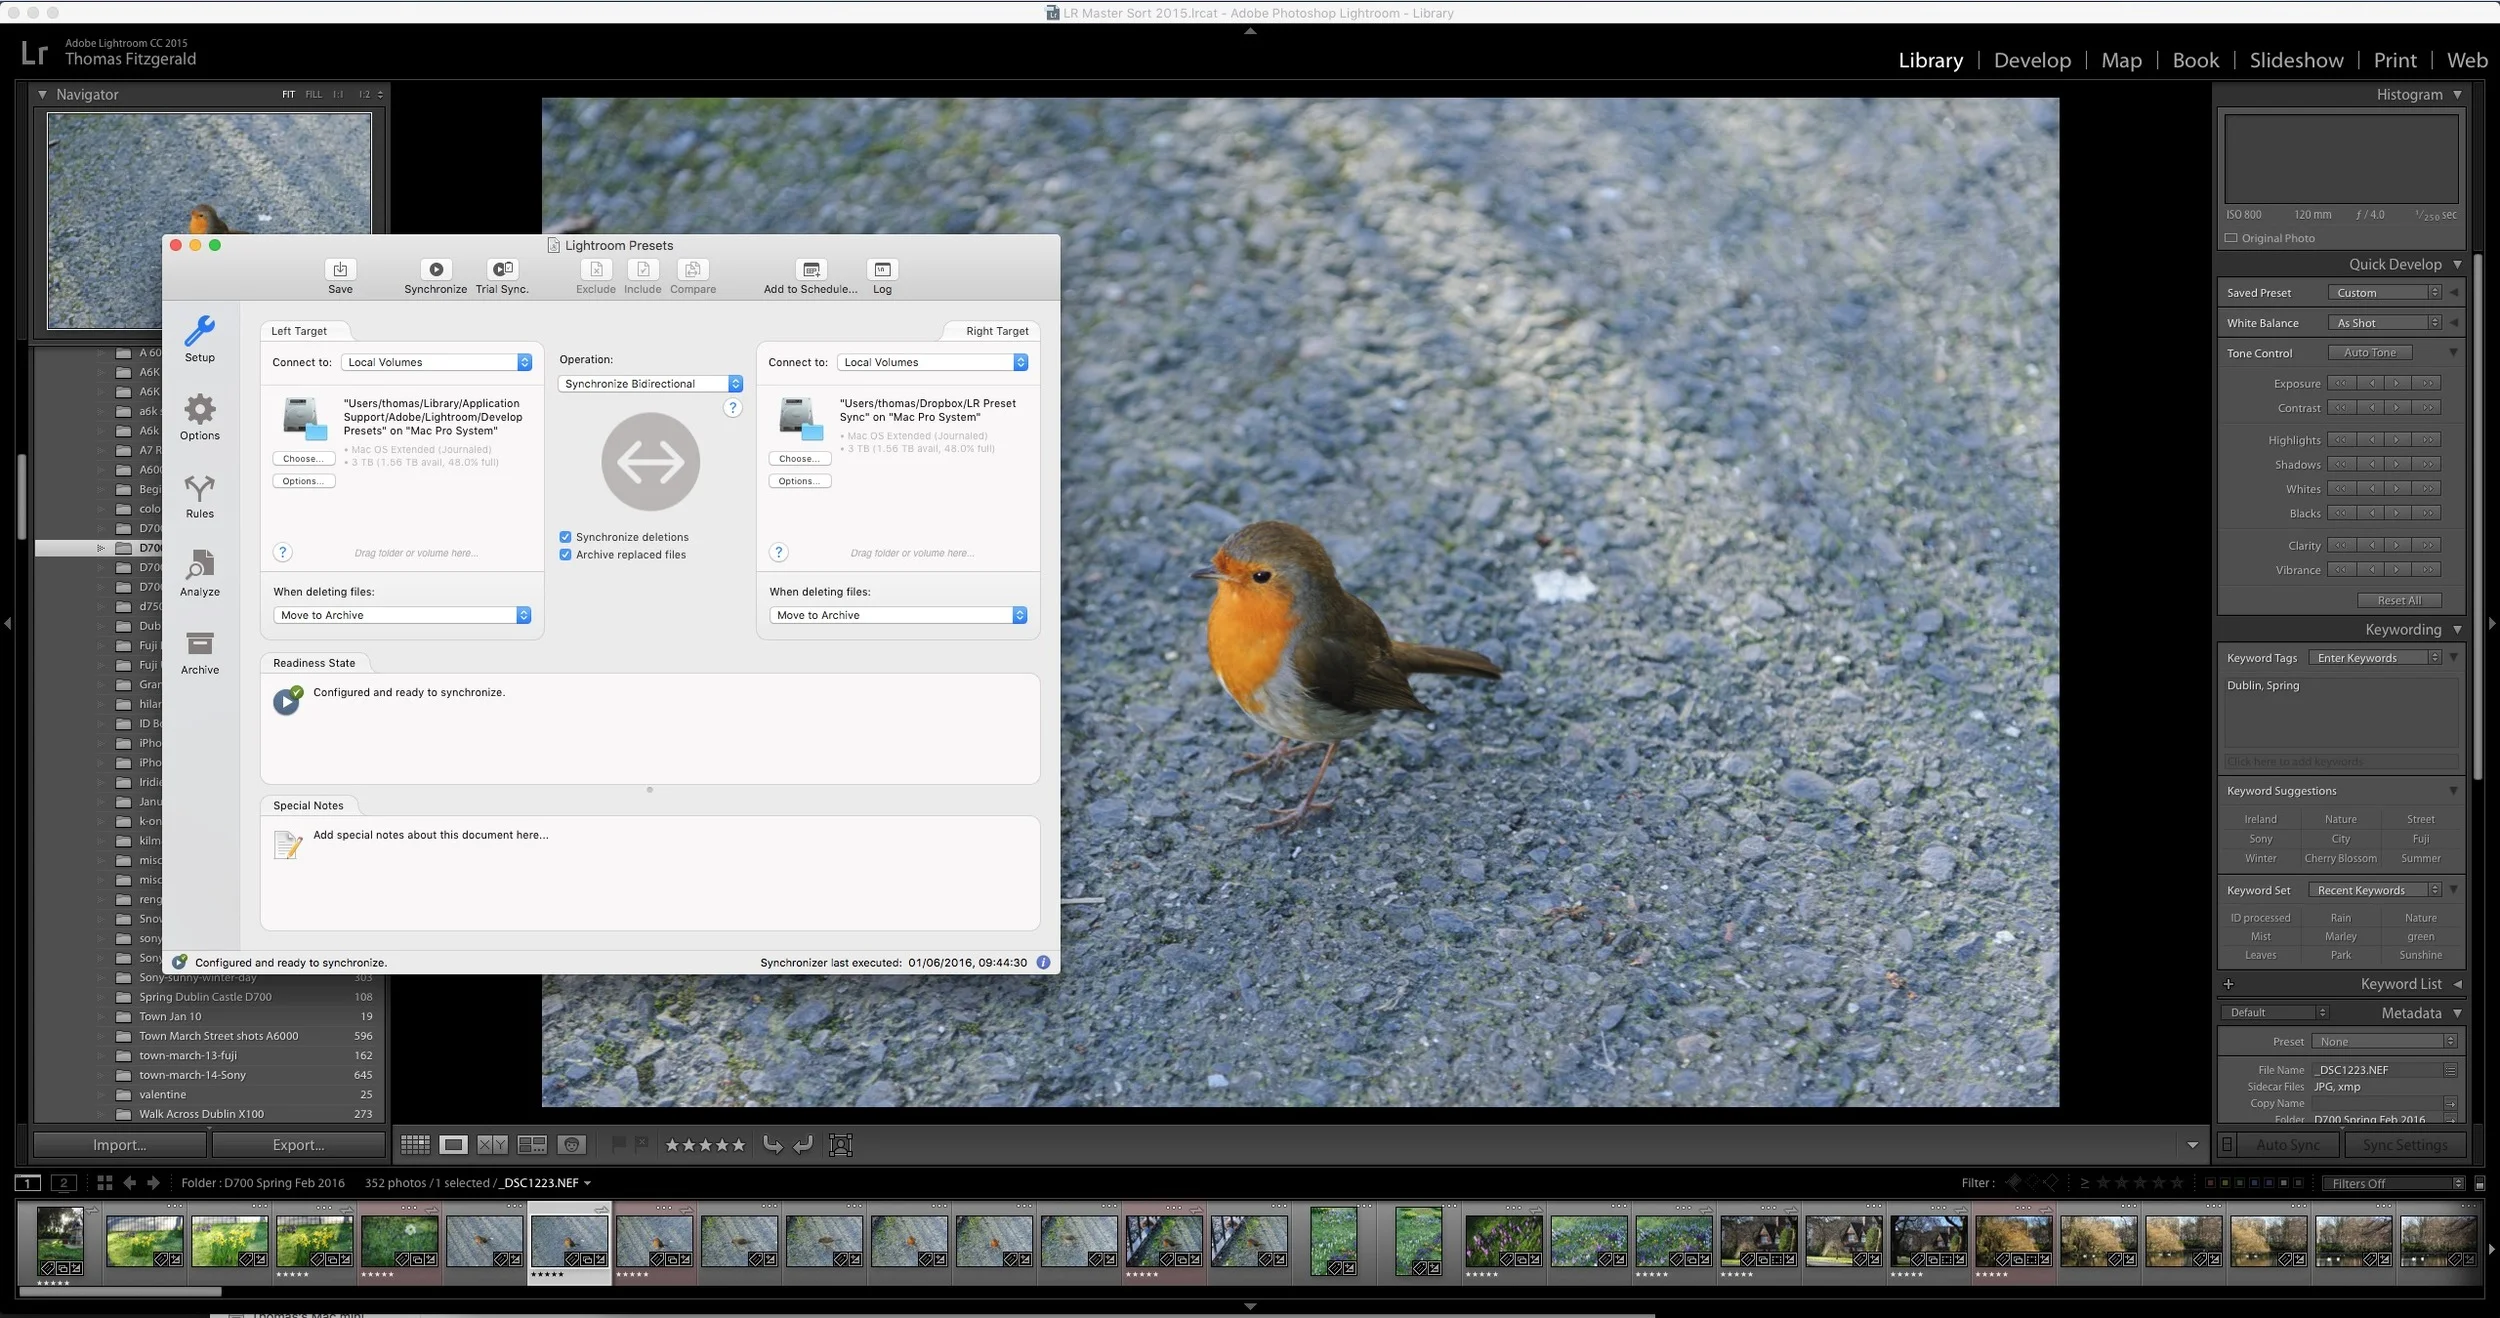
To get this to work, start by creating a temporary folder in Drop Box. In my case I've called this "LR Preset Sync". Next launch Chronosync and create a new "Synchroniser Document", and choose your Lightroom presets folder as the source, and your Temporary folder in Drop Box as the destination. For "Operation", choose bidirectional. Also choose the option for "Synchronise deletions", and to "Archive replaced" files. This means that if you remove your presets on one computer, they'll be removed on the other. Be careful with this though, as you could end up accidentally deleting some of your presets.
Once you've set this up you can hit the big button to sync the folders. The first time you run this, it should copy all your presets to your DropBox folder.
Note: If you choose to Archive replaced files, it will create an Archived Items folder within your presets folder. this will actually show up in your Lightroom Presets. However, if you turn this off, you may loose items if something gets deleted. If you're confident that this is working properly, then you can uncheck the option to Archive files.
For the next step, repeat the process on your laptop or other mac, setting the Lightroom Presets folder and the Temporary Folder again as the source and destination. Give DropBox time to sync and then use ChronoSync again.
You can also automate this a bit by adding your setup to ChronoSync's automatic schedule. With this setup, it will sync automatically based on the schedule that you set. For example, you can set it to run twice a day. For example, the screenshot shows a setup with it set to run at midnight. If scheduling on a laptop, make sure to set it to a time when your laptop will be on. (You may actually be better off syncing manually on your laptop, if you only use it now and again.)
Also, if Lightroom is running and you sync, you will need to restart Lightroom before changes take effect. I prefer to manually sync because of this.
There are a lot of advanced options in ChronoSync, including the option to remotely connect to another computer and sync that way. However, syncing via DropBox in my opinion probably works best as you can be on different networks, and it doesn't matter if your IP address fails.
IMPORTANT NOTE: As with anything that modifies files in your system, don't attempt this if you're not sure of what you're doing. You may accidentally delete something important. You have been warned!

If you want to get regular updates, and notices of occasional special offers, and discounts from my store, then please sign up for the Newsletter.
All of the work I do here, and the information on this blog is done entirely free of charge and takes up quite a bit of work. I want to spend more and more time on this blog, and offer more and more of this kind of information, tips and so on, so If you like what I'm doing here and want to show support, then you can do so by buying something from my Digital Download Store
I have Lightroom Presets, Photoshop ACR Presets, Textures and e-books all available for download.
If you're a Fuji X-Trans shooter and Lightroom user, check out my guide to post processing X-Trans files in Lightroom. I also have a guide for processing X-Trans files in Capture One