Mac Fuji Shooters: Iridient X-Transformer available now!
A while ago I wrote about Iridient’s new product, X-Transformer. It was only available for Windows at the time. I don’t have access to a Windows computer, but I did try it under parallels at the time, and I was impressed with the results. However, because it was just too clunky to work with under emulation, I didn’t do too much with it, as a mac version was promised.
A few weeks later and the beta is now on it’s third iteration, and it’s finally available on the mac too. I tried it out for a bit over the weekend and I’m mostly impressed. I still haven’t done a full test yet, and so I’m not going to delve into the details too much. I’ve been having some computer trouble over the last week which has held my workload back a bit. I will do a full review int he near future, but for now, here are a few observations.
A Quick Overview
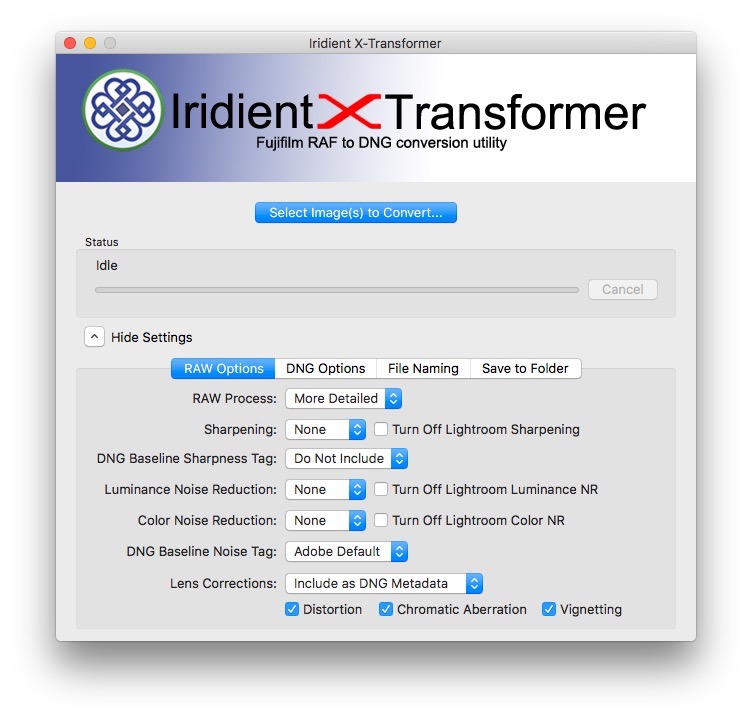
In case you haven’t seen it before, here’s a quick overview of what X-Transformer actually does. It is a DNG converter targeted specifically at Fuji X-Trans shooters. It allows uses the demosaicing engine from Iridient Developer to convert your Fuji Raw files to DNGs using Iridient’s own engine. If you then import these converted DNGs into Lightroom you still get all the benefits of Lightroom’s raw processing, but with Iridient’s decoding. In other words, if you have been unhappy with the way Lightroom decoded Fuji Raw files, this effectively solves the problem by converting to DNG and doing the demosaicing (the bit Lightroom has issues with) as part of the conversion.
That’s probably not the most technically accurate description of what’s going on, but I didn’t want to make this too nerdy! In use, you basically set your options, select your raw files, and let the software batch convert them to DNG.
Options and Approach
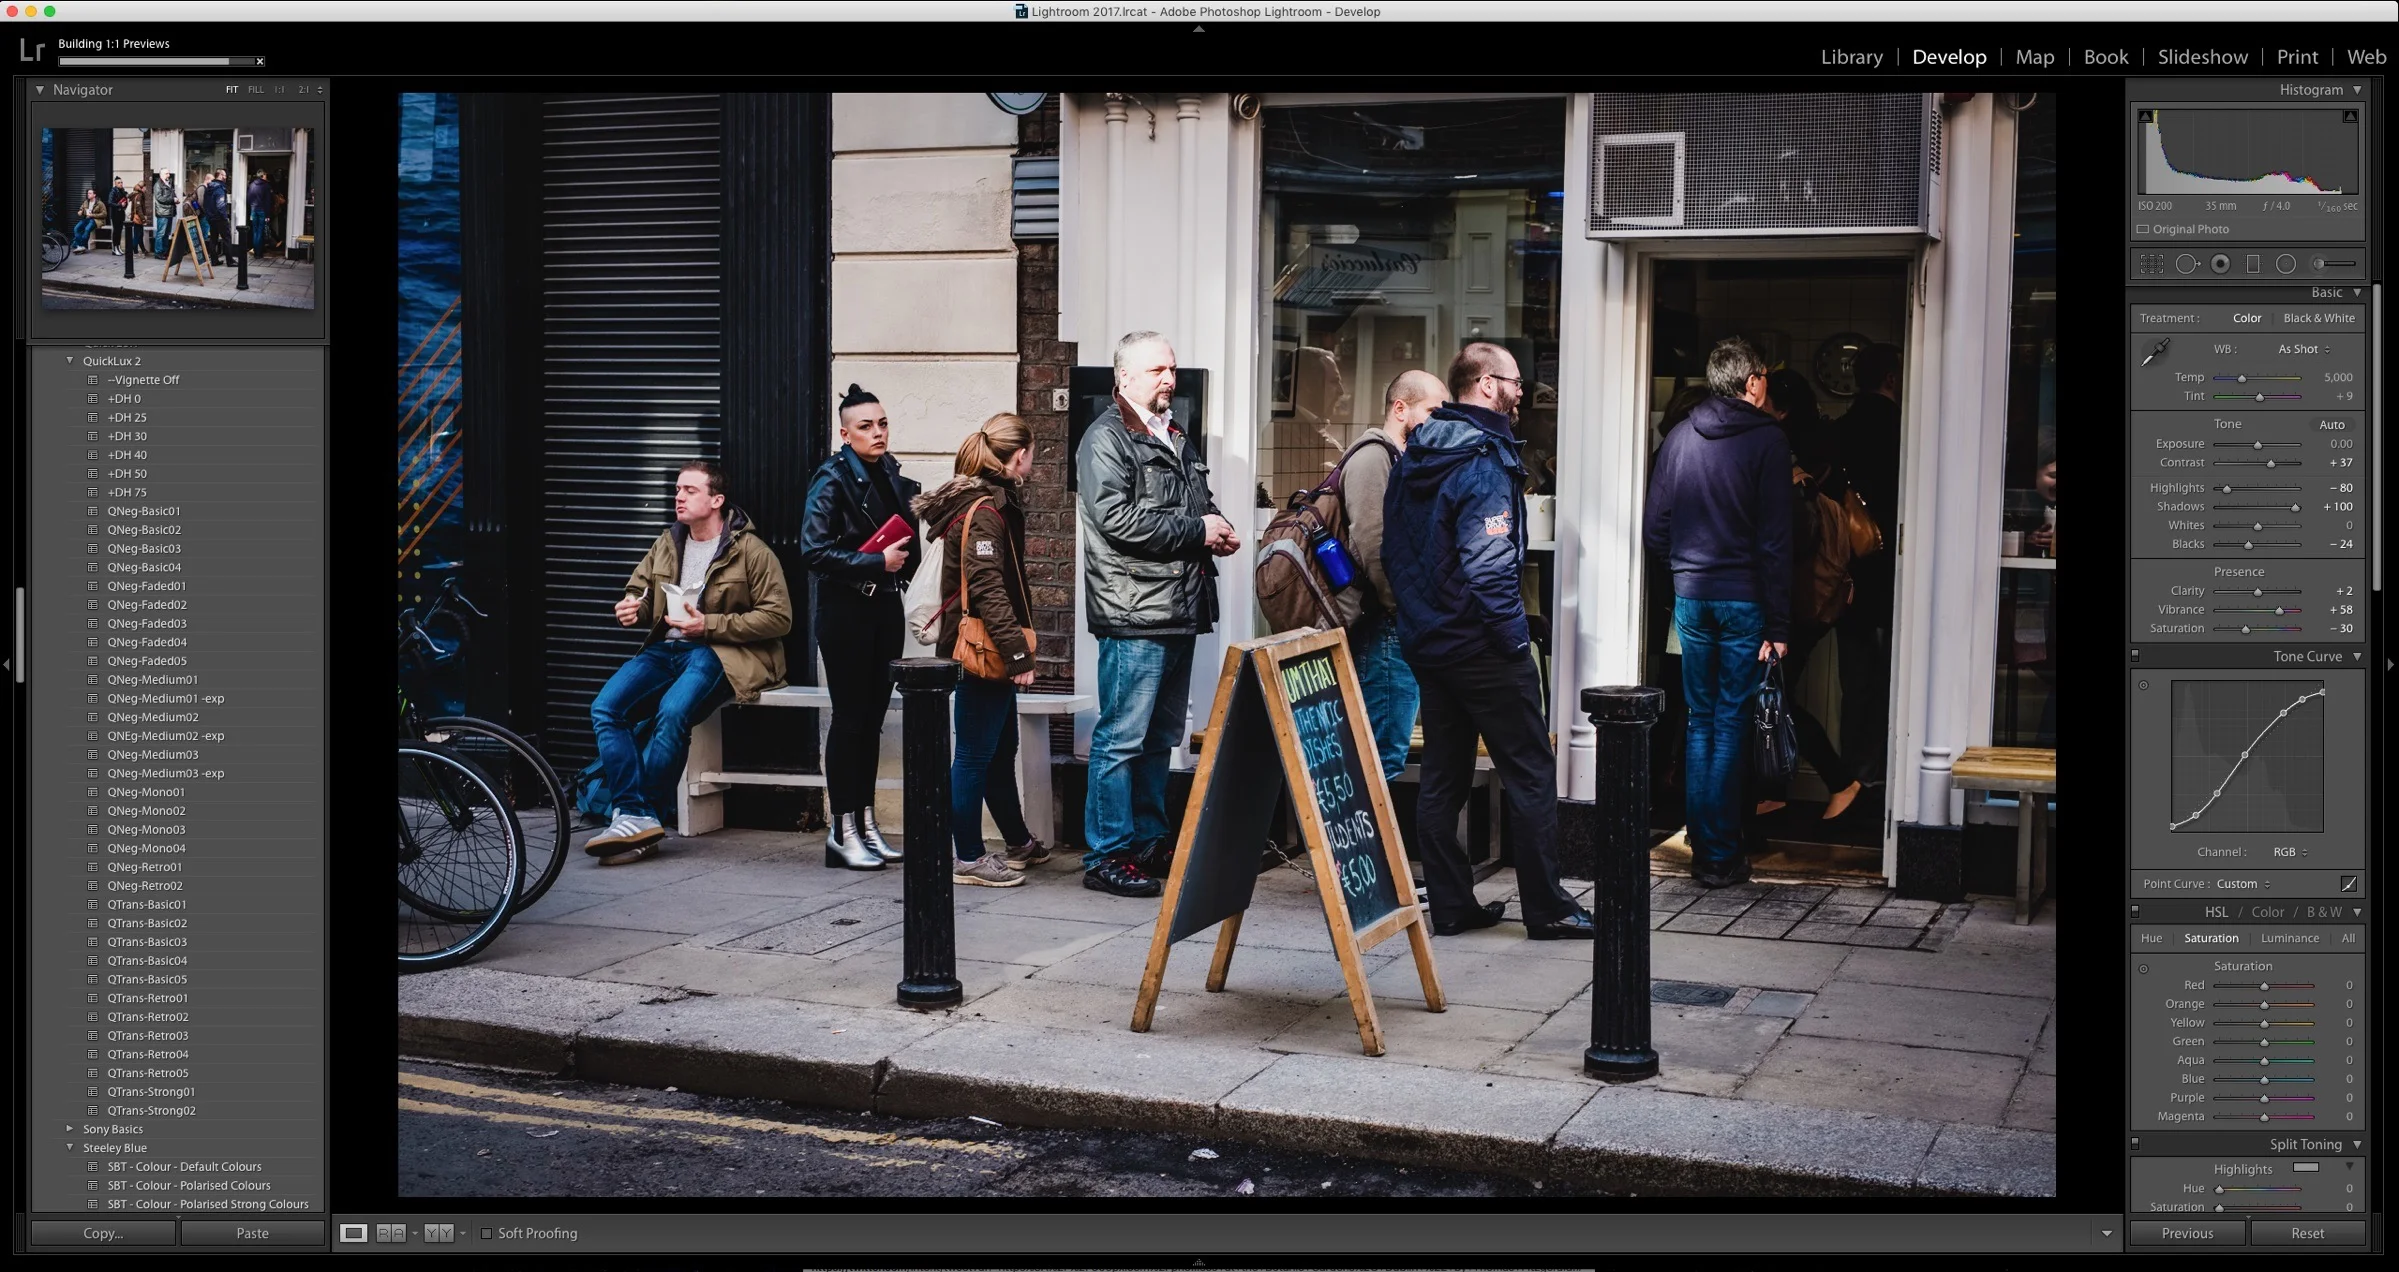
When using the software, you are presented with several options. At fist this seems like only a few pop-ups, but the combination of possible parameters adds up, making for a lot of ways you can configure the converter. You can decide to just use the application to demosaic the files, and apply the sharpening etc in Lightroom, or you can set it up to do some sharpening and noise reduction in the software and then add a little more in Lightroom. Alternatively, you could do all your sharpening and noise reduction in the software, and send a ready file to Lightroom.
After running several batches over the weekend, the approach that I’ve been taking is to turn everything off in X-Transformer, and just use it to demosaic the files. This way you can use Lightroom’s sharpening and noise reduction as you normally would. And I mean: as you normally would with a normal camera, because you don’t have to use the approaches you otherwise would when sharpening X-Trans files. When sharpening images converted with this software they behave more like you would expect from a traditional camera, and you can add quite a bit of sharpening in Lightroom before they start to show artifacting.
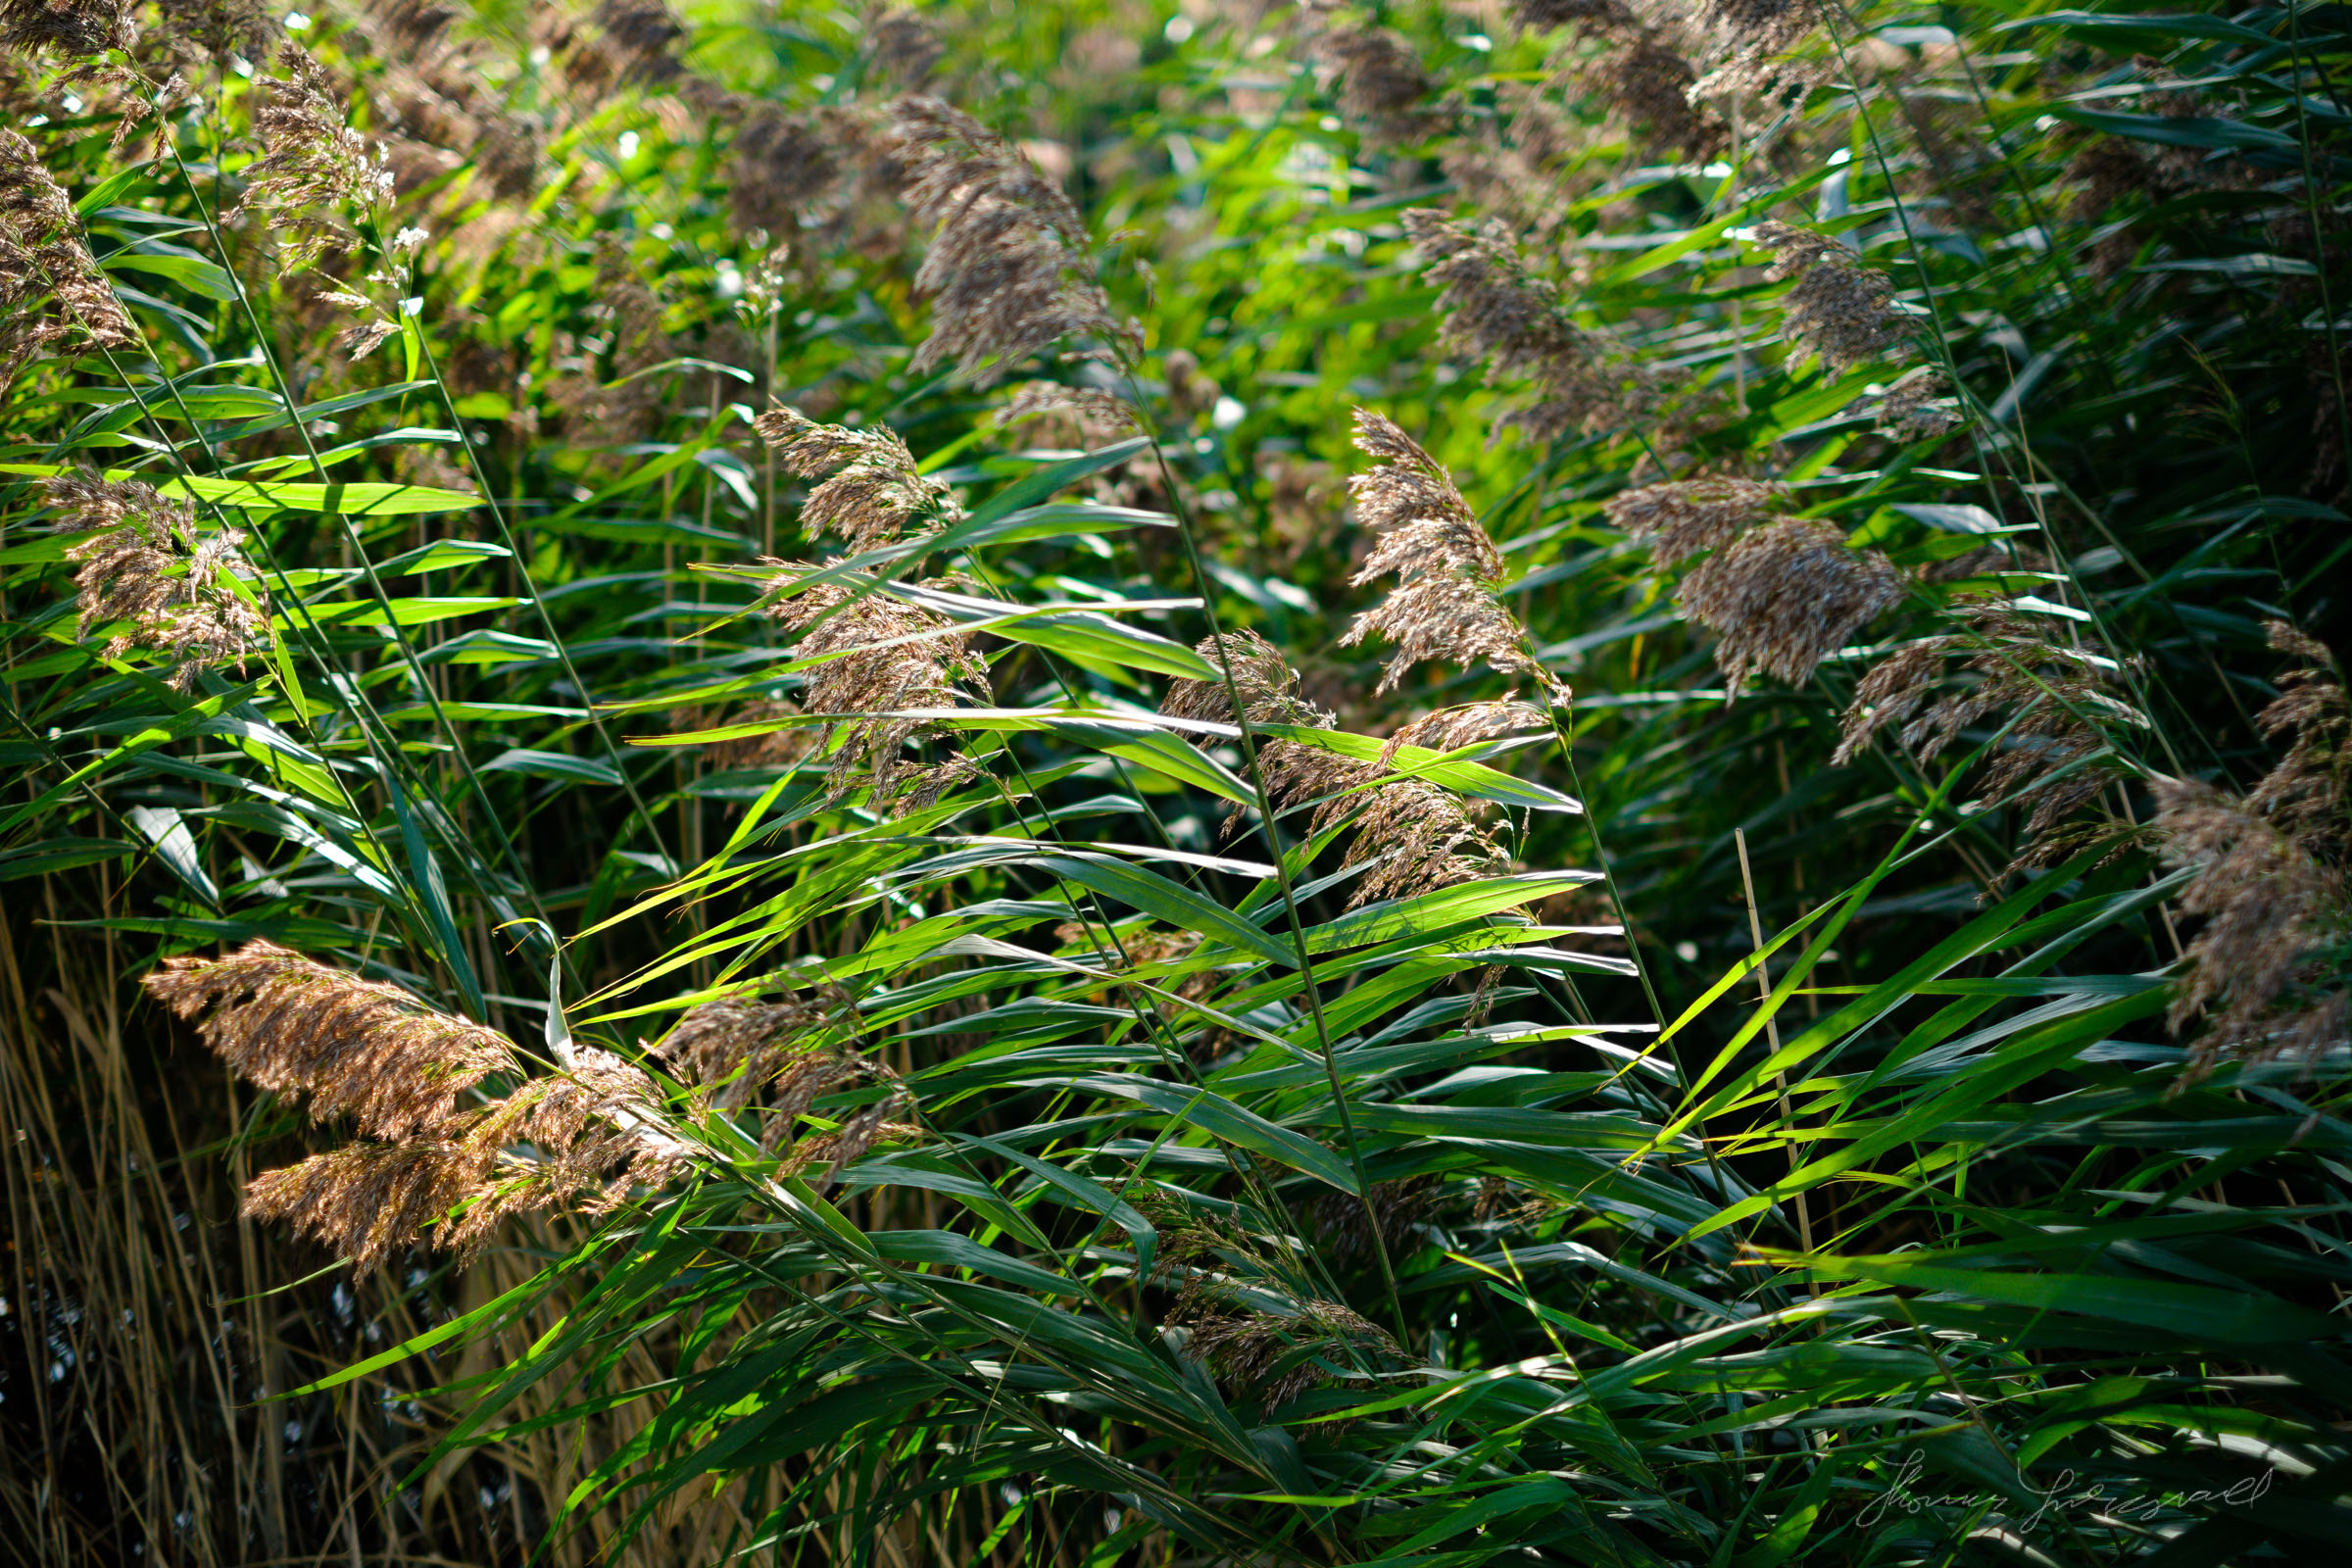
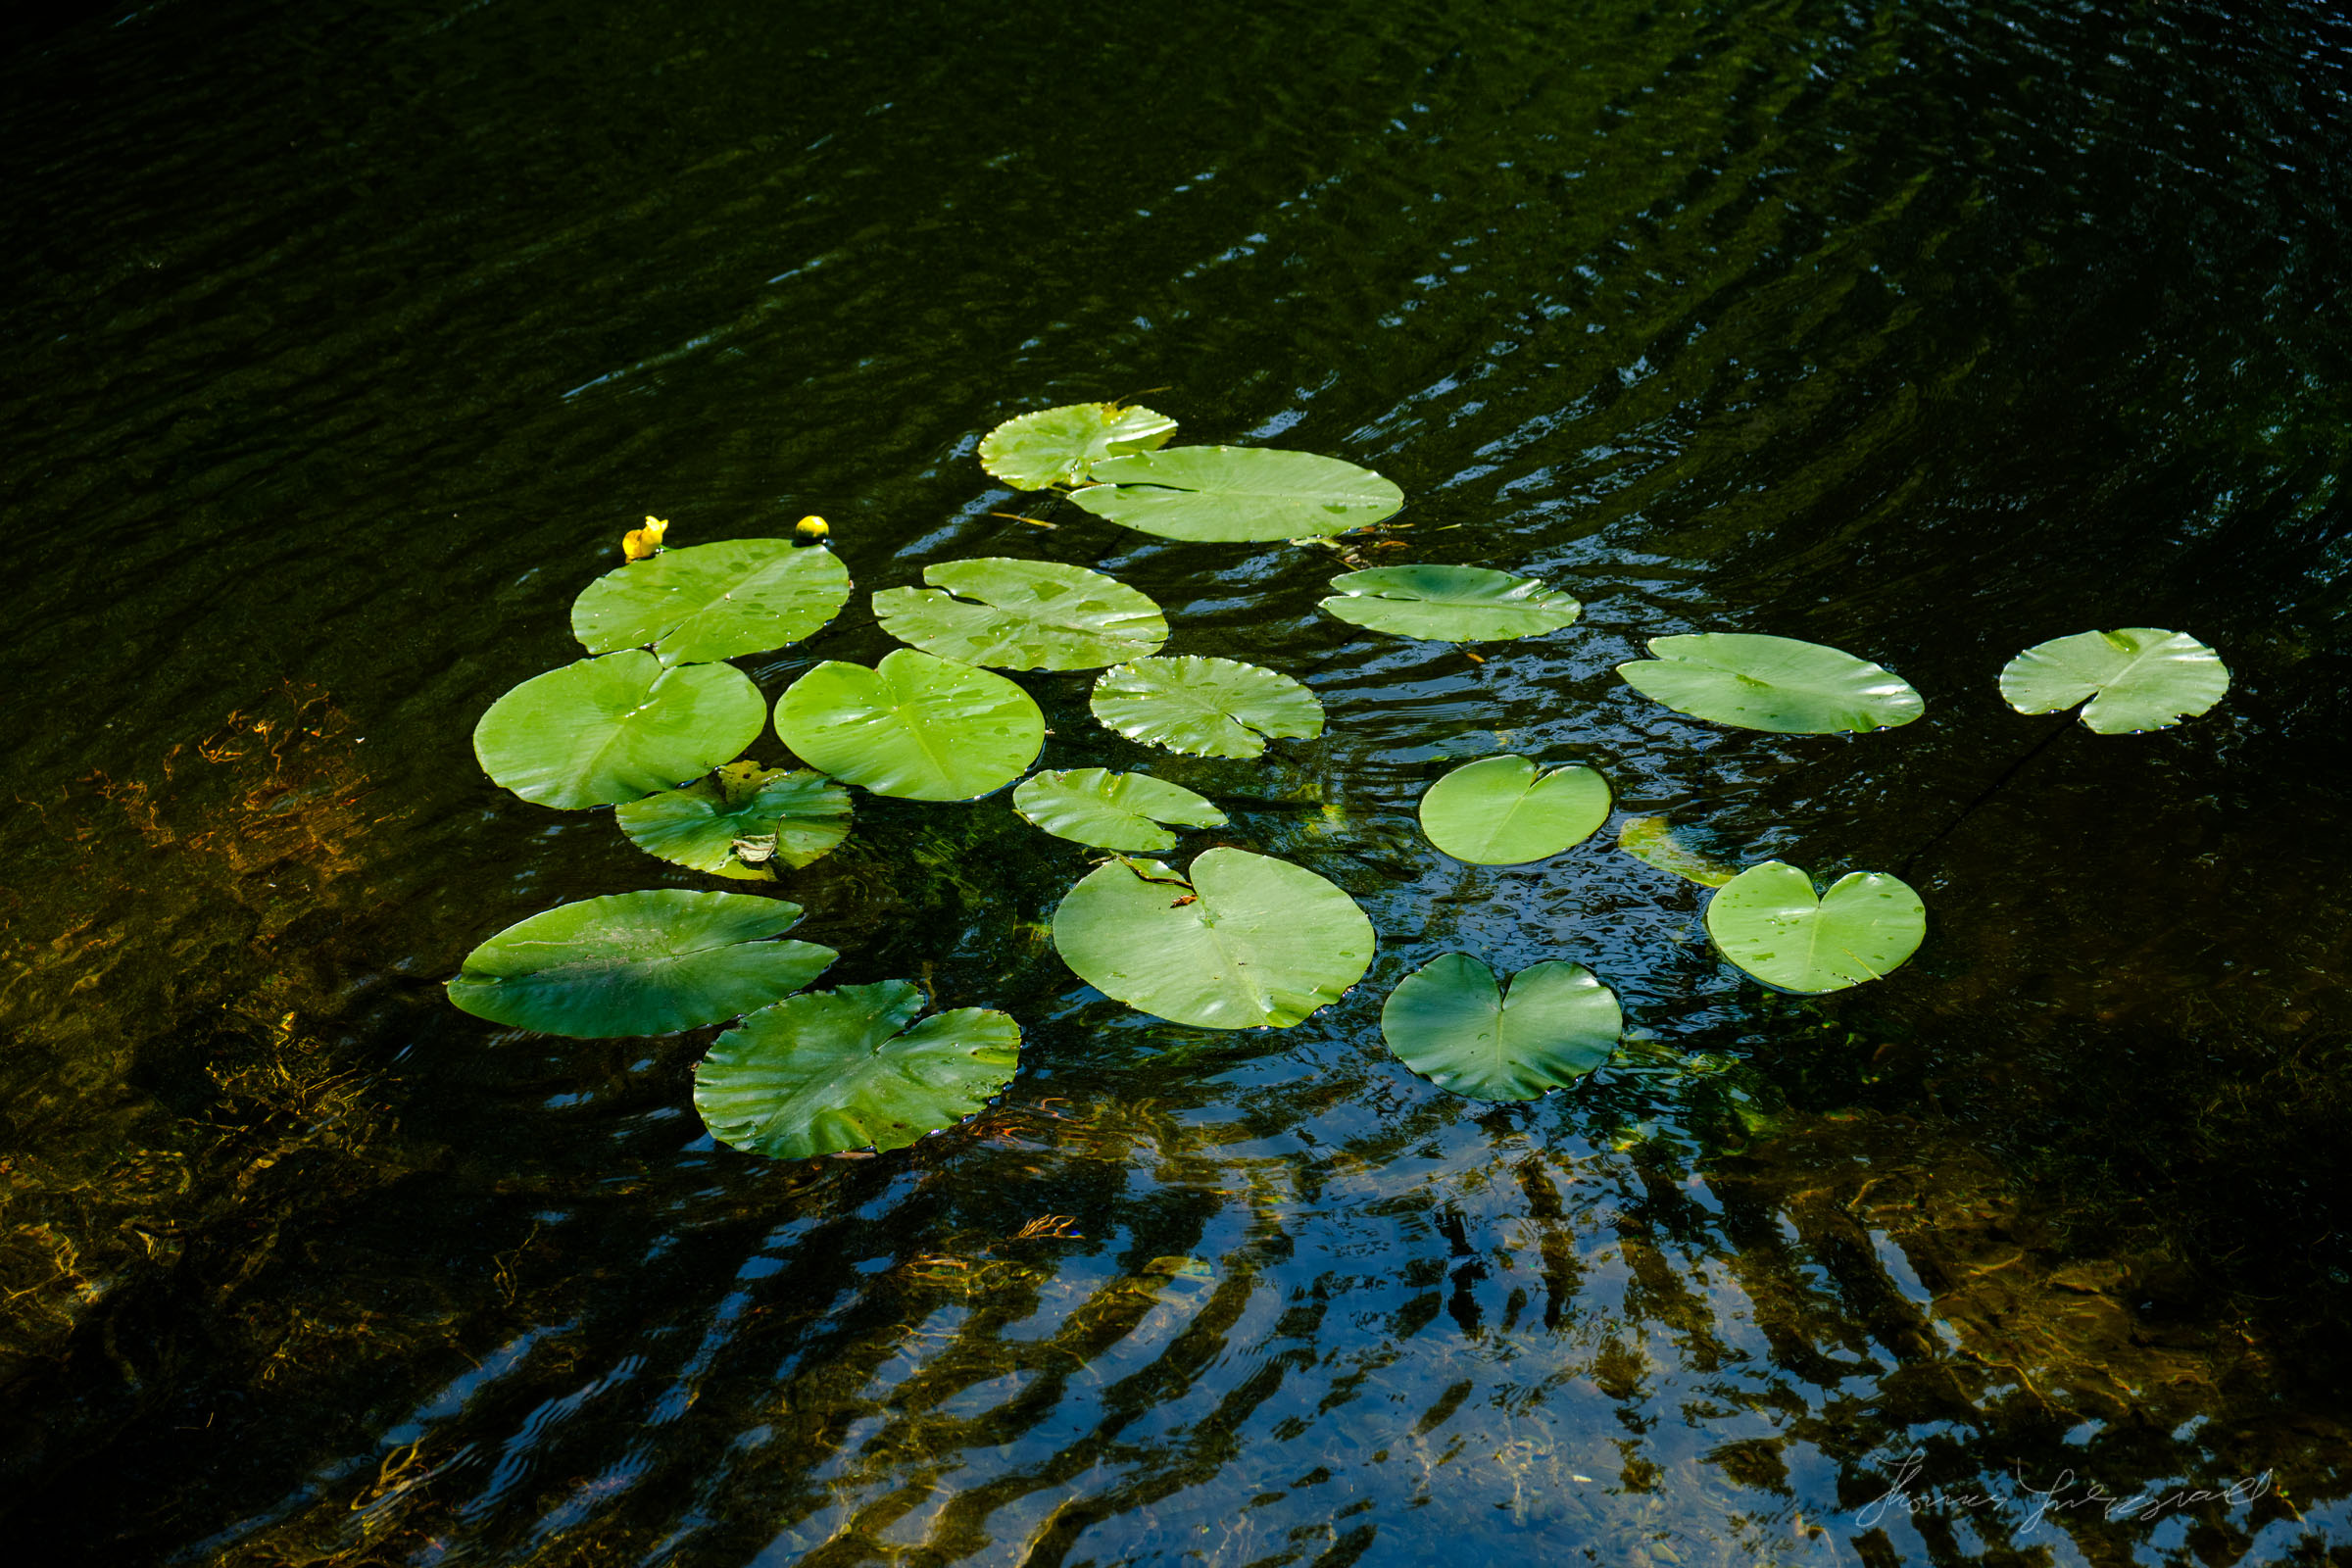
1:1 Crop of Image converted with X-Transformer and Viewed in Lightroom
The conversion process itself can take a bit of time. It does seem to make full use of your computer’s processors though. On my 12 Core mac pro, all 12 cores were maxed out when using it, and it used all available ram too. It did take a while to convert a folder of 200 RAW files though. I didn’t time it, but it was at least 10 minutes. In my opinion, the results are worth it, but I understand that some people may have deadlines to consider, and in such cases this would be a no go.
One of the handy things it can do is embed existing adjustments into the DNG file. So if you had been processing images in Lightroom before, providing you have Lightroom set to write out metadata to XMP files, when you convert the images with this, it will preserve the edits. This makes it very useful to if you have an existing project that you want to convert.
So is it for you? Well, it all depends. If you don’t have a problem with Lightroom’s conversions in the first place, then no, it’s probably not. If you do take issue with the way Lightroom decodes Fuji Raw files, then the results of running them through X-Converter are definitely much better, but the difference will depend on the file and what lens you shot it with. In my experience, Fuji files from sharper primes have more issues with details in Lightroom, than images from the slightly softer zooms.
By just using the demosaicing functions of this application, in my limited testing, it eliminates the edge artifacting and false details that occur with the standard Lightroom conversion. You may find however that this comes at the expense of adding some noise to the image. This is because Lightroom’s demosaicing algorithm inherently reduces noise by the way it works, which is partly why fine detail has that mushy look to it. Having said that, a little noise reduction in Lightroom solves this anyway. It may well be a case of finding the right balance bwtween a little sharpening and noise reduction at the conversion stage, but for now this is what I've done.
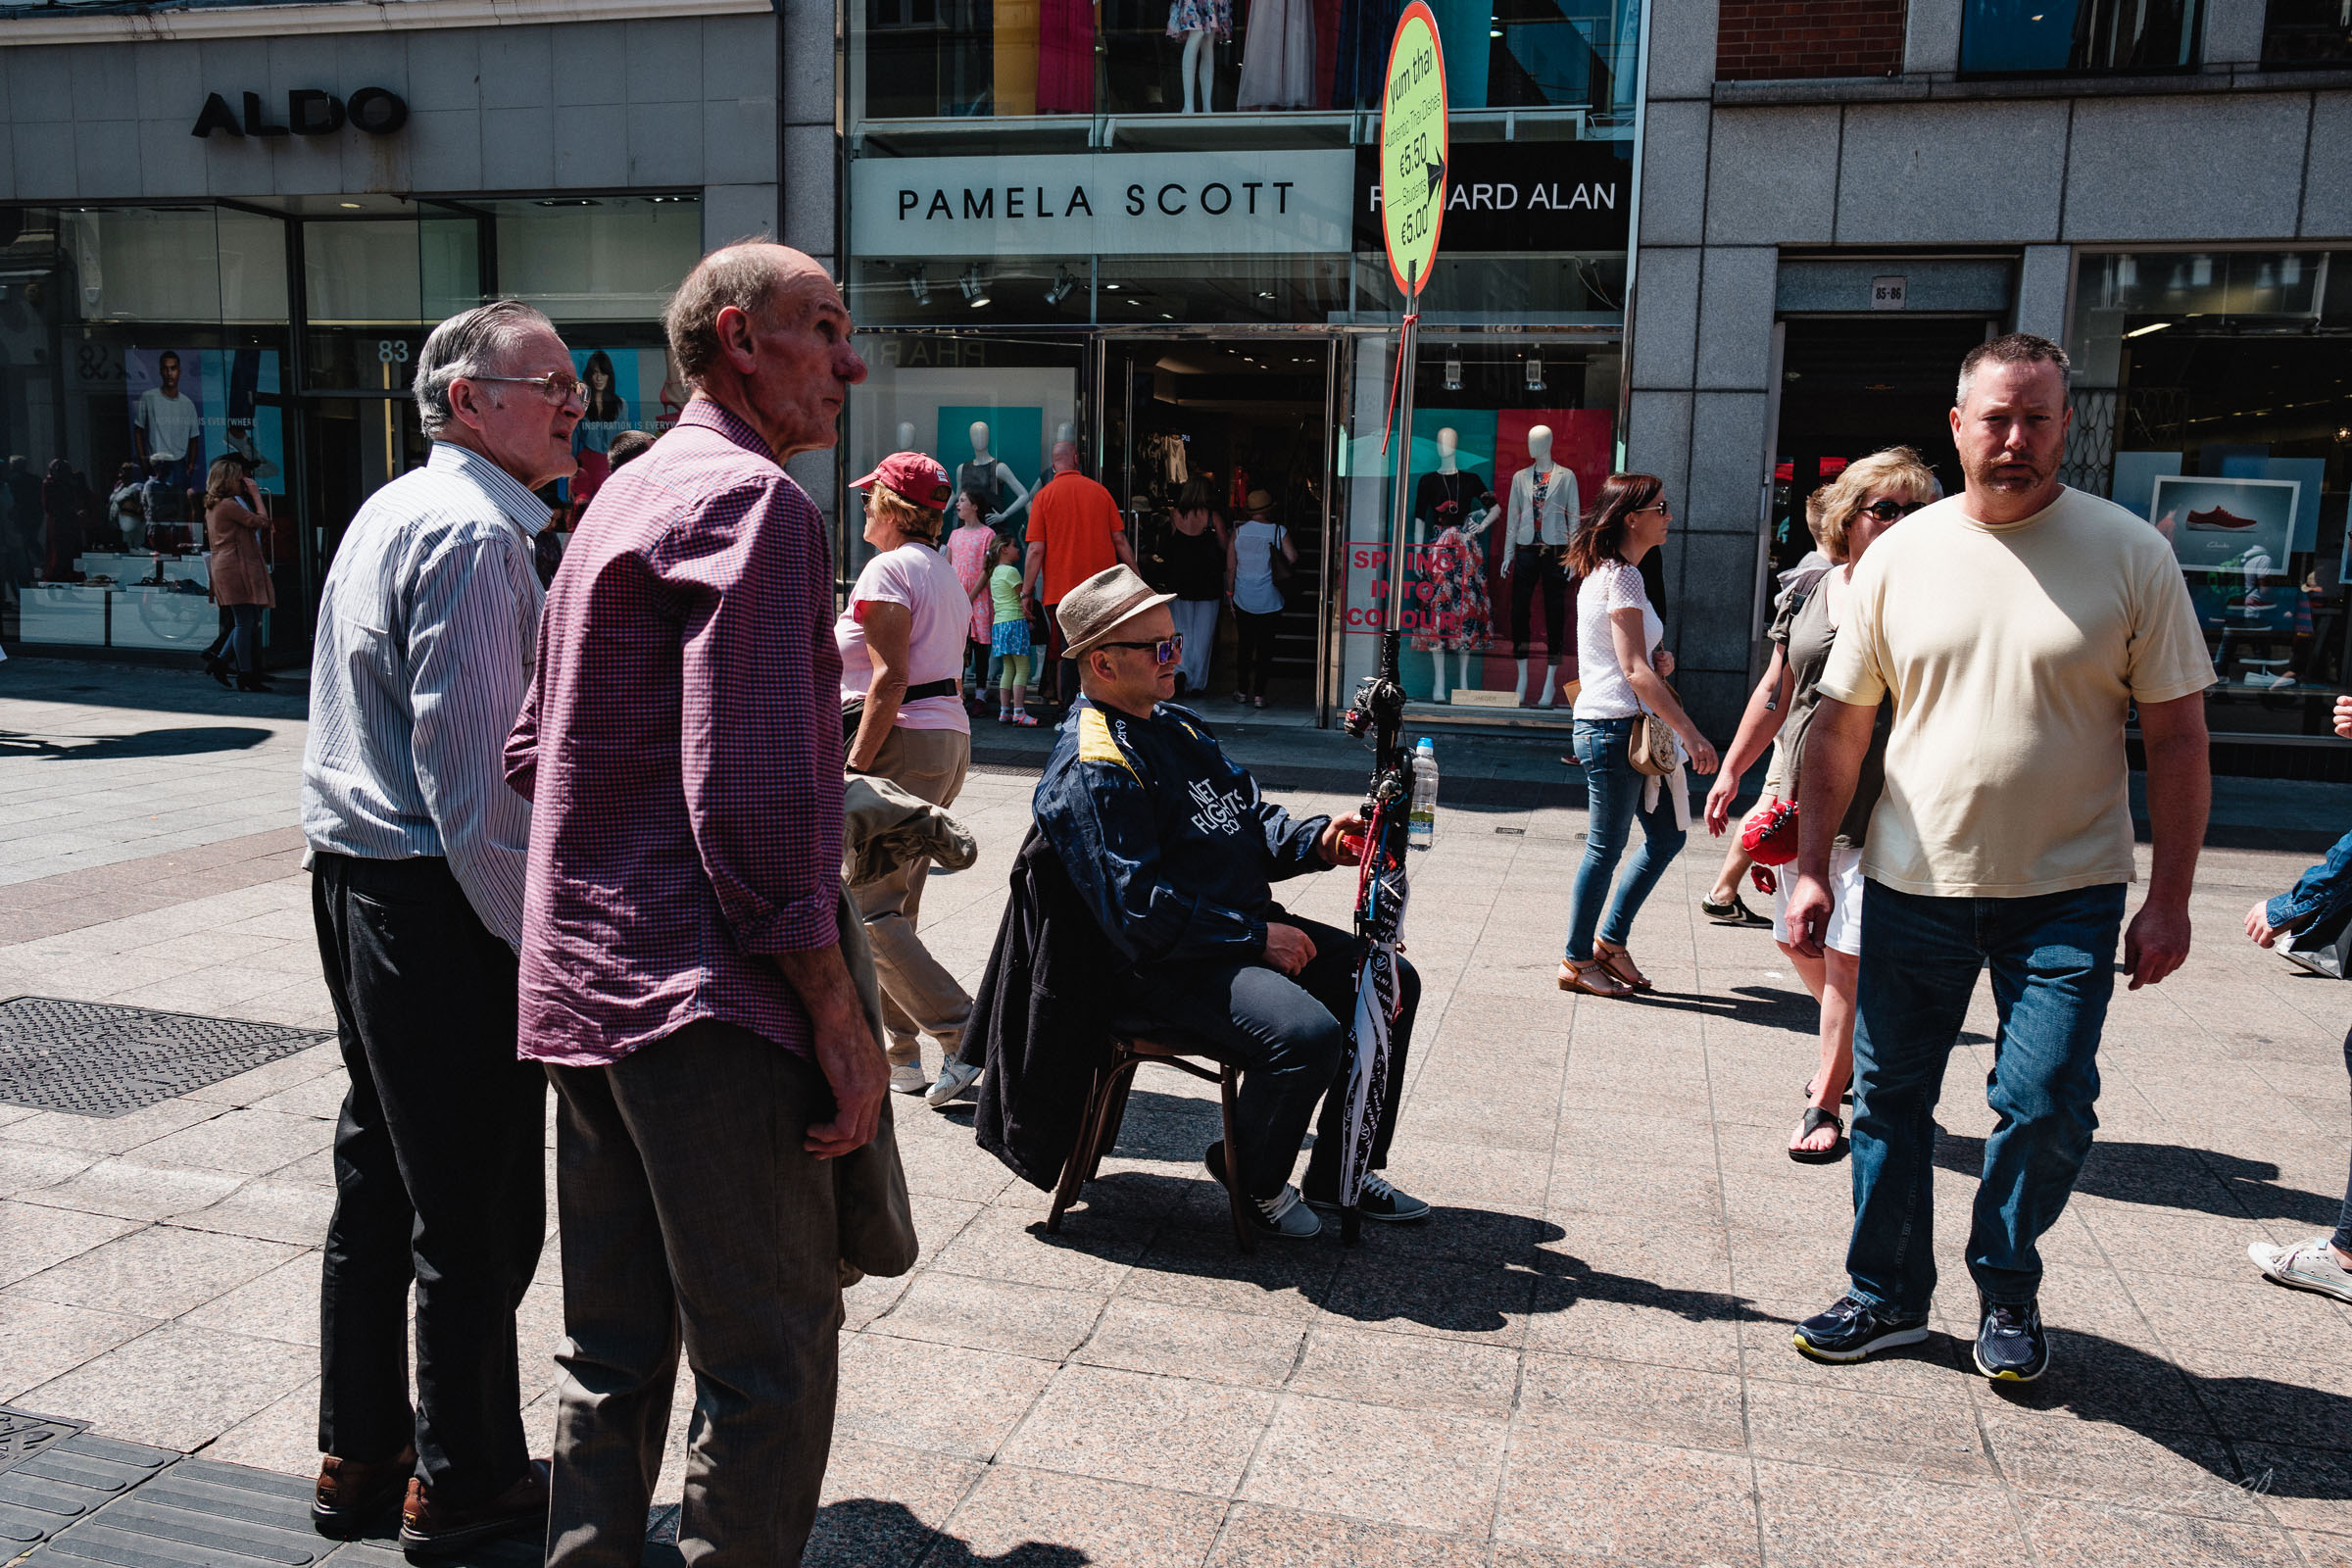
As I said at the beginning, I’ve only done limited testing with this so far, and so I don’t want to get into too much of the nitty gritty. I will be sharing my complete settings and workflow at some point in the future as well as more details of how it compares to Lightroom and other converters, but for now, you can download the trial version from Iridient’s site and try it for yourself. I really think its worth it, but that’s just my opinion. Anyway, here are a few examples of images processed with it.


Help Support the Blog
If you like this post then you can see more of my work on Instagram, Twitter and Facebook. I also have a YouTube channel that you might like. You should also check out my other Photography Project: The Streets of Dublin. If you want to get regular updates, and notices of occasional special offers, and discounts from my store, then please sign up for the Newsletter.
All of the work I do here, and the information on this blog is done entirely free of charge and takes quite a bit of work. I want to spend more and more time on this blog, and offer more and more of this kind of information, tips and so on. All of this is funded exclusively through my Digital Download store, so If you like what I'm doing here and want to show support, then you can do so by buying something from my Digital Download Store where I have Lightroom Presets, and e-books available for download.
If you're a Fuji X-Trans shooter and Lightroom user, check out my guide to post processing X-Trans files in Lightroom. I also have a guides for processing X-Trans files in Capture One and Iridient Developer.
For Sony Alpha shooters I have a new guide with tips on how to get the best from processing your A6000 Images in Lightroom.