
Nik Silver Efex is one of the longest running Lightroom and Photoshop plug-ins out there, and I think it was one of the first plug-ins I ever bought. This was years ago before the suite was owned by DXO and even before they were owned by Google before that. In recent versions, some aspects of the software have changed quite a bit. As I haven’t covered it in quite a while, I thought I would share a few random tips for using the latest version.
Some of these tips will work for older versions too, but in general consider this aimed at Nik Silver Efex 8. I’m also going to be using Lightroom as the host application, but most of these tips work regardless of the host. Throughout this tutorial, I’m going to be using the following image as an example. Above is the end point, and below is where we’re starting from.
A snapshot from Edinburgh. This will be our starting point
Tip1: Do geometry edits in Lightroom first.
If you need to edit the geometry of an image, or indeed remove objects, do this before you send the image to Silver Efex. This is because grain you add in Silver Efex will become distorted, or you may notice inconsistency if you are removing objects after the fact.
In this example, I have removed the car on the left of the image using generative erase, and used upright to correct the perspective in the image. These are the kinds of things you need to do before sending to Silver Efex. You may well be fine doing them after the fact, but you run into a greater risk of artefacts.
The image in Lightroom, after doing the geometry edits, and removing the car
Tip2: Turn Sharpening Down or Off in Lightroom
Another thing I like to do is turn down the sharpening in Lightroom before sending the image over. If you want to emulate film, then the default sharpening in Lightroom combined with the processing in Silver Efex will ruin the illusion by having an image that appears unnaturally sharp for film. Obviously, this depends on your starting point and the kind of look you’re going for, but it's something worth considering.
Tip3: Some Presets don’t have the basic adjustments included. You need to manually add them.
When I use Silver Efex, I generally start with a preset and work from there. However, in older versions all the adjustments were always there, and all you added manually were control points to adjust the image. However, in the newer versions (I can’t remember whether this was changed in version 7 or 8) you have to add individual “filters” to achieve certain effects, similar to how Color Efex works. The upshot of this is that certain presets don’t include the basic adjustments filter. This means that if you want to do local adjustments with control points, you need to manually add this “filter” back in.
(Filter is the terminology used by the application.)
This is fairly simple. Just go to the “Filters” heading and, beside basic adjustments, click on the plus button that appears as you hover over it. This will then add it to the adjustment stack on the right. You can now add control points, control lines etc. to do local adjustments. And of course, you can do overall tweaks too.
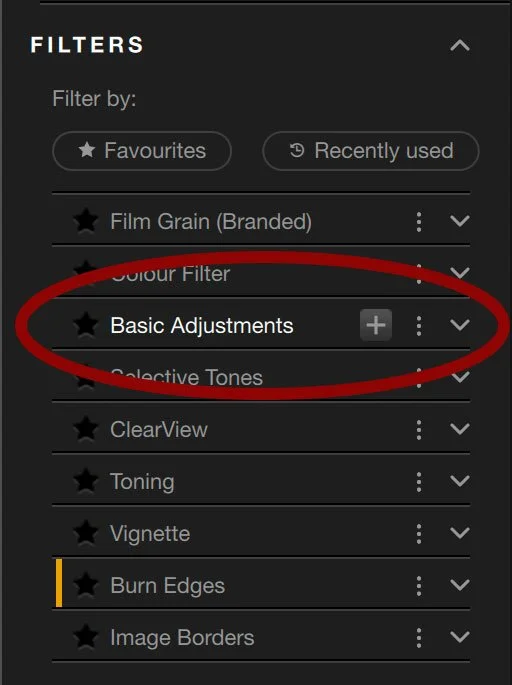
In my ongoing example here, I started with the preset “013 Grad ND (EV-1)” which itself doesn’t include the basic adjustments, so I manually added it. I then tweaked some parameters, including the “Amplify blacks” slider and the shadows slider. I also added some control points to pick out the people near the statue in the middle of the frame.
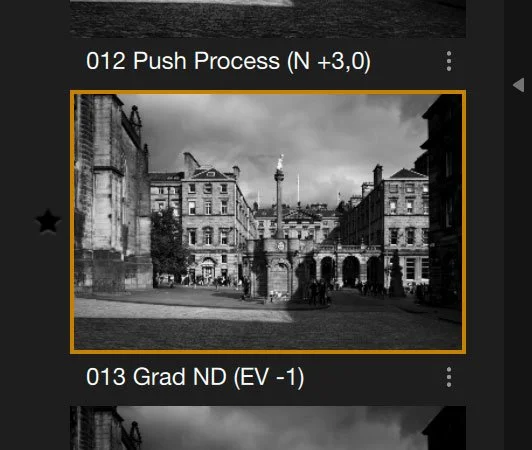
This is the preset I started with
Tip 4: Try using the “Clear View” filter for extra oomph
Clear View is DXO’s technology that first appeared in DXO Photo Lab, and it’s kind of like a combination of dehaze and clarity all in one. If used sparingly, it can add some punch to your image. It’s not just a straight up way of adding contrast, it’s more selective than that. I’m not good at describing it in text, but try it if you want to add some “oomph” to your photos. Just don’t use too much, or it will be a bit over processed looking.
Extra “oomph” with the clear view filer applied
Tip 5: Adjusting the film type and grain
At the very top of the adjustments, you will find film type. This is always added to the stack regardless of what other filters you enable, although you can turn it off. Some presets will set the film type and others just have it set on neutral. The one I chose earlier in this example has it set to neutral, so in this case I changed it to “Ilford Pan F Plus 50”. When you select the film type it changes the sensitivity, the tone curve and the grain.
The grain is the thing I wanted to discuss here because adjusting the grain isn’t as obvious as it might seem. To increase the amount of grain in the image, you have to actually lower the “Grain Per Pixel” slider, which may seem counterintuitive, as it is the opposite oof how you do it in most other software (although if you think about the terminology it makes sense).
To make matters even more confusing, there is actually another filter for adding grain called “Film Grain (Branded)”. This allows you to add grain independently of the Film Type, and you can select the type of film the grain is based on ion addition to grain size and intensity. In this case, increasing the intensity increases the amount of grain.
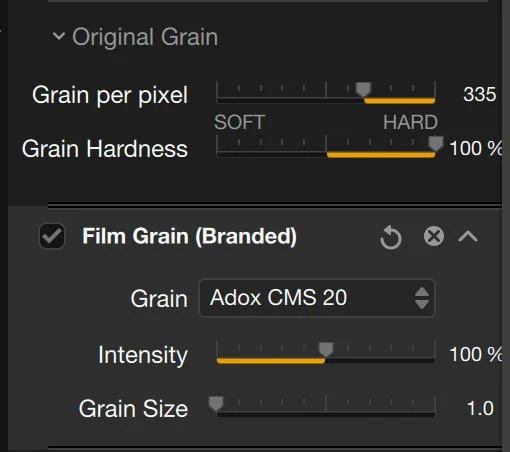
And to confuse matters even further still, you can actually have both enabled, giving you two separate amounts of grain, although not sure why you would want to do that.
Tip 6: Saving non-destructively, and re-editing your image
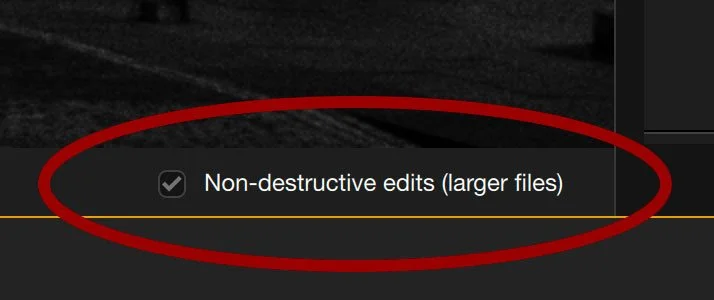
SilverEfex has the ability to save edits non-destructively. To do this, make sure to check the “Non-destructive edits (larger files)” check box at the bottom right of the interface. This will increase the file size, as the name suggests, but it’s worth it in my opinion. Then click “Apply” to send the image back to Lightroom.
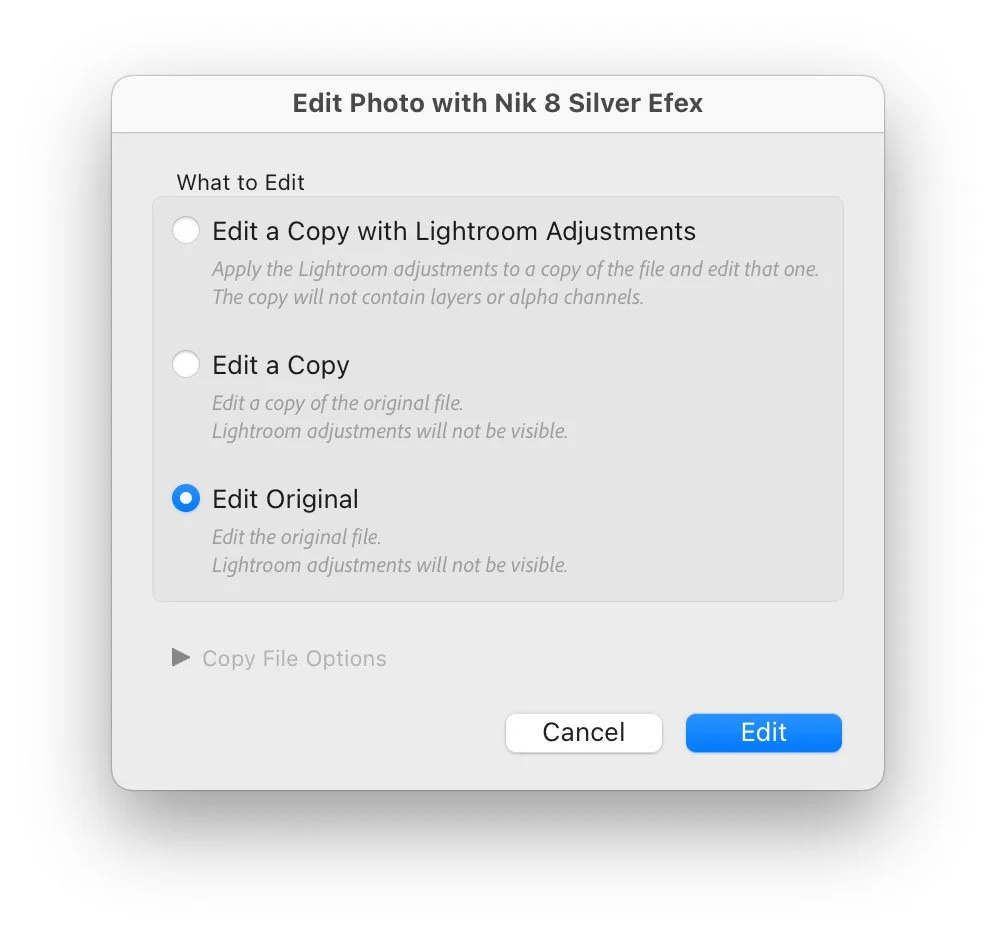
In Lightroom, if you want to re-edit the image, there’s a little trick to it. Select your image and choose** Edit In > Nik 8 Silver Efex** as normal, but then when the window comes up, instead of the first option as you normally choose, select “Edit Original” instead. If you choose “Edit a Copy with Lightroom Adjustments” Lightroom will make a new copy, and it will strip the non-destructive information from the file.
Conclusion
So there you have it, six tips for Silver Efex. I’m sure many of you know some of these already, but I hope it’s been helpful to new users at least! If you don’t have the Nik collection (of which Silver Efex is a part of) you can check it out on the DXO website. There is a trial version available.
If you go to purchase, you can use my code: ThomasFitzgerald15 to get 15% off. (new customers only). They’re also currently running a Christmas promotion, where you can get 20% off the purchase of two or more products. With my code, you can get an additional 5% off this offer. You can find out more details of that here.
Note that this post contains paid affiliate promotion. We get a small commission for purchases made using the creator code, which helps run this site.