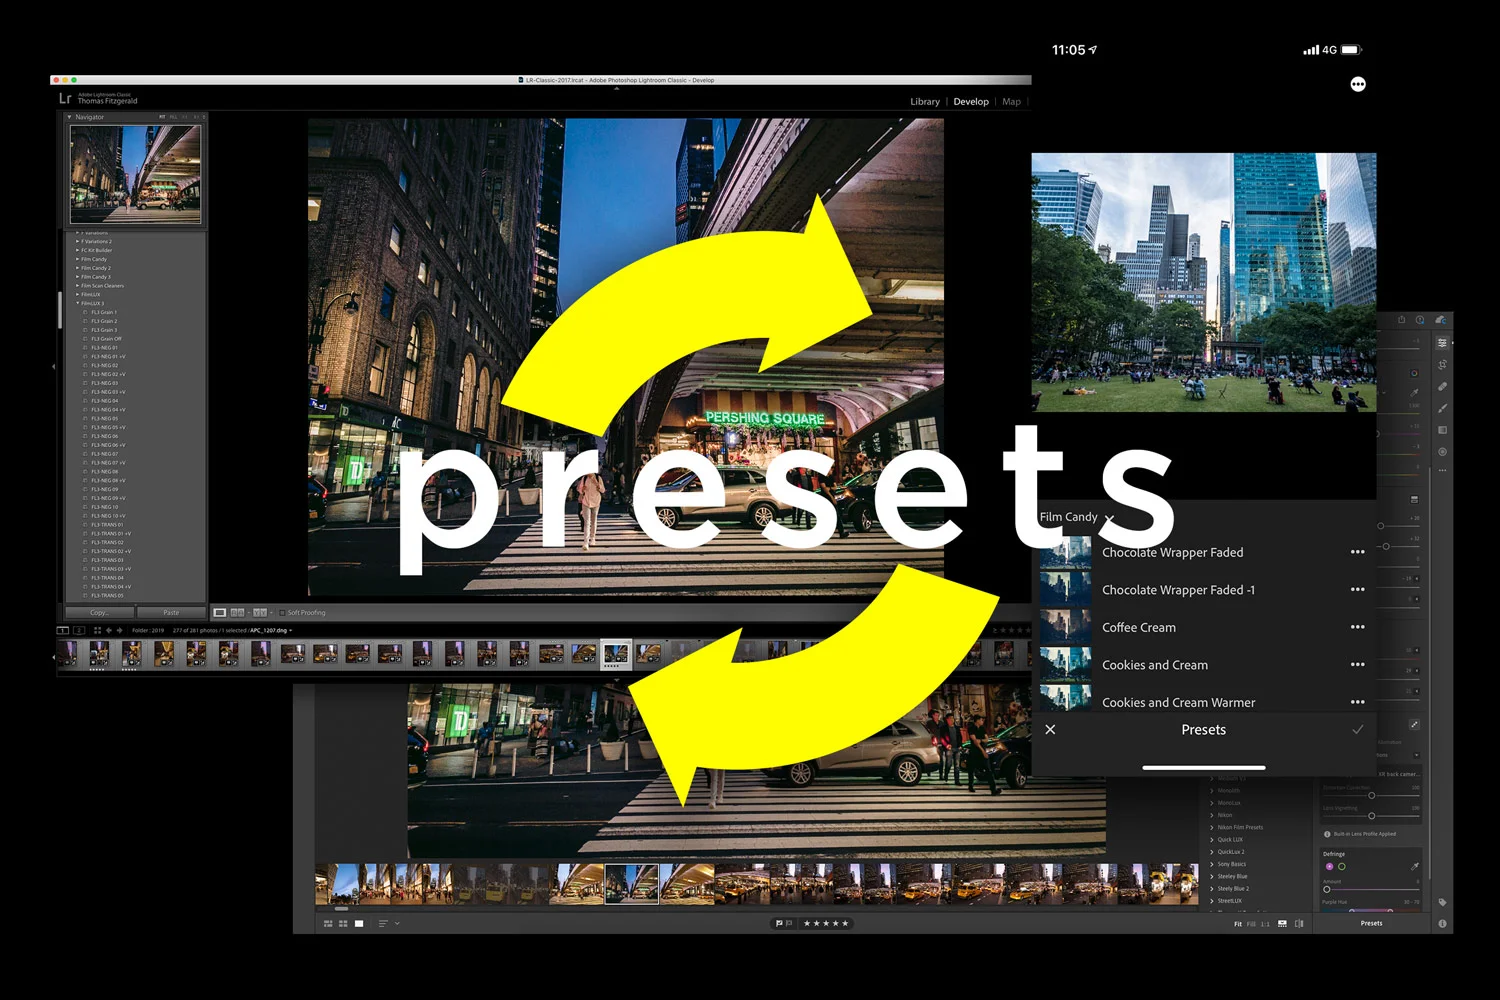
Applying Lightroom’s Auto Settings to Multiple Images
I recently wrote about and made a video demonstrating Lightroom’s new AI-based automatic settings. If you haven’t seen it already, Lightroom now uses artificial intelligence when applying its automatic settings, and it’s much improved over the previous incarnation. However, after I had talked about that a reader sent me an interesting question: “How do you sync this auto option across multiple images?”. At first, I thought you would just use the synchronisation button at the bottom of the develop module, but it turns out, it’s not that straightforward. There are a few ways to do it, but they require a little work to find.
First of all, if you are in the develop module, and you apply "automatic" to an image, and you then try to sync your settings across multiple images, there’s no option in the sync box to apply the automatic settings. If you do a sync, or if you have auto sync turned on, you won’t be syncing the AI-based analysis and automatic settings, but instead, you will sync whatever it applies to the first image. Note that the previous button, will also not work. This too just uses the actual slider positions when applying the previous setting. You can, however, save the “Auto” option as part of a preset, so one workaround is to save the settings from your first image, then switch to the next and apply the preset, and so on. To apply this preset to multiple images at once, you’ll need to go to the Library module.
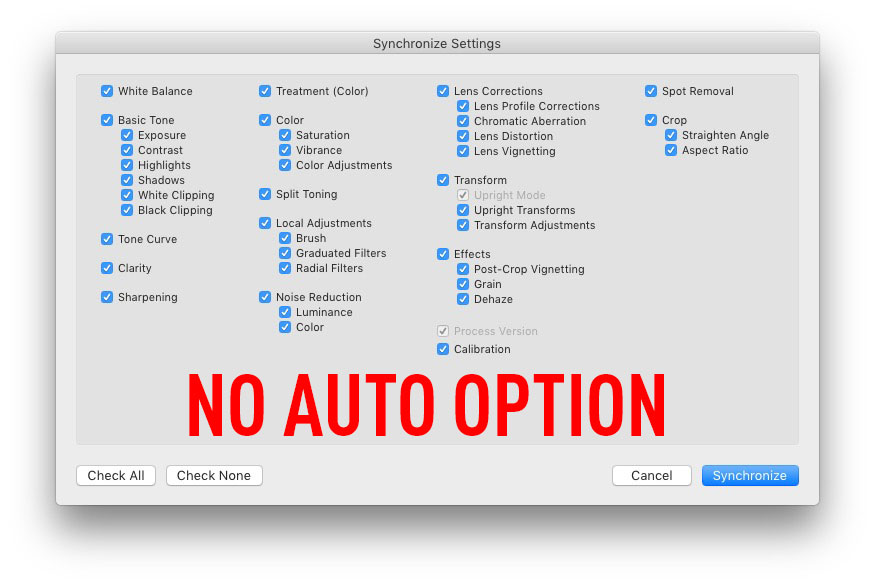
Sync has no Auto Option...

... but saving a preset does have the Auto option
There is already a preset in the default “Lightroom General Presets” set of presets called “Auto Settings” which will apply auto to your images. In order to use this on multiple images at once, you need to be in the Library module.

There are multiple ways to apply auto settings in the Library module. The easiest way to do this is to select multiple images, and then from the Quick Develop panel, press the Auto Button in the Tone Control section. You can also apply this from the menu by going to Photo > Develop Settings > Auto Settings or by pressing Command (Ctrl) + U. Note that this menu option and keyboard shortcut is also in the develop module (under settings, not photo), but doesn’t seem to apply to multiple images when chosen from the main menu
To apply the Auto function to multiple images at a time, at first it seems as if there is no obvious way to do it from the develop module. You can, however, do it by selecting multiple images from the film strip, then right clicking on them to bring up the context menu and choose: Develop Settings > Auto Settings. For whatever reason, this works differently than choosing it from the main menu and it will actually apply to multiple images. Also, it should be noted that even though this contextual menu item shows the shortcut “Command U” this doesn’t actually work on multiple images. You have to choose it from the contextual menu.
So there you have it. As far as I can see these are the options for using the auto function on multiple images. This kind of inconsistency is the type of thing that frankly drives me mad about Lightroom. There are loads of little frustrating things like this in Lightroom, that people have been telling Adobe about for years, and it would seem that it wouldn’t take much to fix, but Adobe has never bothered. I would much rather see the company issue a release of Lightroom that did nothing but clean up all the interface inconsistencies and minor bugs than add new features, but I won’t hold my breath. Anyway, mini-rant aside, I hope this has been helpful to you if you were wondering how to do this.
Help Support the Blog
Buy from our affiliates
If you want to help support our blog, you can do so if you buy anything from our affiliate partners:
- Capture One Pro is available in both subscription and perpetual licences available, in versions for all cameras, Fuji specific , Sony specific or Nikon specific. In addition you can get 10% off the price of any Capture One product by using the following code: TFPHOTO
- Capture One Professional Style Kits from Capture One.
- Luminar AI is available from Skylum Software. Get a 10% discount using the following code: TFP10
- Nik Collection from DXO Labs
- DXO Photo Lab
- DXO Pure Raw
- My Amazon Photo Recommendations
- My Favourite Mac Utility Application: Clean My Mac X from MacPaw
- The VPN I use regularly - Nord VPN - Save on 2 year deal (valid at the time of posting)
If you buy through the above links, we get a small commission, which helps run this site.
Check out my Capture One Style Packs
If you’re looking for some Film Effect, or black and White style packs for Capture One, check out my Capture One styles on my Gum Road Store.
Buy me a coffee!
If you’d rather not use Patreon, but still want to say thanks or help, then you can feed my caffeine habit and buy me a coffee via PayPal with a one off donation to my PayPal tip jar.
Join our Facebook Group
If you want to discuss anything you’ve read here on my website, or saw on my youtube channel, or if you want to share images you’ve created using any of my techniques or presets, then I’ve started a new Facebook Group just for that.
Note that this post contains paid affiliate links. We get a small commission for purchases made through these links, which helps run this site.