
Rethinking My Fujifilm Lightroom Recommendations
It’s been a while since I updated my recommendations for Lightroom processing of Fuji files. Since then, Lightroom has been changing quite a bit, and so, while I had planned it before but never got around to it, I’m now in the pre-production stages of re-writing my Fuji Lightroom guide. One of the big things I’m changing is how I recommend people process their Fuji files for the best results.
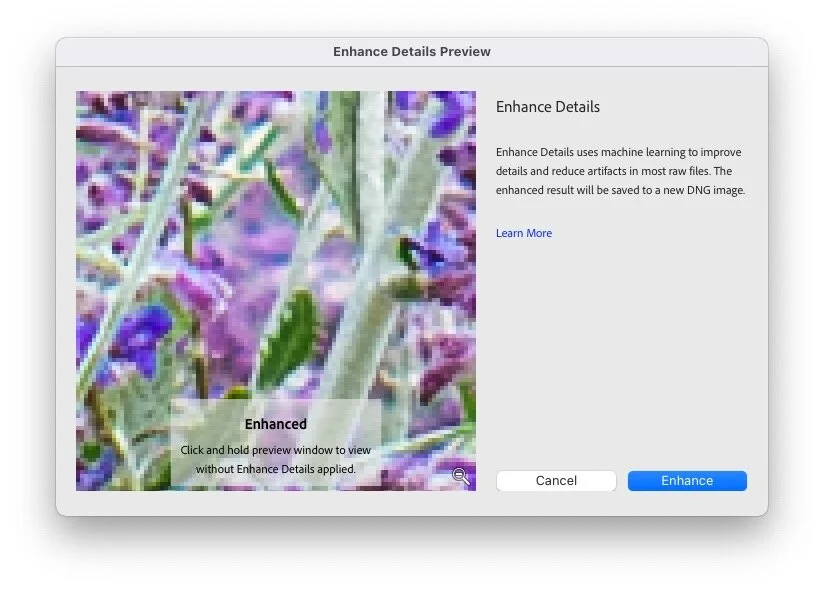
In the past, I suggested that for best results, people consider using X-Transformer with Lightroom. However, having done a lot of research over the last few weeks with sample files from X-Trans 4 cameras, I now believe that Adobe’s “Enhanced Details”, which is soon to be renamed to just “Enhance” in Lightroom (it already is in Camera Raw) will give the best, and most natural results. The only real downside to this is the file size.
In the past, I didn’t suggest this as the best method, partly because at the time, there were still lots of people who may have had incompatible GPUs, but that was a few years ago now, and I suspect that the number of people with older graphics cards have declined significantly since then.
Incidentally, on an M1 Mac it takes about 2 seconds to convert a file in Lightroom (and that’s running under Rosetta)
While X-Transformer gives decent results, I always found that it still has a certain texture to the files, even though it’s much better than the “worm artefacts” of Lightroom’s default conversions. Having scrutinised the results of “Enhance Details”, especially from newer cameras, it gives much more natural, “unprocessed” looking files.
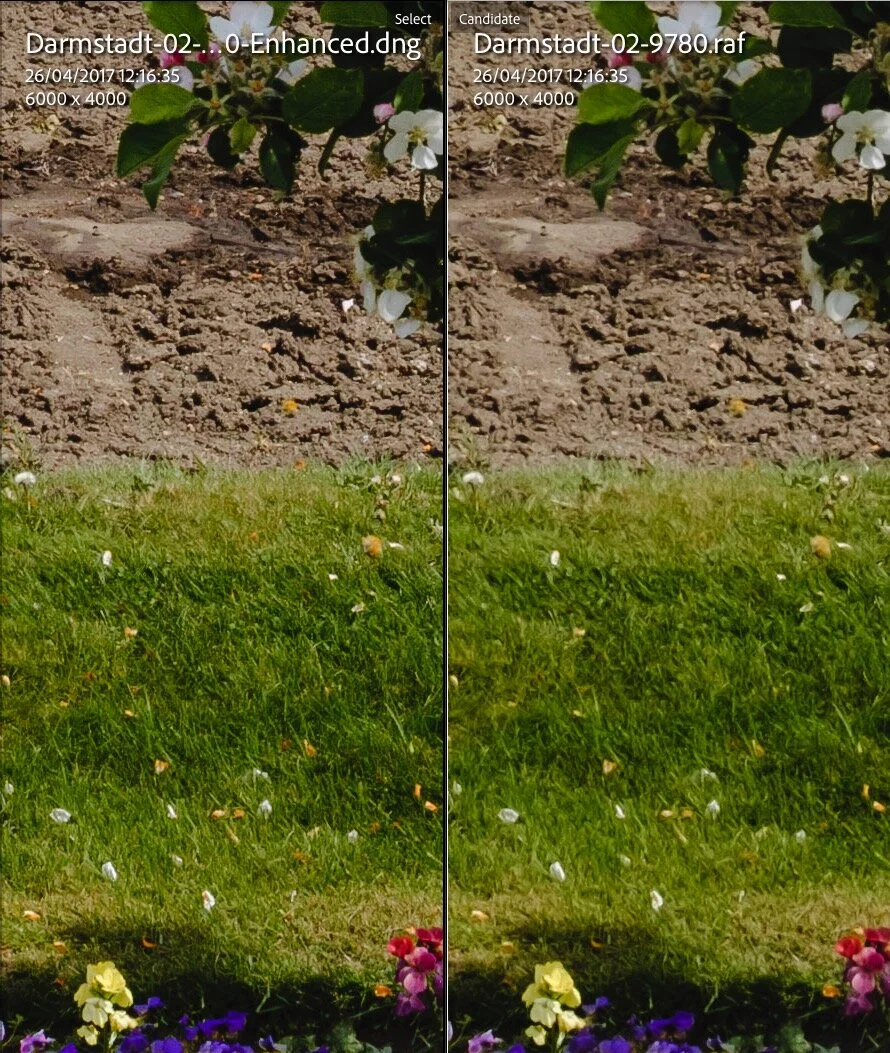
Click to view at 100%
I will still suggest it as a third option for those who maybe can not run Enhanced details, or do prefer X-Transformer for some reason. After all, a lot of this is down to personal choice too. However, I think in the long run, if you can get as good, or better results without external software, then that is the way to go. Which leaves the disk space issue.
For some people, file size is more important than image quality. I’ve had readers complain about even creating DNGs in the first place, regardless of the size. For those for whom storage is more important than image quality, I suggest leaving the default conversion, then just tweak the sharpening settings. If you have an issue with a file, then just run enhanced details on that individual file or files. If you really do want to convert every file, but still want to not use too much disk space, then the only real option is to use X-Transformer. Or switch to Capture One.
For others, I’m working on a workflow to minimise the amount of space used. I would never suggest running enhance on every file, as it would use up too much time, space, and is unnecessary. Instead, I suggest a way of marking your selects, and then just converting those. I’ve even come up with a simple(ish) way to separate the DNG files once they’re created into a sub folder. I will probably do a video on how to do this once I’ve finalised my workflow.
Using Capture One which has superior demosiacing for X-Trans files also solves this problem, and you don’t need an intermediary step. For many though, switching applications may not be an option or they may just not want to. Despite how much I like Capture One, I still use Lightroom 30-40% of the time.
At the end of the day, the ideal solution would be for Adobe to just fix the damn conversion process properly and not have these hoops, but I don’t think that will ever happen at this stage, but who knows. The ACR processing engine is starting to show its age, and needs an overhaul in my opinion, but I can’t see that happening any time soon.
Anyway, I’m still at the planning stages, so I would welcome any feedback, or thoughts you might have on this - so feel free to leave a comment below.
Help Support the Blog
Buy from our affiliates
If you want to help support our blog, you can do so if you buy anything from our affiliate partners:
- Capture One Pro is available in both subscription and perpetual licences available, in versions for all cameras, Fuji specific , Sony specific or Nikon specific. In addition you can get 10% off the price of any Capture One product by using the following code: TFPHOTO
- Capture One Professional Style Kits from Capture One.
- Luminar AI is available from Skylum Software. Get a 10% discount using the following code: TFP10
- Nik Collection from DXO Labs
- DXO Photo Lab
- DXO Pure Raw
- My Amazon Photo Recommendations
- My Favourite Mac Utility Application: Clean My Mac X from MacPaw
- The VPN I use regularly - Nord VPN - Save on 2 year deal (valid at the time of posting)
If you buy through the above links, we get a small commission, which helps run this site.
Check out my Capture One Style Packs
If you’re looking for some Film Effect, or black and White style packs for Capture One, check out my Capture One styles on my Gum Road Store.
Buy me a coffee!
If you’d rather not use Patreon, but still want to say thanks or help, then you can feed my caffeine habit and buy me a coffee via PayPal with a one off donation to my PayPal tip jar.
Join our Facebook Group
If you want to discuss anything you’ve read here on my website, or saw on my youtube channel, or if you want to share images you’ve created using any of my techniques or presets, then I’ve started a new Facebook Group just for that.
Note that this post contains paid affiliate links. We get a small commission for purchases made through these links, which helps run this site.