
Use Automator to create a Watched Folder to automatically import images into Apple Photos
Here's a really useful tip I came across over the weekend. While I don't use Apple photos that much, other than for syncing with my iPhone and other devices, it is handy for that very purpose. Because your photos library is the default repository for most imaging apps on iOS, if you want to get photos into an application on your iPhone or iPad it's useful to put them into Photos on the mac and let it sync across. Importing is easy enough, you just drag photos into ...well, photos. However, there's no way to import directly into photos from other applications such as Lightroom. Fortunately there's now a work around. Sort of.
(Please note that this is currently somewhat buggy - but I'm giving you the details if you want to try it for yourself)
In El Capitan Photos now comes with Automator and Applescript support so it's easy to set up a watched folder that will automatically import anything you put into it into Photos. You can also set it to import directly into an Album. It's fairly easy to set up and I'll walk you through the steps below.
For this example I'm going to create an Album to use for photos that I want to later post to Instagram.
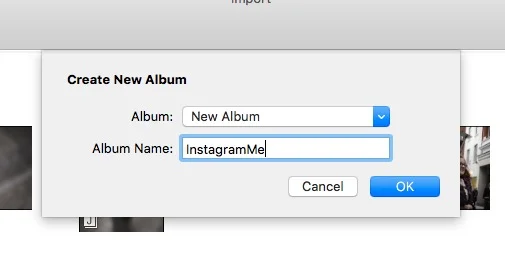
Step 1: Start by going to Photos and creating the Album that you want to use. In Photos from the File menu choose: New Empty Album... (You don't have to create an Album, you can import directly into the Photos library). In this example I've created an Album called "InstagramMe"
Step 2: Open Automator. You can find it in your Applications folder.
Step 3: In the finder create the folder you want to use as the "Watched" folder. In this example I'm going to create a folder called InstagramMe in my Pictures Folder
Step 4: When Automator opens it will ask you do you want to create a new document. Navigate to a location on your hard drive where you want to store the Automator document (not the folder you're going to use as a syncing folder) and click on the New Document button

Step 5: A sheet will open asking you to select document type. Select "Folder Action" and click "Choose"
Step 6: At the top of the workflow area in Automatic you will see a grey area with the text "Folder Action receives files and folders added to" and a pop up menu which says "Choose Folder" Click on this and select "Other..."
Step 7: This will open a file dialog box. From here you can locate the folder you created in step 3. Navigate to this folder and click on the "Choose" button.
Step 8: Now it's time to start adding Automator actions. We want to set this up so it will add the images to Photos and then move them to the Trash. Otherwise you'd end up with files in both photos and the finder. Add the following actions by dragging them into the blank area on the right hand side of the window.
- Under Files and Folders add: Store Disk Item References
- Under Photos add: Import Files into Photos
- Under Files and Folders add: Retrieve Disk Item References
- Under Files and Folders add: Move Finder Items to Trash
Step 9: In the "Import Files into Photos" action set Album option. Click on the pop up menu that says "Import without adding to album" and select "Add to existing top-level album". This will give you a second pop up menu with the list of the Albums you currently have in Photos. Select the one you created earlier, in the case of this example "InstagramMe". Your Automator tree should now look like this:
Step 10: Save your workflow. From the file menu choose "Save". Give it a name and hit "Save". Automator will save it into a special "Folder Actions" location. Once you do this, it should now be "Live". You can test this by copying some files into the folder. They should be added to Photos and then deleted from the folder.
Note: There seems to be some bugs with this. During my testing of this, I had some problems getting it to work on my MacPro but it worked fine on my laptop. Checking the console it seemed to be getting confused and it didn't think that the files I was copying into it were image files. I was trying to copy images in from dropbox so I assume that the added metadata was confusing it. Anyway, just be aware that there are a few bugs in Photos automator implementation at the moment. My MacBook Pro is running the beta of 10.11.2 so it's possible that these bugs will be fixed in that release.
Help Support the Blog
All of the work I do here, and the information on this blog is done entirely free of charge and takes up quite a bit of work. I want to spend more and more time on this blog, and offer more and more of this kind of information, tips and so on, so If you like what I'm doing here and want to show support, then you can do so by buying something from my Digital Download Store
I have Lightroom Presets, Photoshop ACR Presets, Textures and e-books all available for download.
If you're a Fuji X-Trans shooter and Lightroom user, check out my guide to post processing X-Trans files in Lightroom. I also have a guide for processing X-Trans files in Capture One