
A Quick First Look at Alien Skin Exposure X4
While I’ve covered quite a few photo workflow applications here on the blog over the years, especially as it pertains to Fuji processing, one of the applications that I haven’t really dealt with is Alien Skin Exposure. It’s also probably the application I get asked about the most. A new version has just been released, and so I decided to give the trial version a spin, and here are some of my initial findings. This is just a first look and is by no means a comprehensive review.
Overall Application Design and Impressions
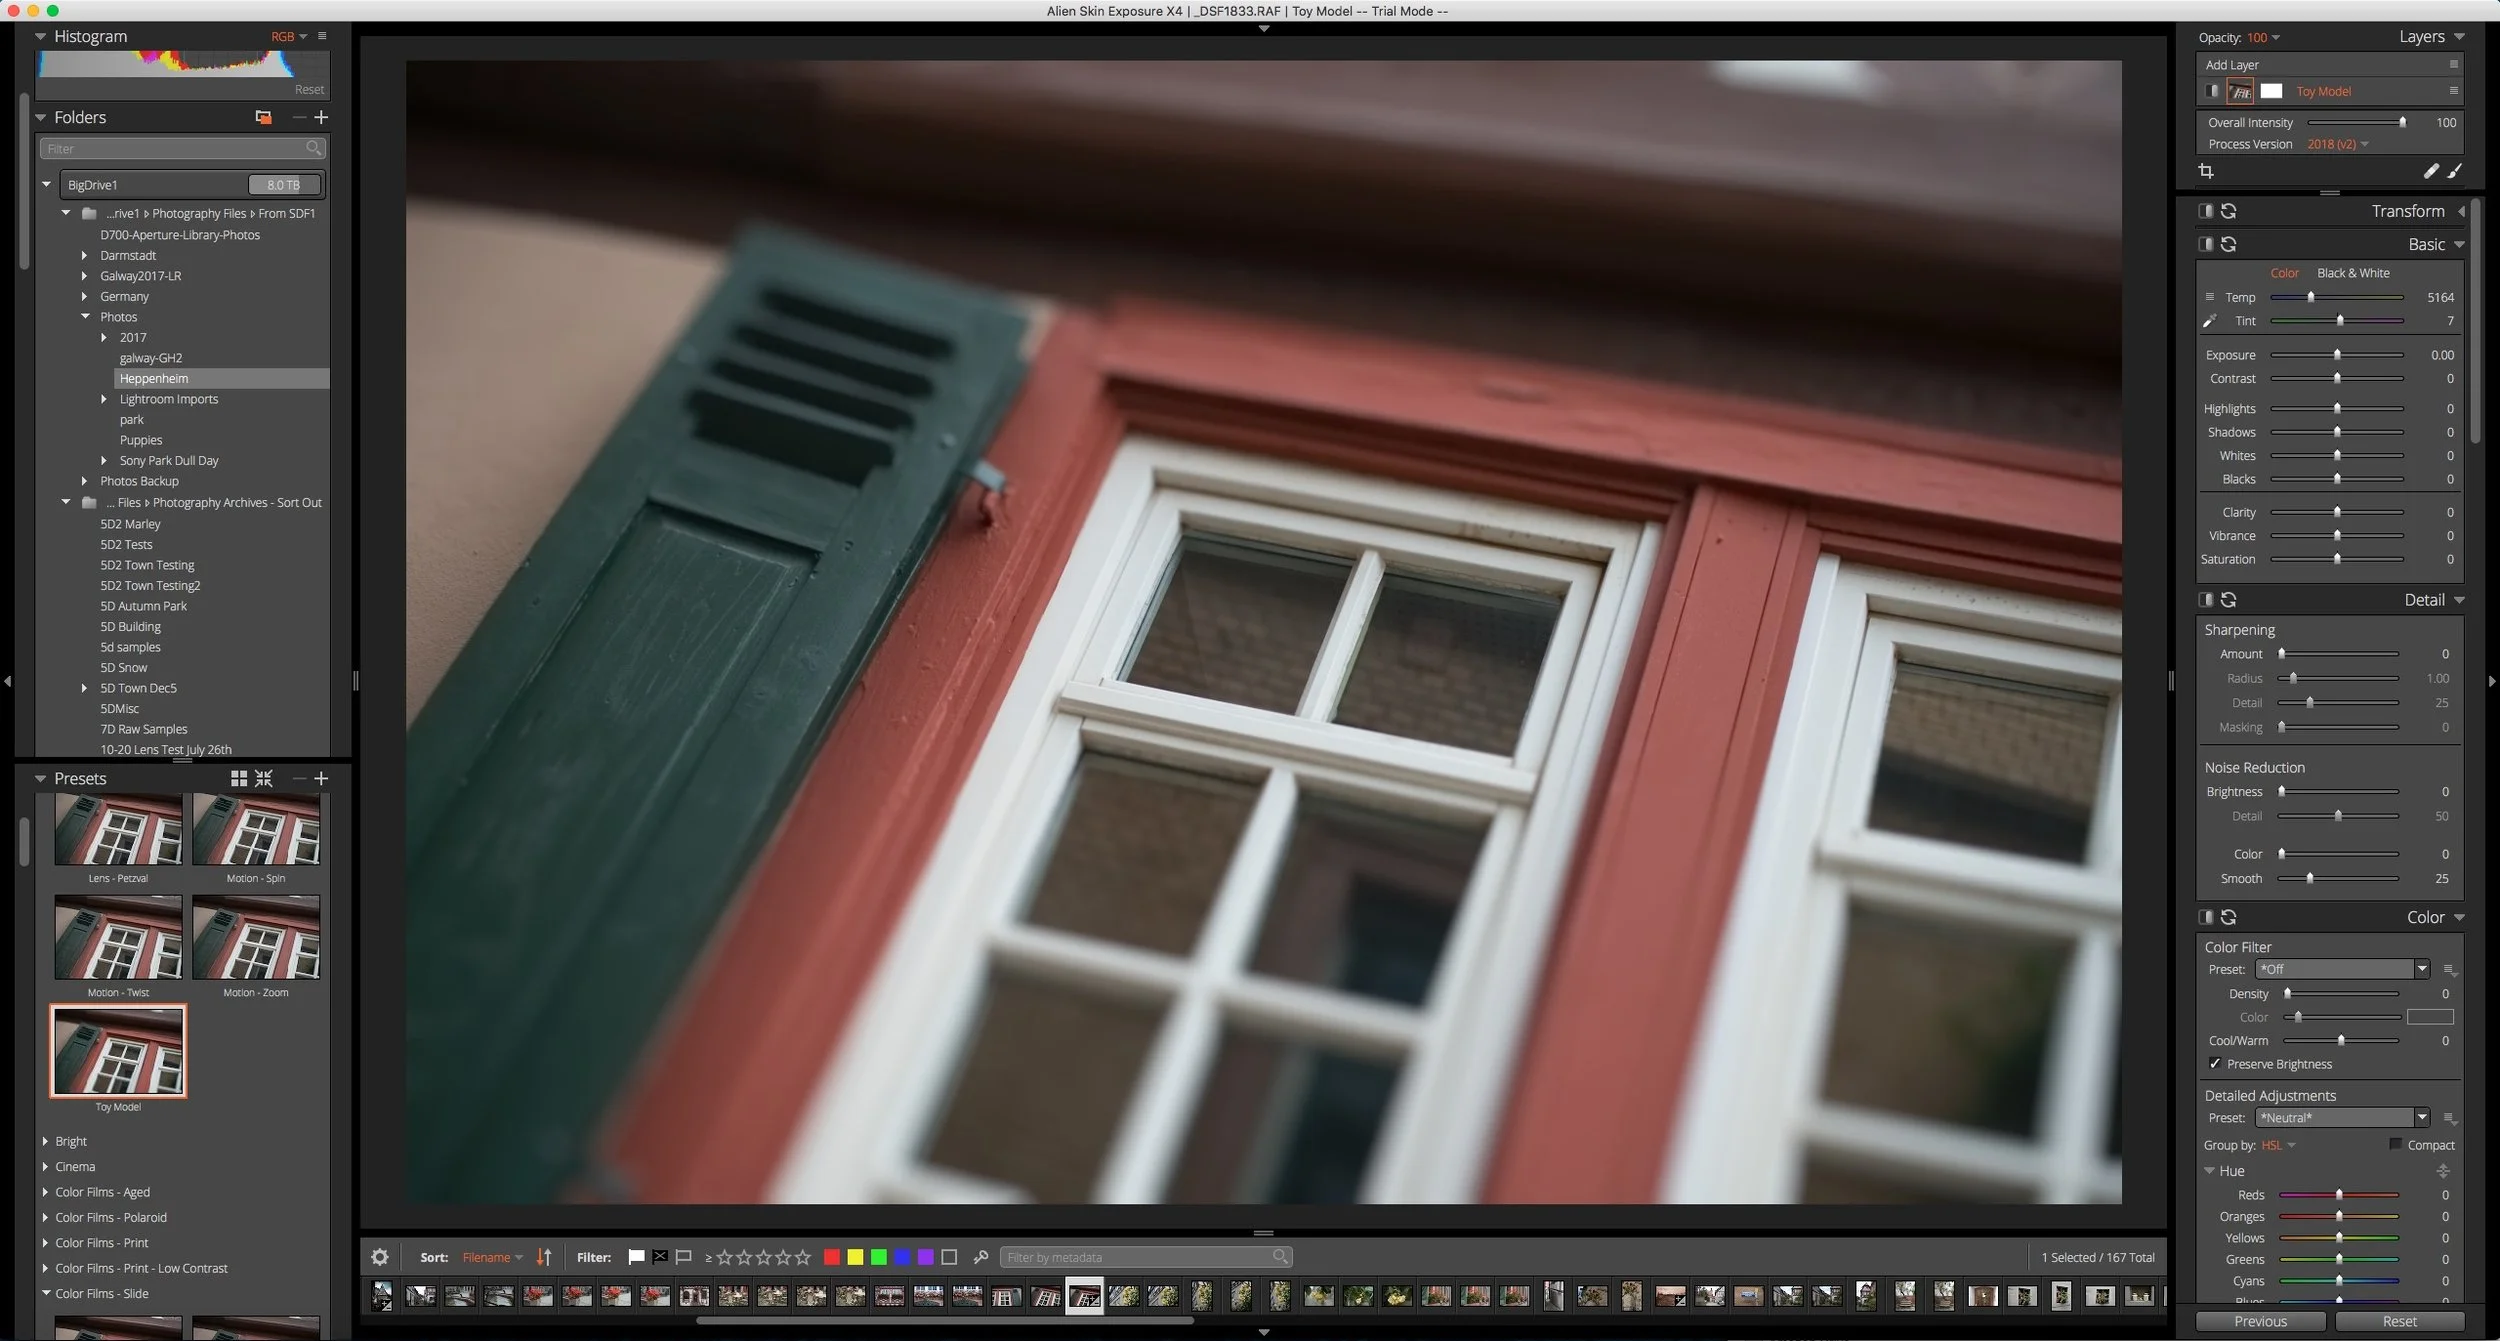
The one thing that’s immediately obvious as soon as you launch the software, is that they’re trying to make it as familiar to Lightroom users as possible. The overall look and feel of the application uses the same design as Lightroom: same colours, same style of sliders and so on. However, unlike Lightroom it doesn’t separate out the functions into different modules, instead cramming everything into the one interface. In my opinion this makes things a little cluttered, but you get used to it.
The software can be used as a plug-in to Lightroom and Photoshop, as well as a stand alone RAW processor and image browser. When used in stand alone mode, you have a folder browser on the top left of the interface, with a thumbnail browser / viewer in the middle and controls on the right. The bottom left contains a large selection of presets, many designed to mimic various types of film, and this is Exposure’s main attraction for a lot of people. Before Exposure X, there was a previous version called “Exposure” which for years was the primary film simulation plug-in. This has become less of a thing in recent years with the advent of accurate film presets from the likes of VSCO and others.
Overall, using the application is quite fast and I didn’t really come across any issues in terms of speed or overall usability. There are a few specific issues with certain missing features, but I’ll get to that a little later.

Applying various effects in ExposureX4
Film Simulations
Exposure offers a lot of film simulations. When looking through the list I see pretty much every type of film I can think of. When you apply one of these presets, it adds various effects to your image. In addition to things like grain and colour, Exposure also has a number of additional effects, such as borders, frames, film damage and flares. You can achieve some complex effects with this.
The one thing that is probably the most important aspect of the software is the grain simulation. It’s much better than the one in Lightroom or Capture One for example, and lets you have a high degree of control over the grain. It also lets you do colour grain. You also have separate options for how the grain appears in the shadows, mid-tones and highlights.
How accurate are the simulations?
It’s hard to tell. To my untrained eyes, they doesn’t seem particularly accurate compared to something like VSCO film, but they do produce a pleasing result. It also varies a lot from camera to camera. VSCO is individually profiled for various cameras, whereas exposure is just applying a global effect. The result is nice, don’t get me wrong, but I’m not sure how accurate it is. I would need to do tests by shooting on film and digital and comparing the results, but even then there would be a lot of possible variations. As an effect it’s pretty effective, and there are lots of options, but overall I’m not sure its a brilliant way of “simulating” film, but again, I could be wrong. Thats’s just my opinion based on some initial testing.
There are some nice black and white options too, and some presets for aged and damaged film. All of these produce nice results, and as an effect it’s pretty comprehensive, with a lot of options. You can also do a tilt shift effect and other defocusing tricks within the application too.
For Fuji X-Trans RAW Files
The software does a relatively good job of processing Fuji RAW files. There are no visible artifacts as far as I can see and the results are pretty clean and normal looking (without the smearing, false detail and other artifacts you get from Lightroom / ACR). I did notice that they appear to be a little soft, especially with images taken using the 18-55 f2.8-4 lens. They seemed to require a greater degree of sharpening than I am used to, or that you seemed to need with other (non fuji) raw files. Having said that, other images were fine, so it’s possible it was just the shots I was looking at. I need to do more investigation to be sure, but I don’t see any glaring issues.
There are Fuji film simulation presets included, but to my eyes these don’t seem particularly accurate. The colour profiles in Lightroom seem more accurate to me. Even the corresponding presets for simulating the actual films in Exposure seem to be better. I haven’t really done extensive testing on this though, so I don’t want to be too harsh on it. This is just a first look after all.
Fuji X-Pro2 File Processed using a Black and White Preset in Exposure X4 (Click to view large)
The One Problem…
There are a couple of minor annoyances, missing features etc. For a start, there doesn’t seem to be any easy way to watermark your images on export. There is a “quick export” system which lets you export images at a range of presets, but these are fixed and don’t seem to be particularly editable. These are pretty minor things though. There is one big problem with the software however, and it could be a deal breaker depending on your preferences.
There’s no chromatic aberration correction.
I was so surprised when I first couldn’t find this that I spent nearly an hour googling it because I was sure it had to be a mistake, but nope, it’s not there. (Unless it’s extremely well hidden.) There is distortion correction, and it appears that with some raw files which include metadata based correction that aberration is partially removed, but for others there is no option to fix it.

Chromatic Aberration (Canon 24-105mm F4L lens - Normally fixed in other software)
How much of a problem this is depends on a lot of factors, the lens and camera combination you shoot with and so on, but be aware that it is a significant limitation. Given that many lenses have some kind of aberration, and rely on software correction, in my opinion this is a glaring omission.
Conclusion
Overall, it’s a pretty good application and I’ve enjoyed playing around with it. I’ve only briefly covered it here too, and I’m leaving out a lot of features. For example there is a layer system for selective edits. There is a tool for “focus” effects and so on. My first impressions though are generally positive, but I find the lack of chromatic aberration correction to be a big let down, and given how ubiquitous this feature is in software now, its kind of a surprise that its missing. If you’re curious about the software, there is a trial version available.
Help Support the Blog
I’m now on Patreon. If you like what I do here and find the information useful, then you can help by supporting me on Patreon. As well as helping keep this blog going with even more useful news, tips, tutorials and more, members also get special Patreon only perks. Stop by and check it out.
If you like this post then you can see more of my work on Instagram, Twitter and Facebook. I also have a YouTube channel that you might like. You should also check out my other Photography Project: The Streets of Dublin. If you want to get regular updates, and notices of occasional special offers, and discounts from my store, then please sign up for the Newsletter.
You can also show support by buying something from my from my Digital Download Store where I have Lightroom Presets, and e-books available for download. If you're a Fuji X-Trans shooter and Lightroom user, check out my guide to post processing X-Trans files in Lightroom. I also have a guides for processing X-Trans files in Capture One and Iridient Developer. For Sony Alpha shooters I have a new guide with tips on how to get the best from processing your A6000 Images in Lightroom.