
Quick Tip: How To Adjust Brightness in Lightroom, Without using Exposure
A long time ago, in a version of Lightroom far far away…well, ok, a previous version…there were separate controls for brightness and exposure. Since then Adobe, apparently feeling that this was too confusing for the average user, decided to roll it into a single “exposure” control. However, brightness controls still exist in other applications, and while the exposure control is probably fine 90% of the time, there are still times when you may need to use a basic “brightness” adjustment in Lightroom.
I ran into such an instance recently. I had taken some photos of a cherry tree. It was a pretty dull day, and the photo came out a little underexposed, because I had been trying to protect the highlights. I found that adjusting the exposure, while it worked, wasn’t quite what I wanted, because, it was starting to clip the highlights, and it was also not brightening the image the way I wanted it to. Even playing with a combination of highlights and shadows in conjunction with exposure wasn’t giving me exactly what I wanted. I also knew from using other applications that a simple brightness adjustment would solve the problem that I was having.
Luckily, despite the lack of a brightness slider in Lightroom, it’s actually pretty easy to achieve. All you need to do is use the curves adjustment. This is because most brightness sliders are basically a gamma adjustment, and this is easily achieved, either in a curves or levels adjustment. Because Lightroom doesn’t have a levels too, we can just use Curves.
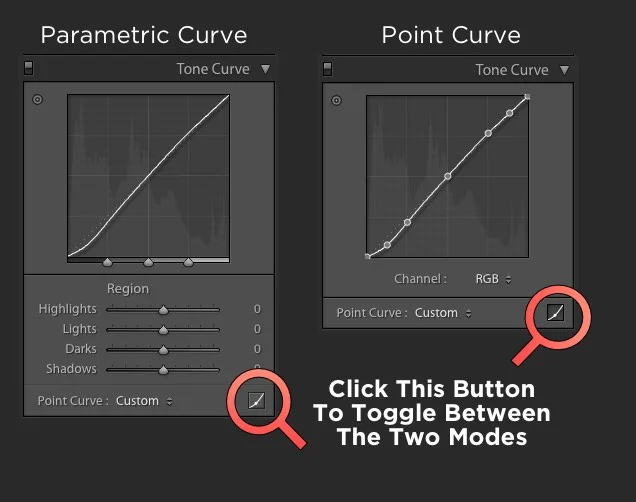
First of all, you must be using the point curve rather than the parametric curve. The point cover is the one that lets you add points to the curve and adjust them, and the parametric one is the one with the sliders underneath. To toggle between the two click on the little button on the bottom right of the curves panel.
Now, to adjust brightness, simply click on the curve in the curves tool, right in the exact centre of the curve to create a point. Now drag this up to increase brightness, or down to decrease brightness. That’s all there is to it. This is the same as a traditional brightness adjustment. I probably could have played around with the various sliders to get the same result, but I knew this would be quicker.
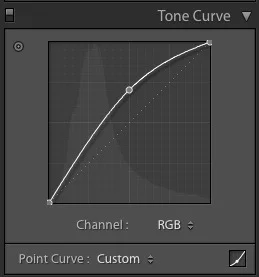
Increase Brightness
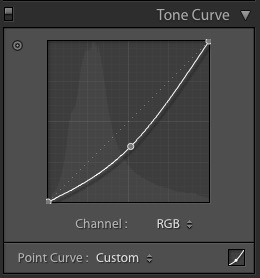
Decrease Brightness
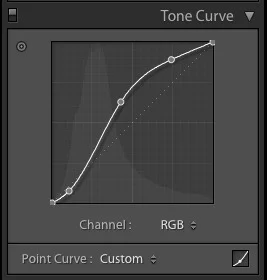
You can of course get a bit more creative with the curves if you find that it’s making your image a little too flat. For example you can add some more points at the top and bottom of the curve for more of a roll off, which will brighten your image without making it look too flat. Here’s an example:
Finally, one more Lightroom curves tip: If you’re having trouble getting precise results in the curves tool in Lightroom (you’re not alone, its programming could se a bit of an overall) then simply hold down the option (alt) key as you drag your mouse to get more precise movements. This basically slows down the response of your curser so you can adjust the curve more precisely.
Help Support the Blog
If you like this post then you can see more of my work on Instagram, Twitter and Facebook. I also have a YouTube channel that you might like. You should also check out my other Photography Project: The Streets of Dublin. If you want to get regular updates, and notices of occasional special offers, and discounts from my store, then please sign up for the Newsletter.
All of the work I do here, and the information on this blog is done entirely free of charge and takes quite a bit of work. I want to spend more and more time on this blog, and offer more and more of this kind of information, tips and so on. All of this is funded exclusively through my Digital Download store, so If you like what I'm doing here and want to show support, then you can do so by buying something from my Digital Download Store where I have Lightroom Presets, and e-books available for download.
If you're a Fuji X-Trans shooter and Lightroom user, check out my guide to post processing X-Trans files in Lightroom. I also have a guides for processing X-Trans files in Capture One and Iridient Developer.
For Sony Alpha shooters I have a new guide with tips on how to get the best from processing your A6000 Images in Lightroom.