
How do I “Save” in Lightroom or Capture One? How Photo Workflow Applications Work - A Guide for Beginners.
While photo workflow applications like Lightroom or Capture One have been around for a while now, there are still some new users who are confused by how these applications work. One of the most common questions I see from beginners or people not familiar with this way of working is “how do I save in Lightroom?”, as there is no save function in the menu. To answer that and other questions, let’s take a look at how this class of "photo workflow” applications actually work.
Note that this post is for absolute beginners who may be struggling with the whole concept of photo workflow applications. If you’re already familiar with Lightroom or Capture One or two they work, please remember that not everyone has the same skill or knowledge level.
A brief history of Photo Workflow Applications
Apple’s now discontinued Aperture application was the first piece of software that was a true photo workflow application. When it was released, it changed the way people work with photos, especially RAW photos by combining what was previously several different types of applications.
The traditional way of working with a RAW file, before Aperture came along was to open the file in something like Photoshop. First you would do your conversion in Camera RAW or alternatively you might use your camera’s native raw converter. Then you would do your image processing in Photoshop and finally you would save your edited file from photoshop as a Tiff, PSD or Jpeg.
Aperture combined all of these separate tasks into one application, and added a media management option for managing and sorting your files. Adobe followed with Lightroom, and after a few years of the two competing, Apple eventually discontinued Aperture and Lightroom was left as the major photo workflow application. Since then newer competitors have emerged. Capture One, which has actually been around for quite some time, became more mainstream and a direct competitor to Lightroom, and newer applications such as On1 Raw and Luminar also emerged.
Note: This applies to working with Jpeg or RAW files. You can use Jpeg files in Photo Workflow applications and they behave the same way to useing RAW files for the purposes of what we're talking about here.
So what is a Photo Workflow Application?
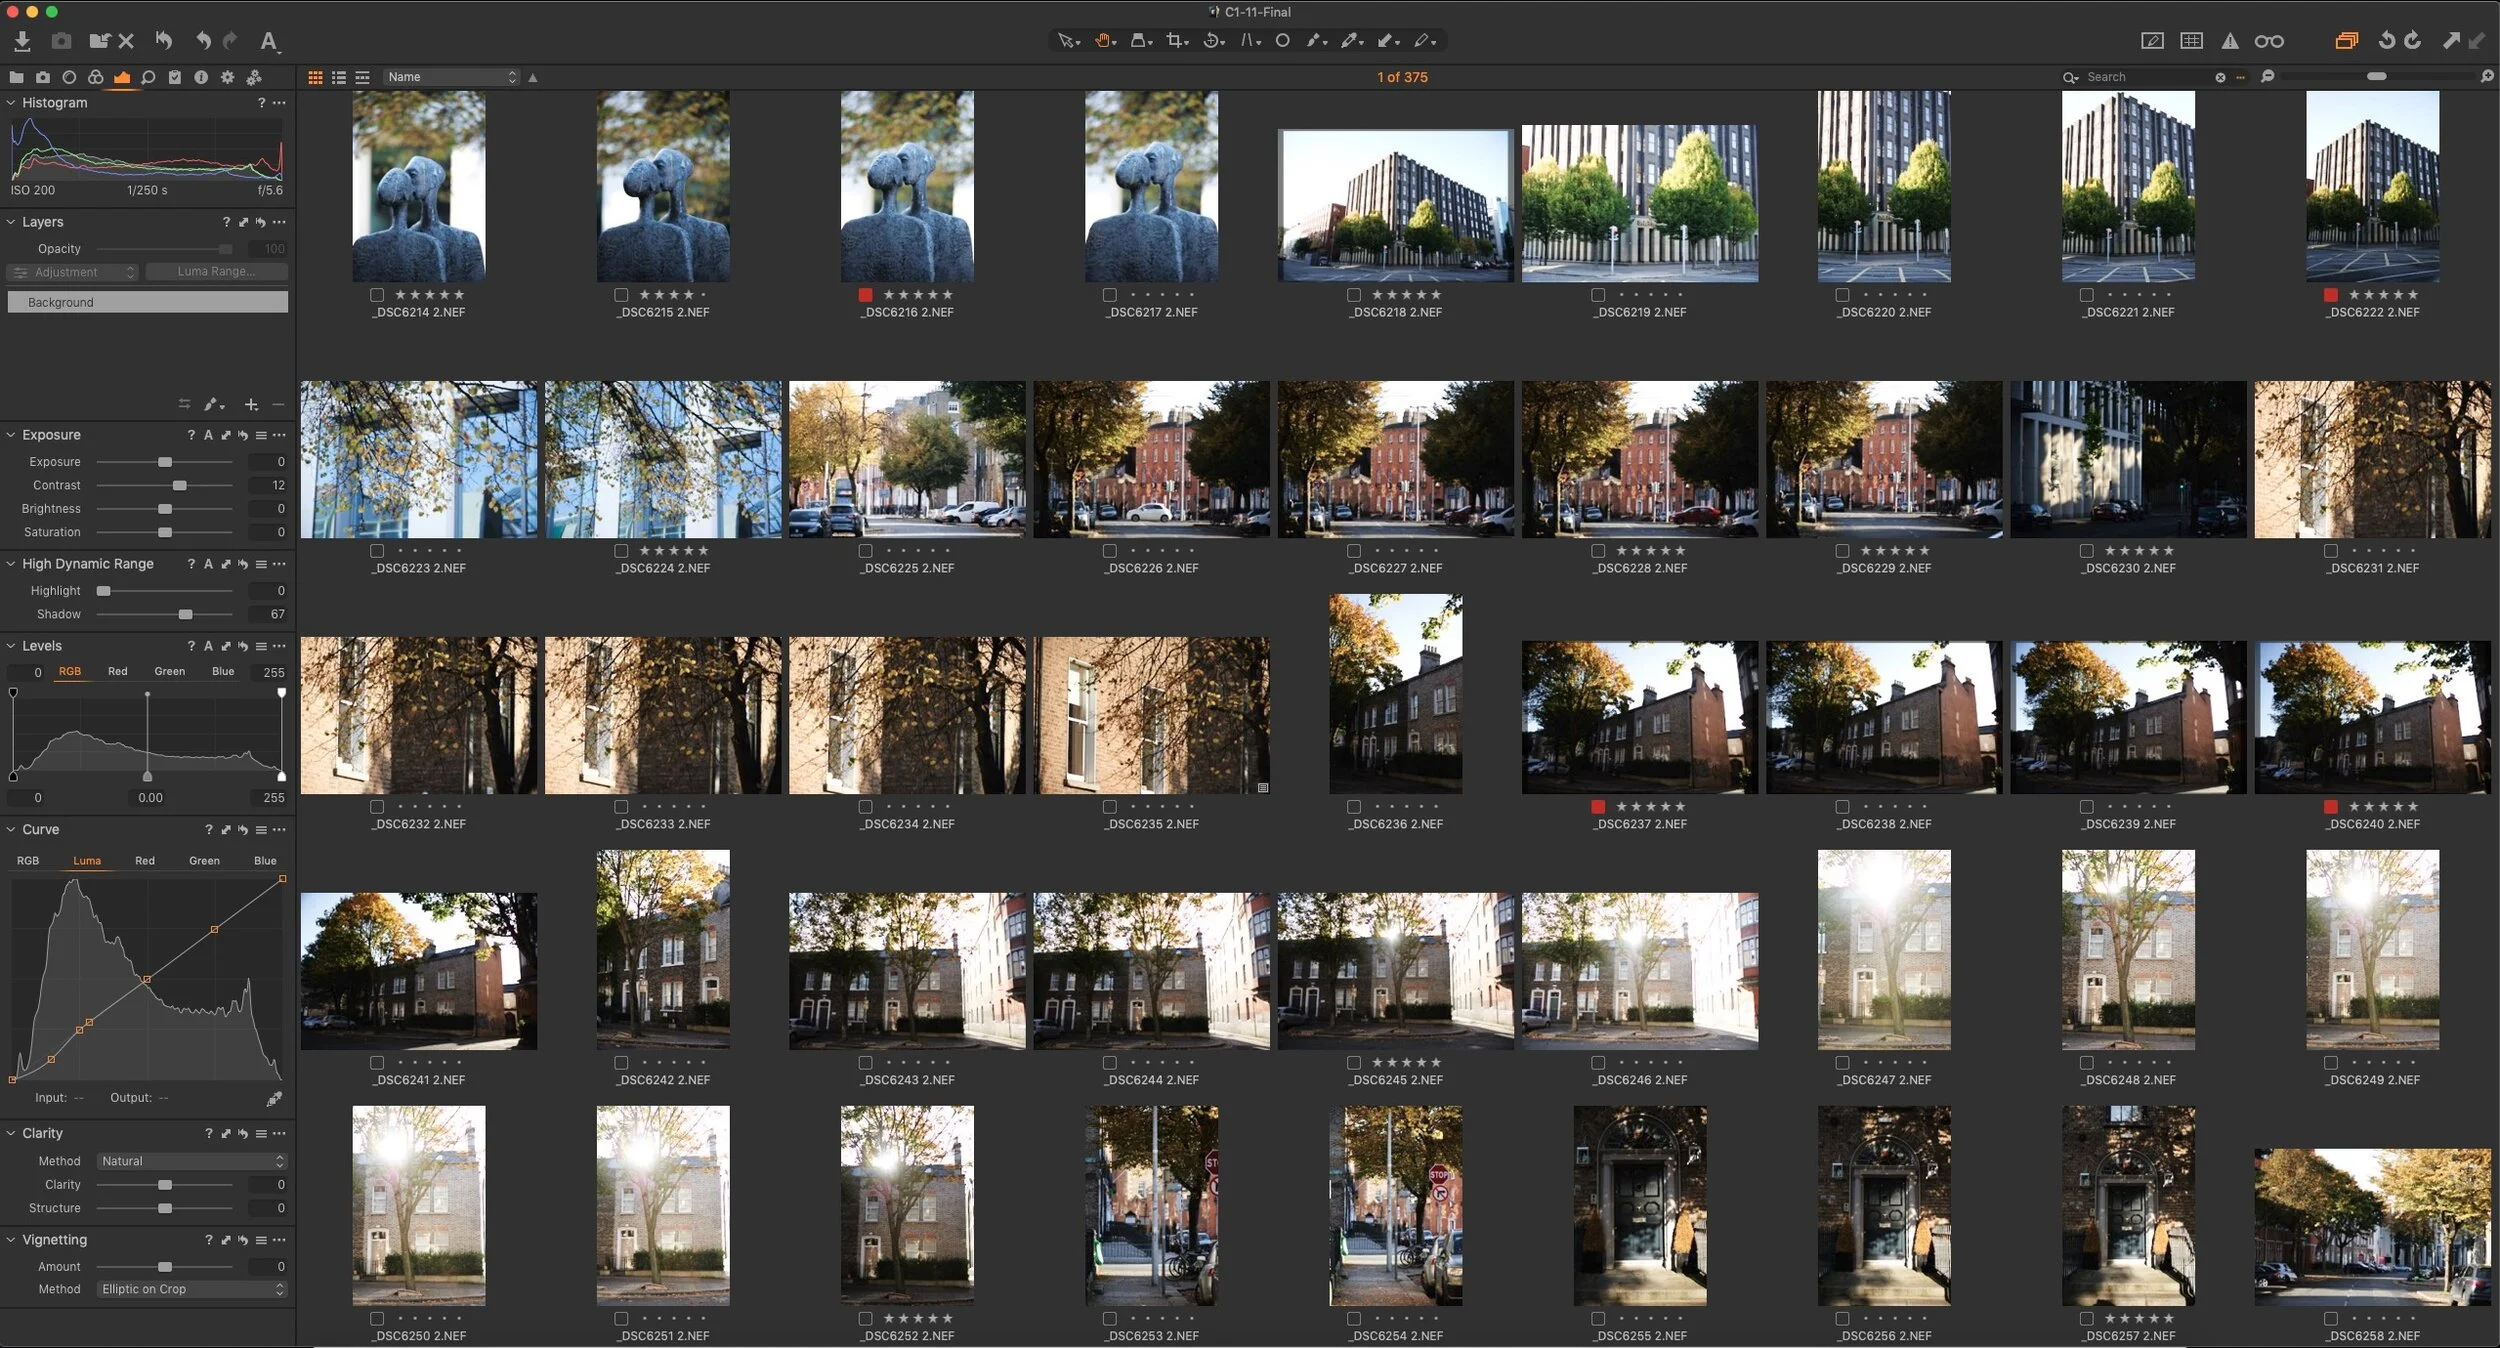
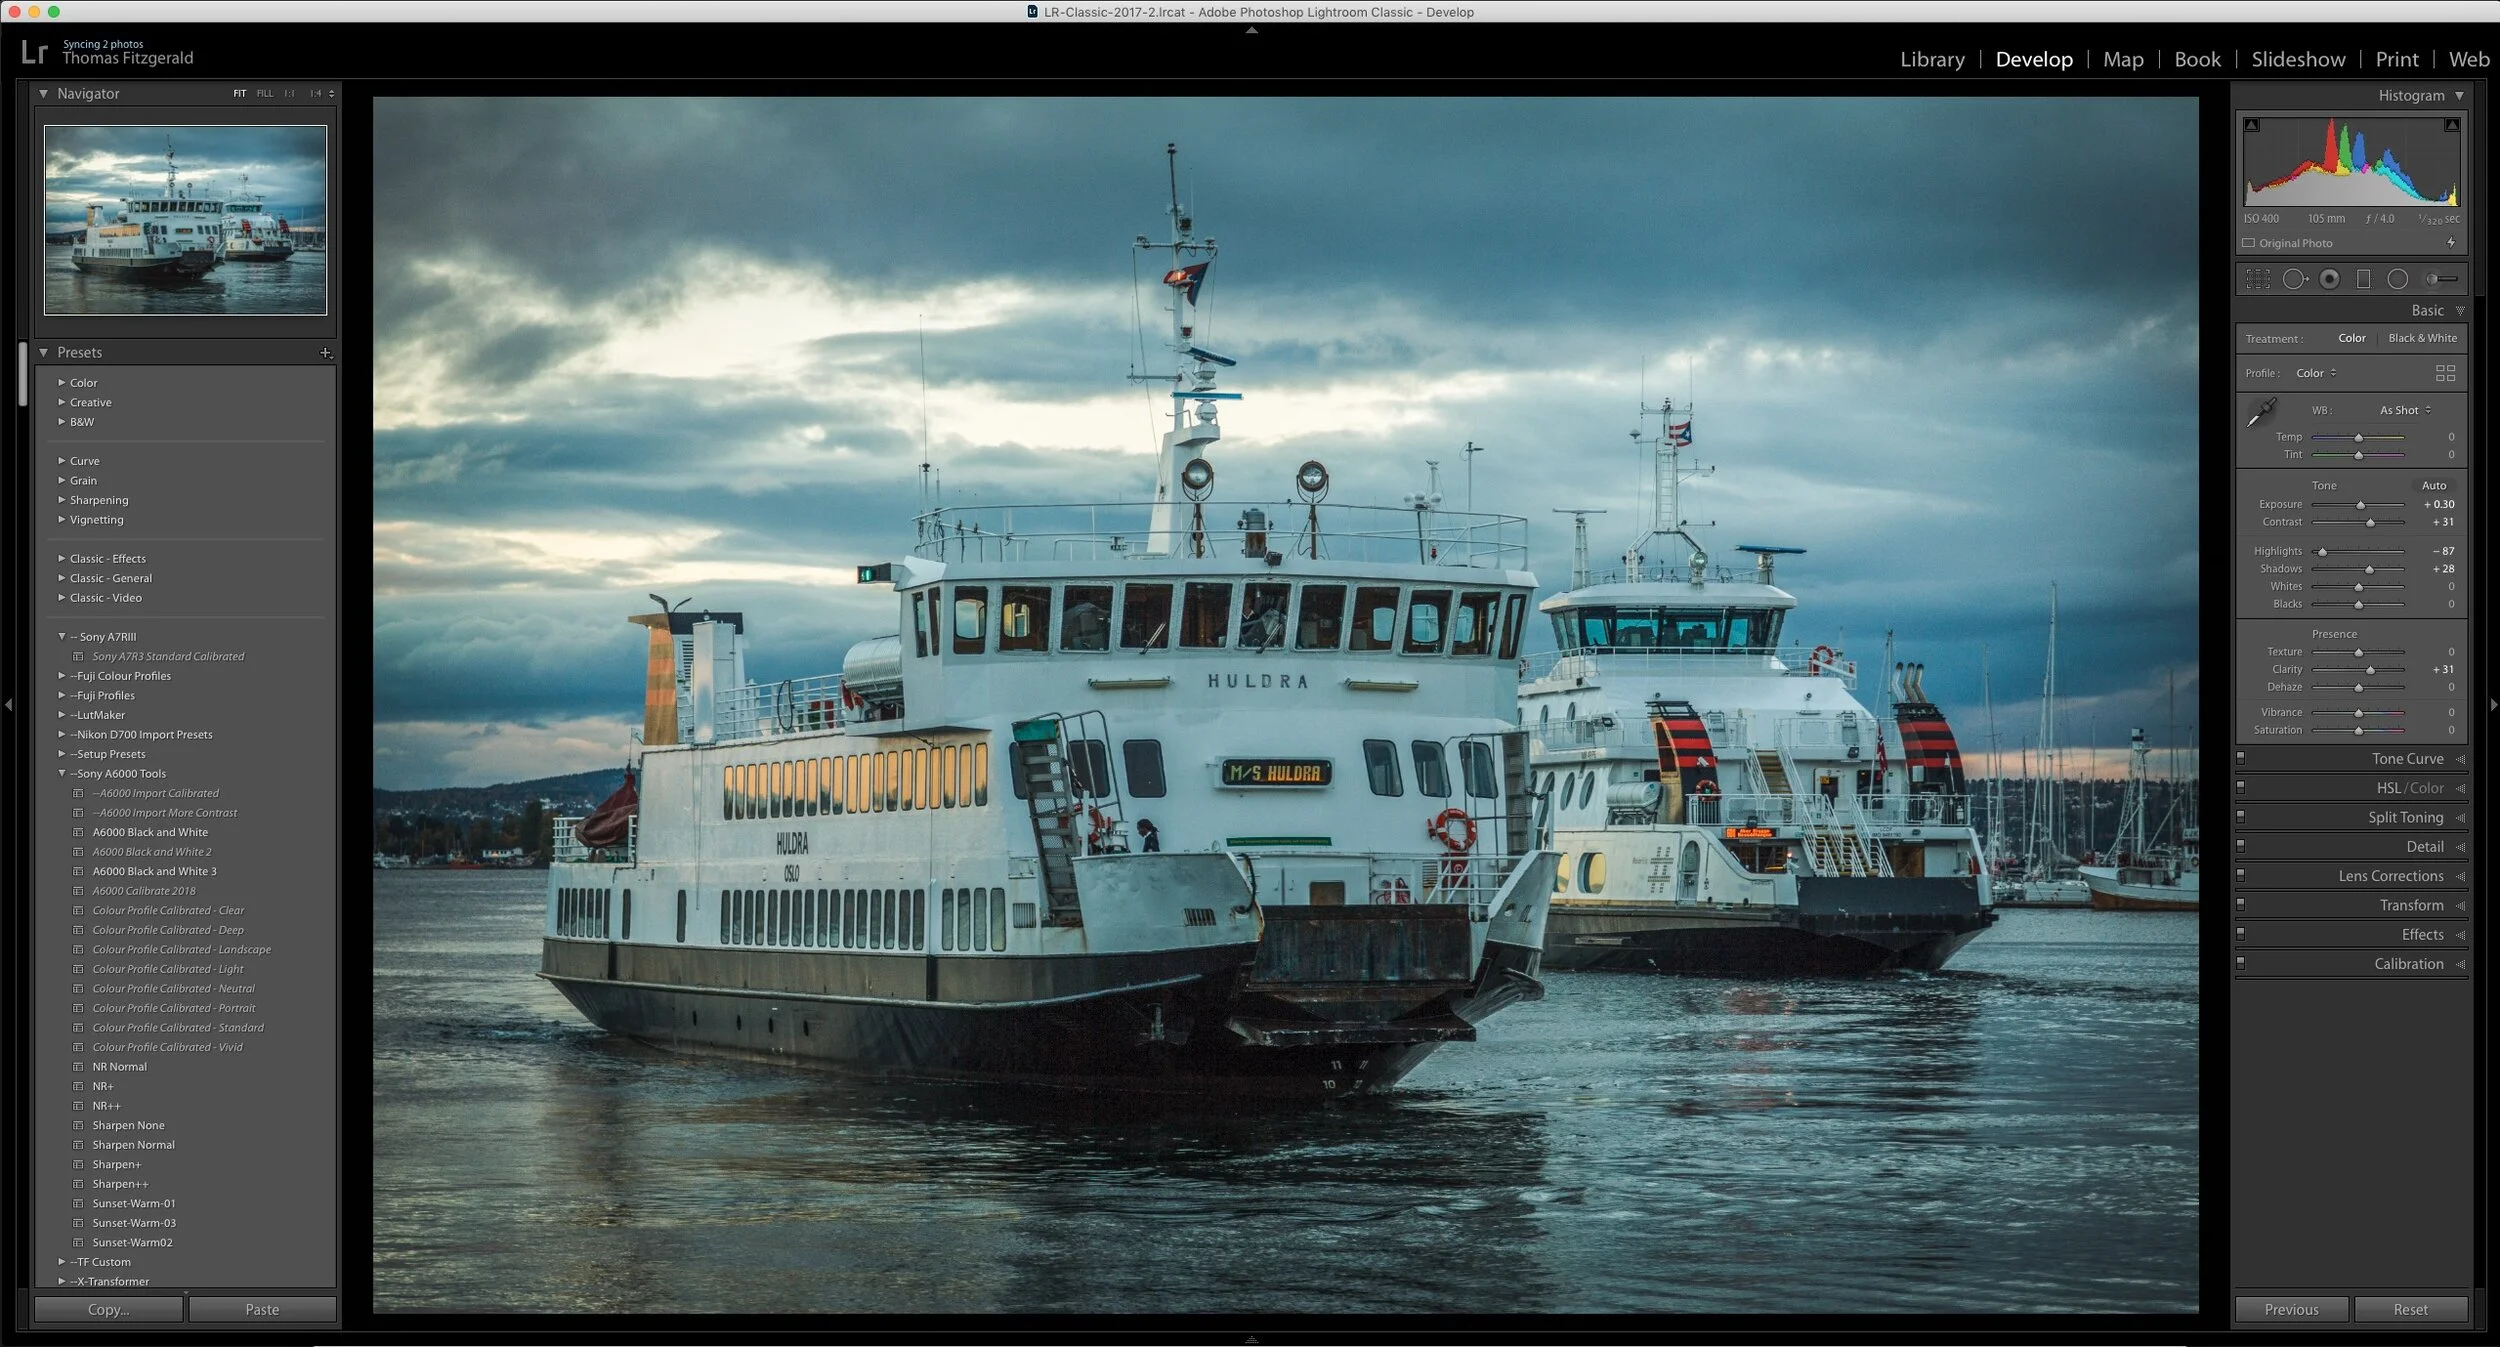
In a photo workflow application, instead of working with individual files one at a time, you import all of your images as a set. Once imported, you can organise and sort your photos, rating them and putting them into albums or otherwise organising them. You can also edit your images, adding contrast, exposure and so on, or making more complex edits, such as dodging and burning, removing dust spots, converting to black and white and so on, all within the application.
And this is the part that confuses some new users…
When you are editing in one of these applications, you don’t actually need to save your edits. Your edits are stored in a database, and the original file is never actually touched. Instead, applications like Lightroom store a set of instructions on how to edit your image. When you come back to this image later, it recalls this set of instructions and applies the edits to the original file again. As these edits are just a set of instructions, they never alter the original file, and so are totally non-destructive. You can revert to the original at any time, and any edit you make can be undone, no matter how much editing you do. You don’t need to save because the software is constantly keeping track of the changes you make, and it can store these changes for thousands of images.
To use a terrible cooking analogy, think of the RAW file like a key ingredient, and the editing you do, like writing out a recipe. But instead of baking the recipe and storing the finished product, you store the ingredients and the recipe, and very time you view it, the software uses the recipe to give you a look at the finished product. You can tweak the recipe and because it was never truly baked you can keep making changes without altering the original. Ok, I know, a terrible analogy.
To put it another, more photographic way, think of it like storing your negatives. When you want to develop your image, you put the negative into an enlarger and then make whatever timing and other adjustments you need to make to expose it onto a paper print. Only instead of actually exposing it, you just write down the settings and store those. Every time you go back to it, you enter the use those again to see what your print would be like, but you don’t actually make the print.
Unlike working with photoshop where you would have to convert your raw file, make the changes and then save a jpeg or tiff, you don’t have to do any of that with a photo workflow application. Because it keeps all of the edits “live” you can go to any photo at any time and see your edits and continue to work on your application. And just like you don’t have to save, you don’t have to load either (although technically it’s doing this in the background).
While long time users of Lightroom or Capture One might find all of these things common knowledge, there are still lots of people out there who struggle with this, especially if hey are used to the traditional, photoshop style of editing.
How do I get my images out of Lightroom or Capture One?
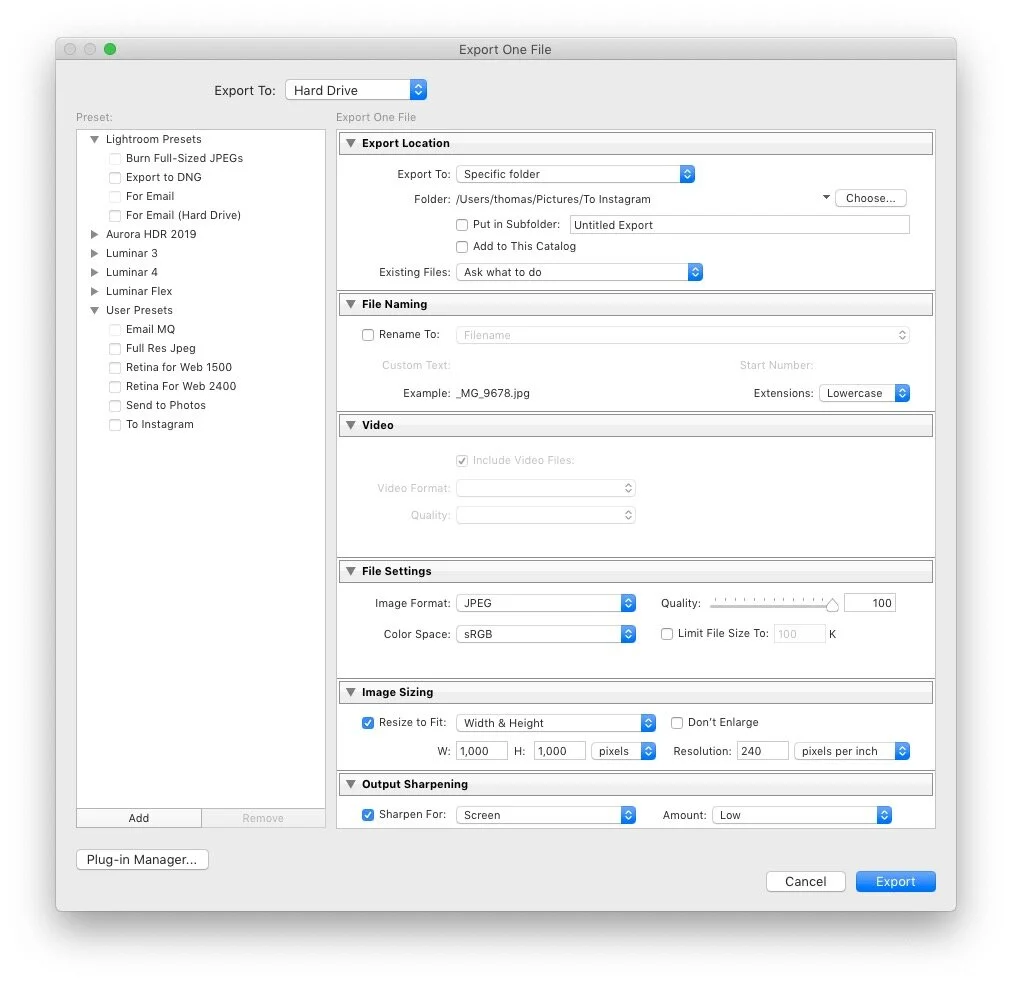
If you ant to use your image in another application, or on the web or social media, then you need to export it. Exporting your image, basically bakes the edits you’ve made into the image and saves it as a Tiff, or Jpeg or whatever other format you wish to save in.
When exporting, you’re still not touching the original files. What the application is doing is using the raw file, and then using the “recipe” of settings that you changed to make a copy in a format of your choosing. When exporting you can also do things like change the resolution to scale up or down your image, set the file format and so on.
You can also print directly form most of these applications, and again, it takes the information directly from the RAW file, and optimises it for print at the time of printing. Different applications use different interfaces for printing, and most include some kind of layout tool to help you here too. If you want to use a commercial printer, or a lab to print, you can just export your image as a PSD or Tiff file using he correct settings, and send it to your print supplier.
Note: Most applications let you send your image to another application directly, but this is technically exporting as file and then opening that file in another application - but doing it in one step. Just to get more confusing, when working with Lightroom, it has a special way of sending a file to Photoshop. It actually opens the RAW file and Photoshop reads your “recipe” of changes to make those same changes using its raw converter, called “Camera RAW”. Once in photoshop though it behaves like a normal file, and when you save, it saves as a PSD, but Lightroom will automatically import it back into its database and link it to the original RAW file. But don’t worry about that for now!
Do I need to export every image?
This is another common misconception from beginners. You don’t have to export all your images as Jpegs or Tiffs. They can live quite happily in Lightroom as raw files. Some people think that you need to export every single image as a jpeg, because that’s the way you would have done it if just using photoshop. But you can browse print and view your photos in Lightroom, without ever having to export your photos. You only really need to export your images if you want to use them else where.
However….
That doesn’t mean you can’t. Some people like to create a “flattened” version of their finished, edited photos, as a Tiff or Jpeg and store them separately from their Lightroom or Capture One database. This means that you have an extra backup and should something happen, you still have a version with all of your edits baked in. It also means that if you accidentally change your image in the future you still have a version that you liked. Some people do this for just the photos they’re really happy with, and want to keep as part of a portfolio for example. Another option might be to export your favourite images as Jpegs and then import to something like Apple Photos, so you can access them on your iPhone or iPad.
But you absolutely don’t need to do this.
What if I want to work on a different computer?
You may be wondering then, if these applications store all of my edits in a database, what if I want to work on another computer, like a laptop? DO I need to export the image, and then will I loose all of my edits?
You could do this, but you don’t need to.
If you’re woking with Lightroom, it has an option to write your edits to a special file called a sidecar file. This takes your “recipe” and saves it in a tiny text file beside the RAW file. When you import both of these into another copy of Lightroom, it will read the settings from this sidecar file and then you will see all of your edits exactly as they were.
You can also export a whole selection of images as a “catalogue” file, and import that back into another copy of Lightroom, which will also keep all of your edits, and still allow you to make changes.
Capture One has similar functionality for exporting a subset of images.
What if I want to load my edits form Lightroom into Capture One or another application?
This is where things get tricky. You actually can’t directly. Each of these use different technologies and processes to actually make the changes to your raw file. Because of this, the “instructions” or “recipe” that you store when editing your file only work s in that software, and is incompatible with other applications.
In this case, if you want to move your edited images from one Application to the other, you will need to export as a flattened format, like tiff, psd or jpeg and import them into the other application, but you will loose the ability to make changes to the things that you’ve already changed once you bake it into a file by exporting.
There are some applications which claim to be able to read edits from Lightroom, but most will still give you a different result.
Conclusion
This is really just scratching the surface here, and I wanted to just give you the basics in as simple a way as I can think of. There is a huge amount more to this topic, and there are probably lots of exceptions to the things I talked about here, but that’s for another time! I hope you have found this useful, and if you have, please let me know in the comments and I will do more “beginner” content like this.
Help Support the Blog
If you like what you see here and you find this useful, then you can help support this blog and help me keep making great content like this by supporting me on Patreon for as little as $1 a month. There are a number of options available with different rewards, such as behind the scenes content, special Patreon only videos and more. Check out my Patreon Page for more details, and a big thanks to everyone already supporting this blog on Patreon.
Buy me a coffee!
If you’d rather not use Patreon, but still want to say thanks or help, then you can feed my caffeine habit and buy me a coffee via PayPal with a one off donation to my PayPal tip jar.
Lightroom Presets and Capture One Styles
If you use either of these applications, then check out my range of custom made Looks in the form of presets for Lightroom, and Styles for Capture One.
Join our Facebook Group
If you want to discuss anything you’ve read here on my website, or saw on my youtube channel, or if you want to share images you’ve created using any of my techniques or presets, then I’ve started a new Facebook Group just for that.