
Lightroom May 2019 Updates (Lightroom Classic 8.3 Released)
Today Adobe rolls out a series of updates across the Lightroom portfolio of applications. Lightroom Classic is now at 8.3 and it contains quite a few bug fixes and performance enhancements, as well as several new features. The entire suite of Lightroom versions has been updated including the mobile and desktop versions. Here are some of the details.
New Name for Lightroom Classic
With this release, Adobe is changing the way Lightroom Classic is named. The “CC” moniker is being dropped, so that it will now simply be referred to as Lightroom Classic. Given how this is how most people referred to it anyway, and how this has been a bit confusing up till now, I think this change will be welcome.
Lightroom Classic
Most of this post will talk about Lightroom classic. There are several new features in the software, some of which will also roll out across the line and I assume will also be in Camera RAW. I’ve been able to test it in advance and here are some of the main additions and changes.
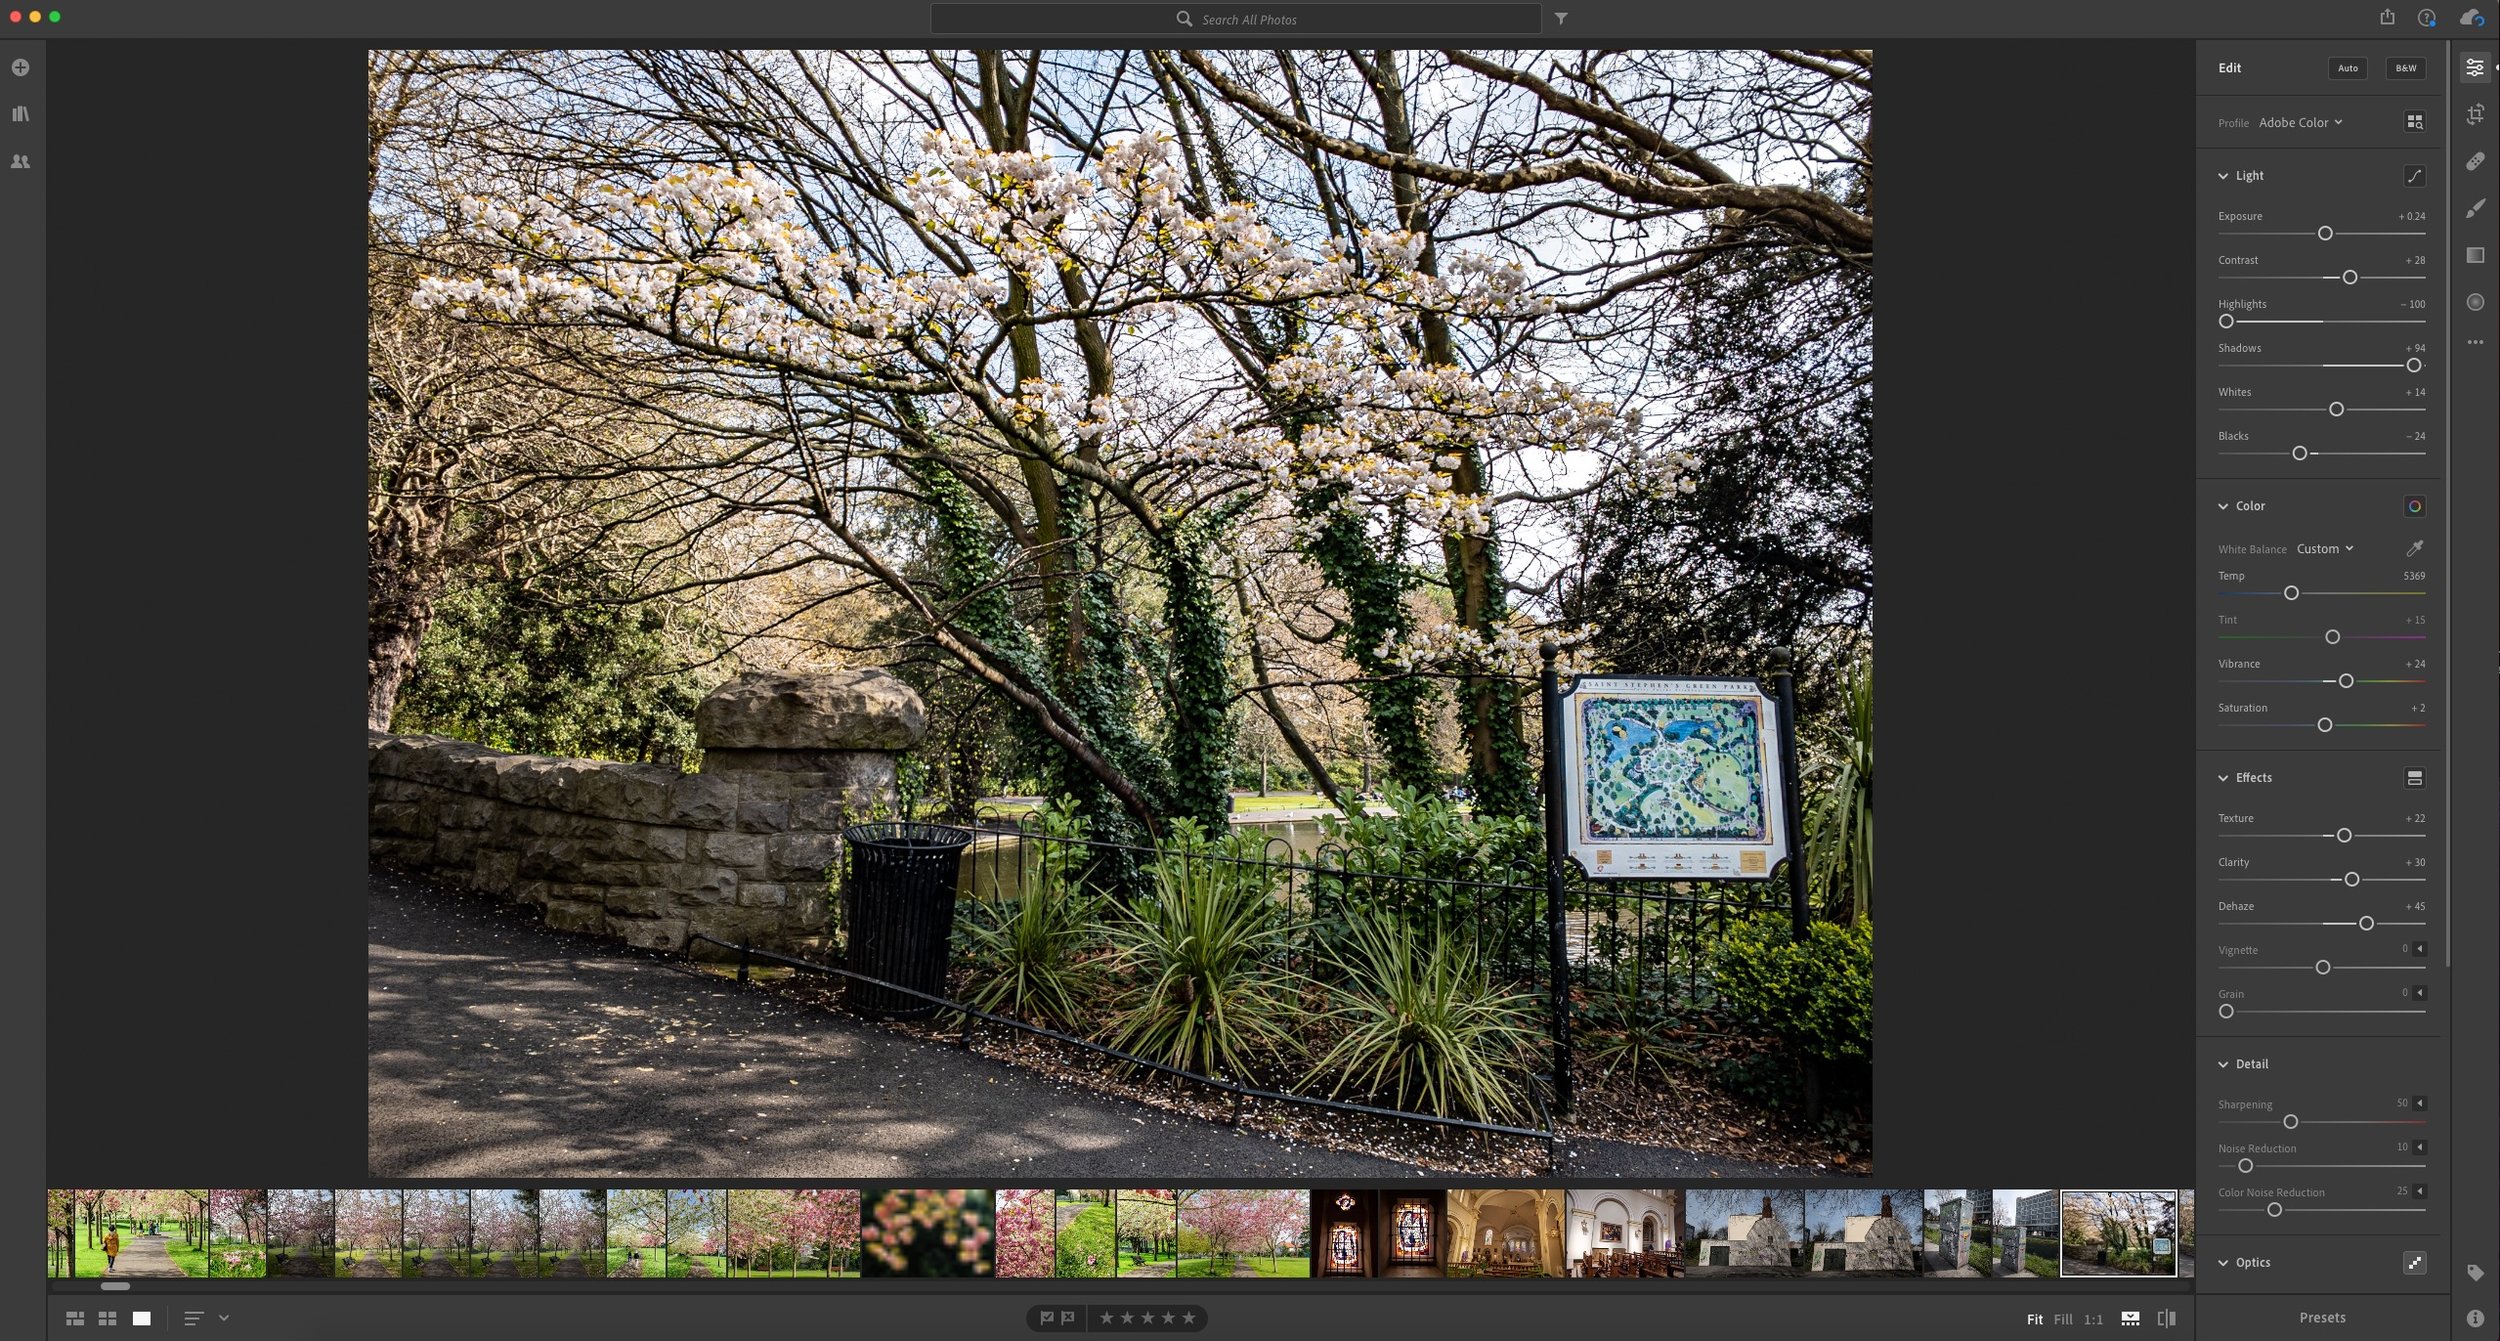
Texture
“Texture” is a new slider in the develop module. It performs like a more fine version of clarity and is useful for adding…well…texture to images. It enhances or softens "medium" details in an image. At first, I thought it might be similar to the “structure” control found in other applications, but it’s not quite the same. It probably sits somewhere between structure and clarity.
I suspect that this will become a favourite adjustment for a lot of people (and possibly overused a lot too)
As well as positive values adding detail to an image, negative values apply a degree of softening to textures and can be used for things like skin softening for example. The algorithm is able to soften skin without affecting pores.
As well as being available in the main develop panel, you can also apply texture as part of a selective adjustment. In other words, you can use it with a brush, gradient, radial gradient etc.
Below are some examples showing texture in action. (Click to view large)


In the examples above I used texture at 100% just to illustrate the effect, but in reality, you wouldn’t use it this way. Here is the last example at a more reasonable 30%
Texture: 30%
Flat Field Correction
This is probably one of those things that for many people will be something they never use, but for those for whom it is important, this will be a welcome addition. It was previously available as a plug-in, but this release it is now standard.
Flat field correction corrects colour shifts and light falloff that can occur with some lenses. It’s particularly prevalent when using older manual focus wide angle lenses on digital cameras. You could sometimes see a fairly prominent colour vignetting, and this allows you to correct for that.
It works by basing the corrections on a reference image, that you take either against a plain background or by using a diffuser. Once you have this reference image, you can tell Lightroom to correct a subsequent set of images using the reference as the source for the corrections.
As this is something that I don’t personally have use for, I haven’t actually tried it, but I know it is an issue. I have seen a lot of people talking about this when the Sony A7R came out because they were using Leica wide angle lenses. I won’t bore you with the technical reasons as to why this happens - it’s something o do with the angle at which light hits the sensor. Previously people have used third-party software to create corrected DNGs, so now you can do it directly inside of Lightroom.
Improved Automatic Settings
The AI-based auto settings that were introduced a few versions ago have changed to improve the quality of the auto settings. Obviously this is subjective, but in my opinion, it looks a little better. I found the older version used to lower the contrast too much, while the new version seems to be better at this, although it still gives some unusual results in certain circumstances.
It’s still an automatic setting though, and I always just use this as a starting point if I use it at all. It can give you a good place to start at times, and for beginners, this is often a good way to quickly get their photos into the right place without too much effort.
Here’s a quick example. In this case it’s pretty subtle, but there is more contrast by default. Click to view large - You can compare by using the left and right arrows on the Lightbox when you click on the images and you will better be able to see the differences.


Import behaviour
When you insert a memory card into a card reader and go to import images, the default behaviour will change with this release. Instead of selecting the folder from the “devices” section, it will be selected from the list of attached drives, and the “DCIM” folder should be automatically selected.
What is the difference with this? Adobe claims it speeds up the import process. I haven’t done any comparisons, but I suspect that this will vary from computer to computer.
Lightroom Desktop
As well as getting the texture control mentioned above, Lightroom desktop will also now get defringe controls. These perform a similar function to defringe in Lightroom Classic but the controls are different.


Lightroom Mobile
As well as the new texture control, the iOS and Android versions of Lightroom get a new home view. This shows your most recent photos, as well as tutorials. It’s somewhat similar to the home screens in other Adobe applications such as photoshop etc.
The interactive tutorials aren’t just a movie playing on your device. They provide the actual photo used and you can follow along on your phone or tablet as you’re guided through the process of the edits.


It also adds what they’re calling “Inspirational Photos”. These show a selection of photos from other artists, and you can click on them to see what edits were made to the images, and scroll through the edits as they were being added. I suppose you could consider them mini tutorials.
The Android version of Lightroom also now gets batch editing. This allows you to copy and paste settings to multiple images at once.
Collaboration
Across all the new versions you can now invite people to contribute to shared albums. You can invite people by email, or via a shared link, to add photos to your albums, and you will have access to the full res versions of any images added, including RAW files.
Additional details
In addition to these main features there are some other performance tweaks and bug fixes behind the scenes, including an improved text engine in the book, slideshow and print module of Lightroom Classic, as well as performance tweaks to the syncing, pdf exporting and I’m sure I’m probably missing something here too.
There is also lots of new camera and lens profile support too. Here are the new models supported with this release.
Cameras:
- Canon EOS 250D (EOS Rebel SL3, EOS 200D II, EOS Kiss X10)
- Canon EOS RP
- Google Pixel 3 Front Standard Camera
- Google Pixel 3XL Front Standard Camera
- Google Pixel 3 Front Wide Camera
- Google Pixel 3 XL Front Wide Camera
- HMD Global Nokia 9 PureView
- LG V40 ThinQ
- Panasonic LUMIX DC-FZ1000M2 (DC-FZ10002)
- Panasonic LUMIX DC-S1
- Panasonic LUMIX DC-S1R
- Panasonic LUMIX DC-ZS80 (DC-TZ95, DC-TZ96, DC-TZ97)
- RICOH GR III
- RICOH THETA Z1
- Sony A6400 (ILCE-6400)
- Sony RX0 II (DSC-RX0M2)
Lens Profiles:
Canon EF
- SIGMA 28mm F1.4 DG HSM A019
- SIGMA 28mm T1.5 FF HIGH-SPEED PRIME
- SIGMA 40mm T1.5 FF HIGH-SPEED PRIME
- SIGMA 70-200mm F2.8 DG OS HSM S018
- Tokina opera 16-28 mm F2.8 FF
- Tokina opera 50mm F1.4 FF
HMD Global
- HMD Global Nokia 9 PureView Front Camera
- HMD Global Nokia 9 PureView Rear Camera
LGE
- LG V40 ThinQ Front Standard Camera
- LG V40 ThinQ Front Wide Camera
- LG V40 ThinQ Rear Main Camera
- LG V40 ThinQ Rear Telephoto Camera
- LG V40 ThinQ Rear Wide Camera
Nikon F
- SIGMA 28mm F1.4 DG HSM A019
- SIGMA 40mm F1.4 DG HSM A018
- SIGMA 60-600mm F4.5-6.3 DG OS HSM S018
- SIGMA 70-200mm F2.8 DG OS HSM S018
- Tokina opera 16-28 mm F2.8 FF
- Tokina opera 50mm F1.4 FF
PENTAX K
- HD PENTAX-DA 11-18mm F2.8ED DC AW
- HD PENTAX-FA 35mm F2 Ricoh
- Ricoh GR III 18.3mm f/2.8 SIGMA
- SIGMA 28mm F1.4 DG HSM A019
- SIGMA 40mm F1.4 DG HSM A018
- SIGMA 70-200mm F2.8 DG OS HSM S018
Sony FE
- SIGMA 28mm F1.4 DG HSM A019
- SIGMA 40mm F1.4 DG HSM A018
- Sony FE 135mm F1.8 GM
- Tokina FiRIN 20mm F2 FE AF
For more details see Adobe’s official blog post on the releases.
Help Support the Blog
This blog is pretty much my day job now and I work to bring you my own take on photography, both tutorials and tips, as well as inspiration from my own art. I support this work, and my YouTube channel entirely either via sales of my eBooks and Lightroom presets, or the kind support of my readers. (I also have one affiliate ad). Running all this isn’t cheap, and so If you like what you see and you want to help keep this all going, there are a number of ways you can do so:
You can support me on Patreon. If you like what I do here and find the information useful, then you can help by subscribing to me on Patreon. As well as helping keep this blog going with even more useful news, tips, tutorials and more, members also get special Patreon only feed, which gives you behind the scenes content, as well as monthly downloads (for the top tier), for only €2 or €5 a month Stop by and check it out.
Buy me a coffee / Tip Jar. If you want to support the blog but don't want to sign up for Patreon, you can buy me a coffee via PayPal with a one off donation to my PayPal tip jar.
You can also show support by buying something from my from my Digital Download Store where I have Lightroom Presets, and e-books available for download. If you're a Fuji X-Trans shooter and Lightroom user, check out my series of Fuji Guides. For Sony Alpha shooters I have a guide with tips on how to get the best from processing your A6000 Images in Lightroom.
If you like this post then you can see more of my work on Instagram, Twitter and Facebook. I also have a YouTube channel that you might like. You should also check out my other Photography Project: The Streets of Dublin. If you want to get regular updates, and notices of occasional special offers, and discounts from my store, then please sign up for the Newsletter.