Lightroom 11.4 Released - New Features: Mask Improvements, Preset Amount Slider and GPU Export Acceleration
Adobe has just announced its June photography updates, and this includes new versions of all versions of Lightroom as well as Photoshop and Camera Raw. In this article, I’m only going to be focusing on Lightroom Classic, which is now at version 11.4. This release actually has quite a few new and improved features for a point release, and I’ll outline the key new features in the post (and video) below.
Masking Improvements in Lightroom 11.4
In this release of Lightroom, they have continued to improve the new masking tools, with the addition of some new functionality. Specifically, there are three main areas of improvement.
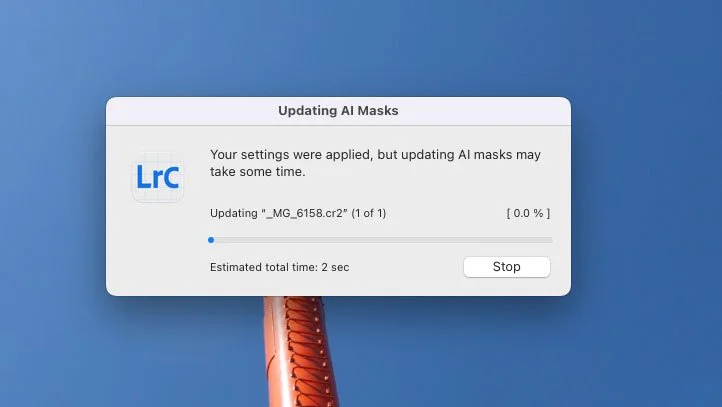
Updating AI Masking
In the previous version of Lightroom, if you copied AI smart masks from one image to another, or if you added them as part of a preset, you would have to manually update the masks on the new image. Now if you copy and paste masks from one image to another the smart masks will update automatically when you paste them. This also works for presets, or when using he previous button.
For times when there are still missing masks, they have also added the ability to update all the masks on an image in one go with an update all button.
Mask amount slider
Masks now have an amount slider, so you can control the amount of adjustments applied to each mask. In other words, it kind of acts like an opacity slider in Photoshop for fading the mask layer on and off.
Invert entire mask stack
In the previous version of Lightroom, if you had a bunch of masks in a single mask group (for example adding or subtracting to a mask) and you wanted to invert the the whole stack, you would have to invert each sub mask individually. Well, now you can invert the main mask group as a single entity.
Preset Improvements
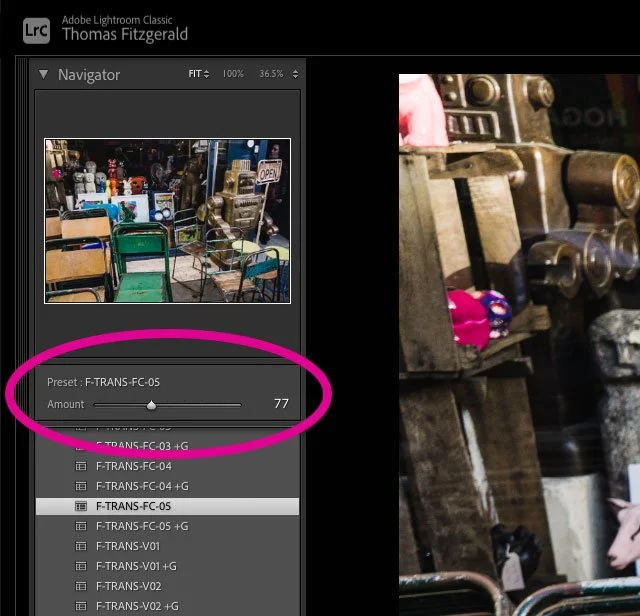
There is one big new feature when it comes to presets. You now have an amount slider when you apply a preset. This means that you can apply a preset and then fade that preset up or down to achieve the desired effect. I know this is something that people have written to me about for a long time, and there were plug-ins that would do this also, but it’s great to see this feature coming to Lightroom.
There are a couple of limitations to be aware of though. Once you edit an individual adjustment - one that is in the preset, the slider is no longer available. If you watch the adjustments panel in the develop module as you adjust the sliders, you’ll see they actually change as you move them - so it’s literally scaling the adjustments with the amount slider. So, once you tweak something its no longer the preset, and so thats why you loose the slider. This only applies to adjustments that are part of the preset. Also, certain things aren’t scalable, such as toggles for things like chromatic aberration and so forth - as these are either on or off.
The other new preset related feature is that they’ve added some more premium presets, including a whole bunch of adaptive ones which use smart masks to adapt to the subject.
GPU Acceleration
Another new feature, and one long requested, is GPU acceleration for exporting images. This means that Lightroom will now use the GPU to accelerate exporting, and your mileage may vary depending on the configuration of your system.
Export acceleration will be turned on automatically if you have a compatible GPU and 8GB or more of VRAM. If you have less than this, you can manually turn it on in the Performance preference pane of the settings window. They recommend that for systems with integrated graphics that use a shared ram system (like Apple Silicon) that you have at least 16GB for optimal performance.
How much faster this will be than just using the CPU will depend greatly on the GPU - obviously. On my M1 MacBook Pro, I was getting approximately a 15% improvement. With a faster GPU, such as M1 Max or M1 Ultra, or any of the modern Nvidia or AMD GPUs on a PC, you should see much more than this. Remember though, that this probably won’t scale linearly, as there will still be the time it takes to read and write the file to drive too, so, there will always be some limits as to how fast this can go.
Other Improvements
There are quite a few other smaller improvements in this release too, that I’m not going to go into in too much detail, but here are a list of them.
- Rule of 5ths Crop Overlay
- You can dow elect a different Loupe overlay in the Develop and Library Modules
- Stale Preview Purging - Orphaned previews will now be purged automatically
- New Camera and Lens support
Conclusion
Adobe continues to pack the new features into each release, and we’ve come a long way from when people used to complain that they weren’t doing anything. (Some people do still complain about this, but anyway.) I think that these are solid, and really useful updates, and should make a practical difference for using Lightroom.
FYI: If you don’t already have Lightroom, Photoshop or Adobe Creative Cloud, you can sign up here.
Help Support the Blog
Check out my eBooks and Presets
Check out my photography eBooks , Capture One Styles and Lightroom Presets available on GumRoad.
Buy me a coffee!
If you want to say thanks or help, then you can feed my caffeine habit and buy me a coffee via PayPal with a one off donation to my PayPal tip jar. (Please note that PayPal doesn’t make it easy to respond to these so just know you are thanked in advance)
Join our Facebook Group
If you want to discuss anything you’ve read here on my website, or saw on my youtube channel, or if you want to share images you’ve created using any of my techniques or presets, then I’ve started a new Facebook Group just for that.
Note that this post contains paid affiliate links. We get a small commission for purchases made through these links, which helps run this site.


