Adobe has just released a new round of updates for its photography applications, including all versions of Lightroom and Photoshop. Here are some of the key features in this new release.

Thomas is a professional fine art photographer and writer specialising in photography related instructional books as well as travel writing and street photography.
All in Lightroom
Adobe has just released a new round of updates for its photography applications, including all versions of Lightroom and Photoshop. Here are some of the key features in this new release.
I got an interesting question from a Patreon supporter the other day, and I thought it was important enough that I should write about it. The person wanted to know why people use presets more in Lightroom compared to Creative Profiles, and why Lightroom’s Creative Profiles aren’t more common. While I don’t have any definitive answers to this, I do have some theories, so read on. I’ll also outline how to use profiles and how to create them.
Lightroom’s move from a perpetual license model to a subscription was undoubtedly the most controversial development in the history of the software. Because of this, there are still a substantial number of people using Lightroom version 6. While many of these using 6 do so out of ideological objections to paying a subscription, some may not realise just how far Lightroom has come since the last version.
I’ve been trying to spruce up my office for a while now, and I wanted to get some wall art printed to hang up behind my computer. As I had been going through some old projects and shoots, I came across an old set of images I had shot of NewYork to turn into a panorama, so I figured that would be a good option. So, below I will detail some of the steps I took when creating the finished image (above).
If you don’t print your images, you may not have spent much time in Lightroom’s print module. The thing is, though, the print module is actually quite a useful and relatively easy to use layout tool, that can be used for more than just printing. A little while ago I posted about how to use it for framing your images to post to Instagram, but that’s just the start.
A little while ago I wrote a post about the Canon EOS RP and how the RAW files were looking in Lightroom compared to Capture One. I had noted that RAW images from the camera looked pretty flat in Lightroom and that for some bizarre reason, Adobe had not supplied camera matching profiles for the camera (or a number of recent Canon models) and if you opened the same image in Capture One they had much more impact before even doing any editing. At the time I was working with RAW files I downloaded from DP Review, and so couldn’t share my results. Since then a reader has kindly sent me some raw files that I can use, and so now I can show you what I mean.
If you post on Instagram, I’m sure you’ve come across the problem of getting your images to fit within the Instagram aspect ration. Instagram uses 5X4 (or 4X5) as the ratio for images posted to the platform, but most cameras shoot 6X4. There are many ways around this, such as cropping to the right ratio and making special Instagram versions. Another popular option is to fame your image in its default format inside a white frame that fits on Instagram. This is quite common, and I recently got a question from a reader asking if there was a way to do this from within Lightroom. There is, and it involves using the Print Module.
A while ago a reader sent me in a rather interesting tip and I wanted to share it. It’s actually something that never occurred to me. When they wanted to re-frame an image in Lightroom, instead of using the crop tool, they used the transform adjustments. In essence they were mimicking the way a film enlarger would work.
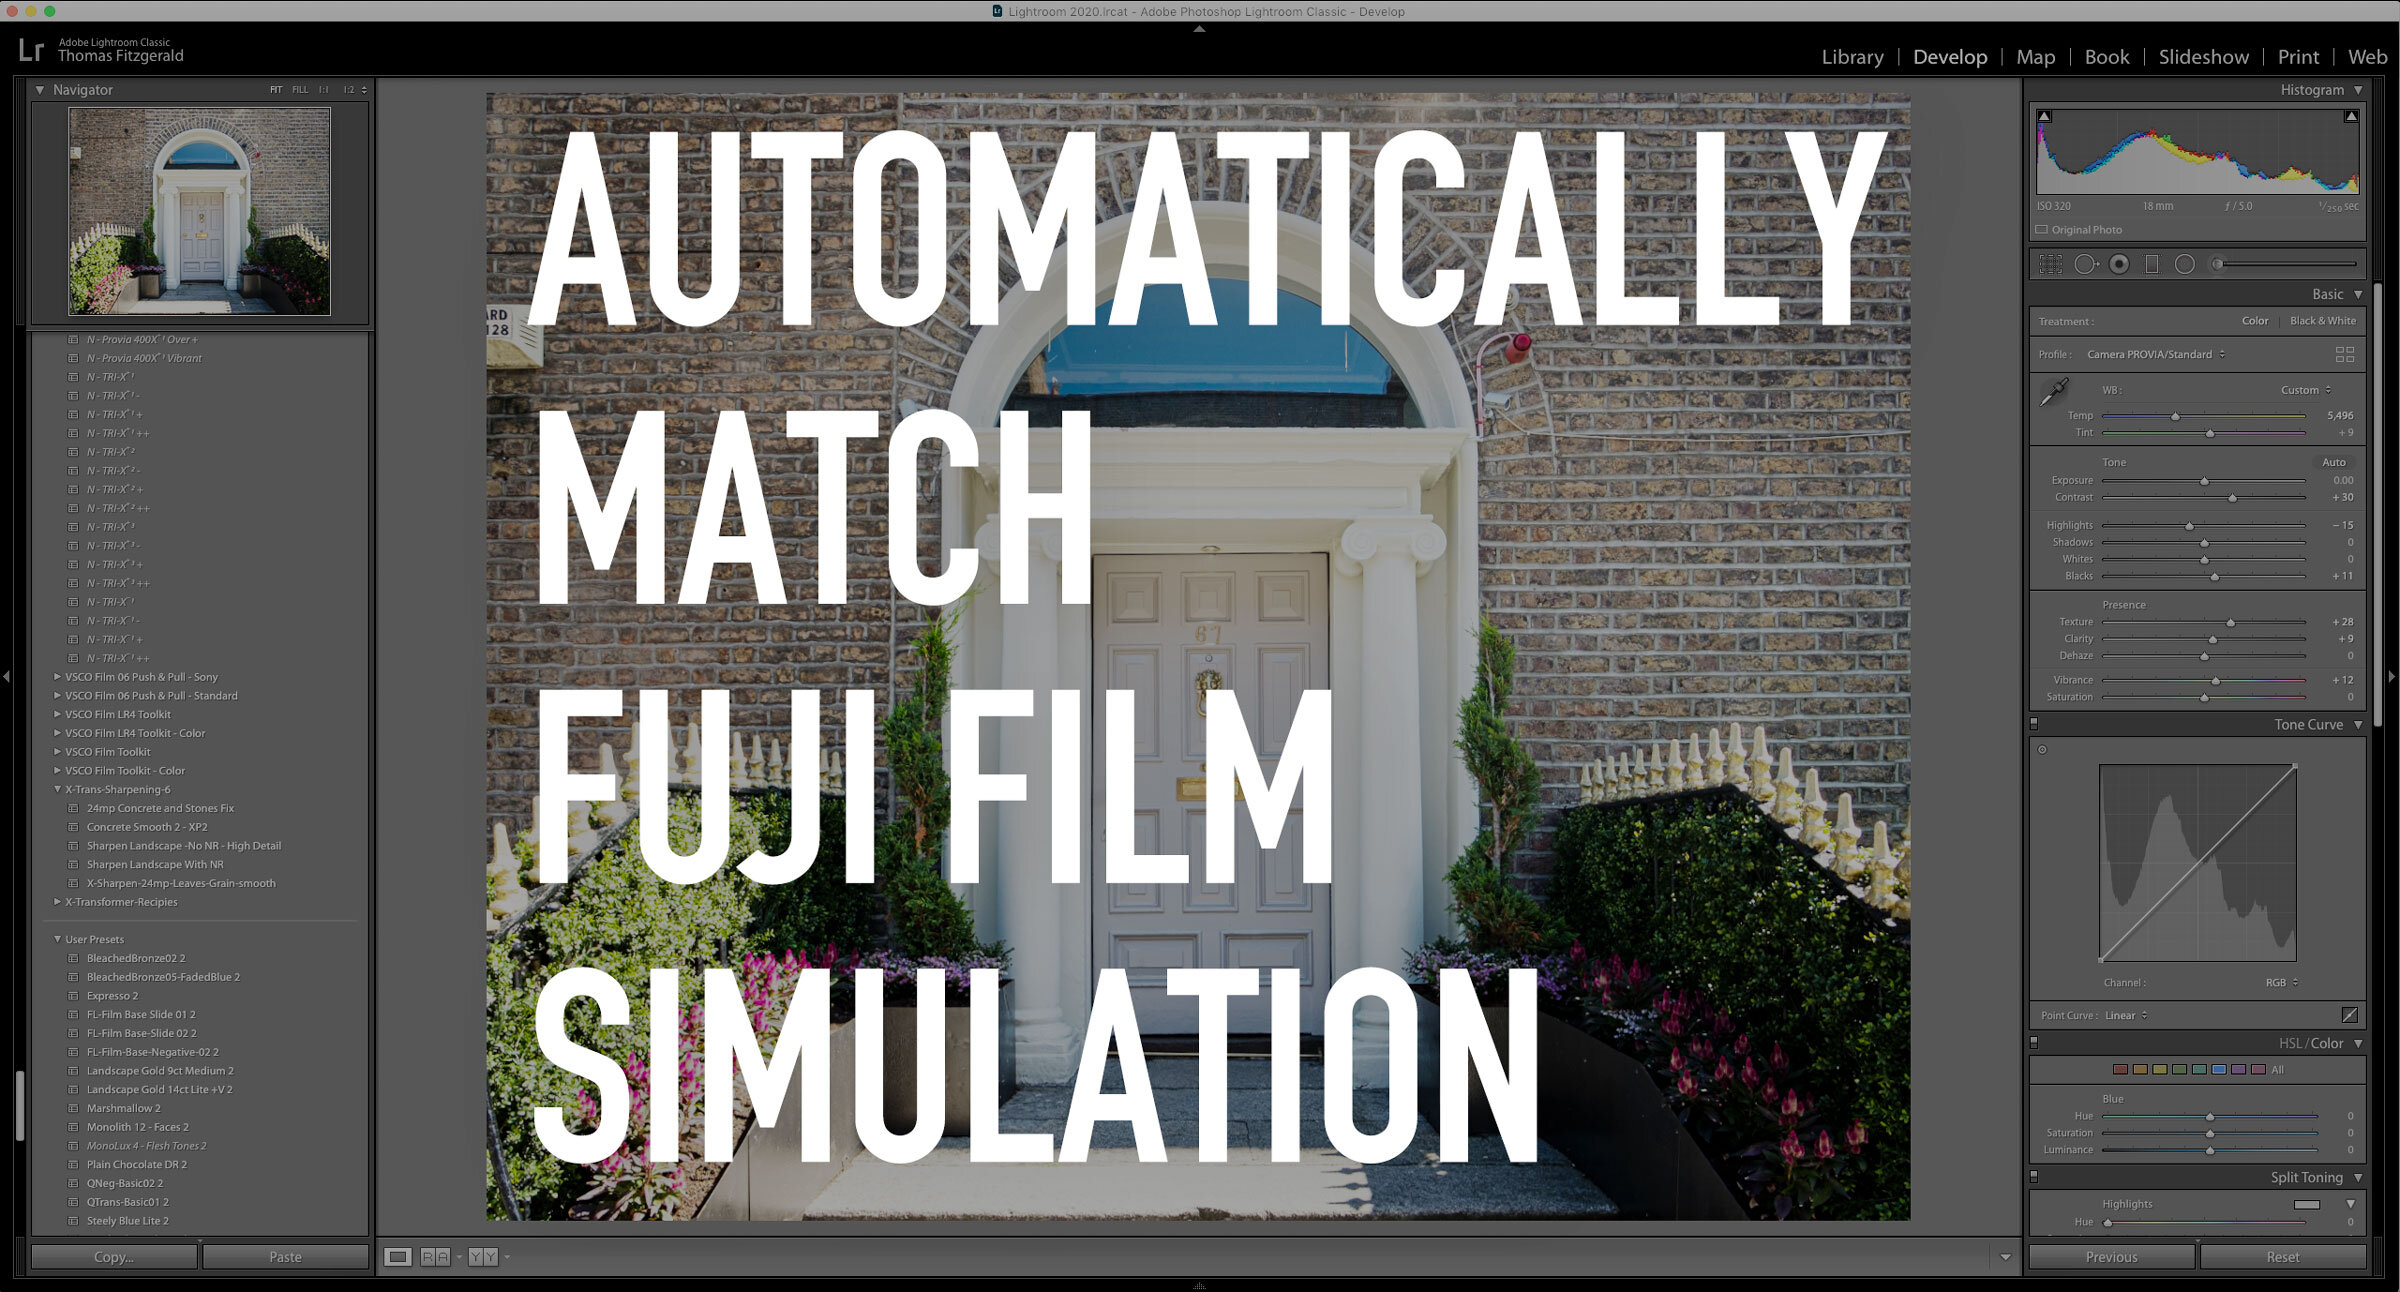
One of the new features in the recently released Lightroom 9.2 should particularly appeal to Fuji shooters. Thanks to the new RAW defaults options, you can now automatically apply the correct colour profile to match what you shot in-camera. It's pretty straightforward to use, so in this post, I'll show you what to do.
Adobe has just released its latest round of Lightroom updates, with new versions across the Lightroom ecosystem. I want to focus on the new version of Lightroom Classic today though, and one of the new features in particular. But first, here’s an overview of what’s new…
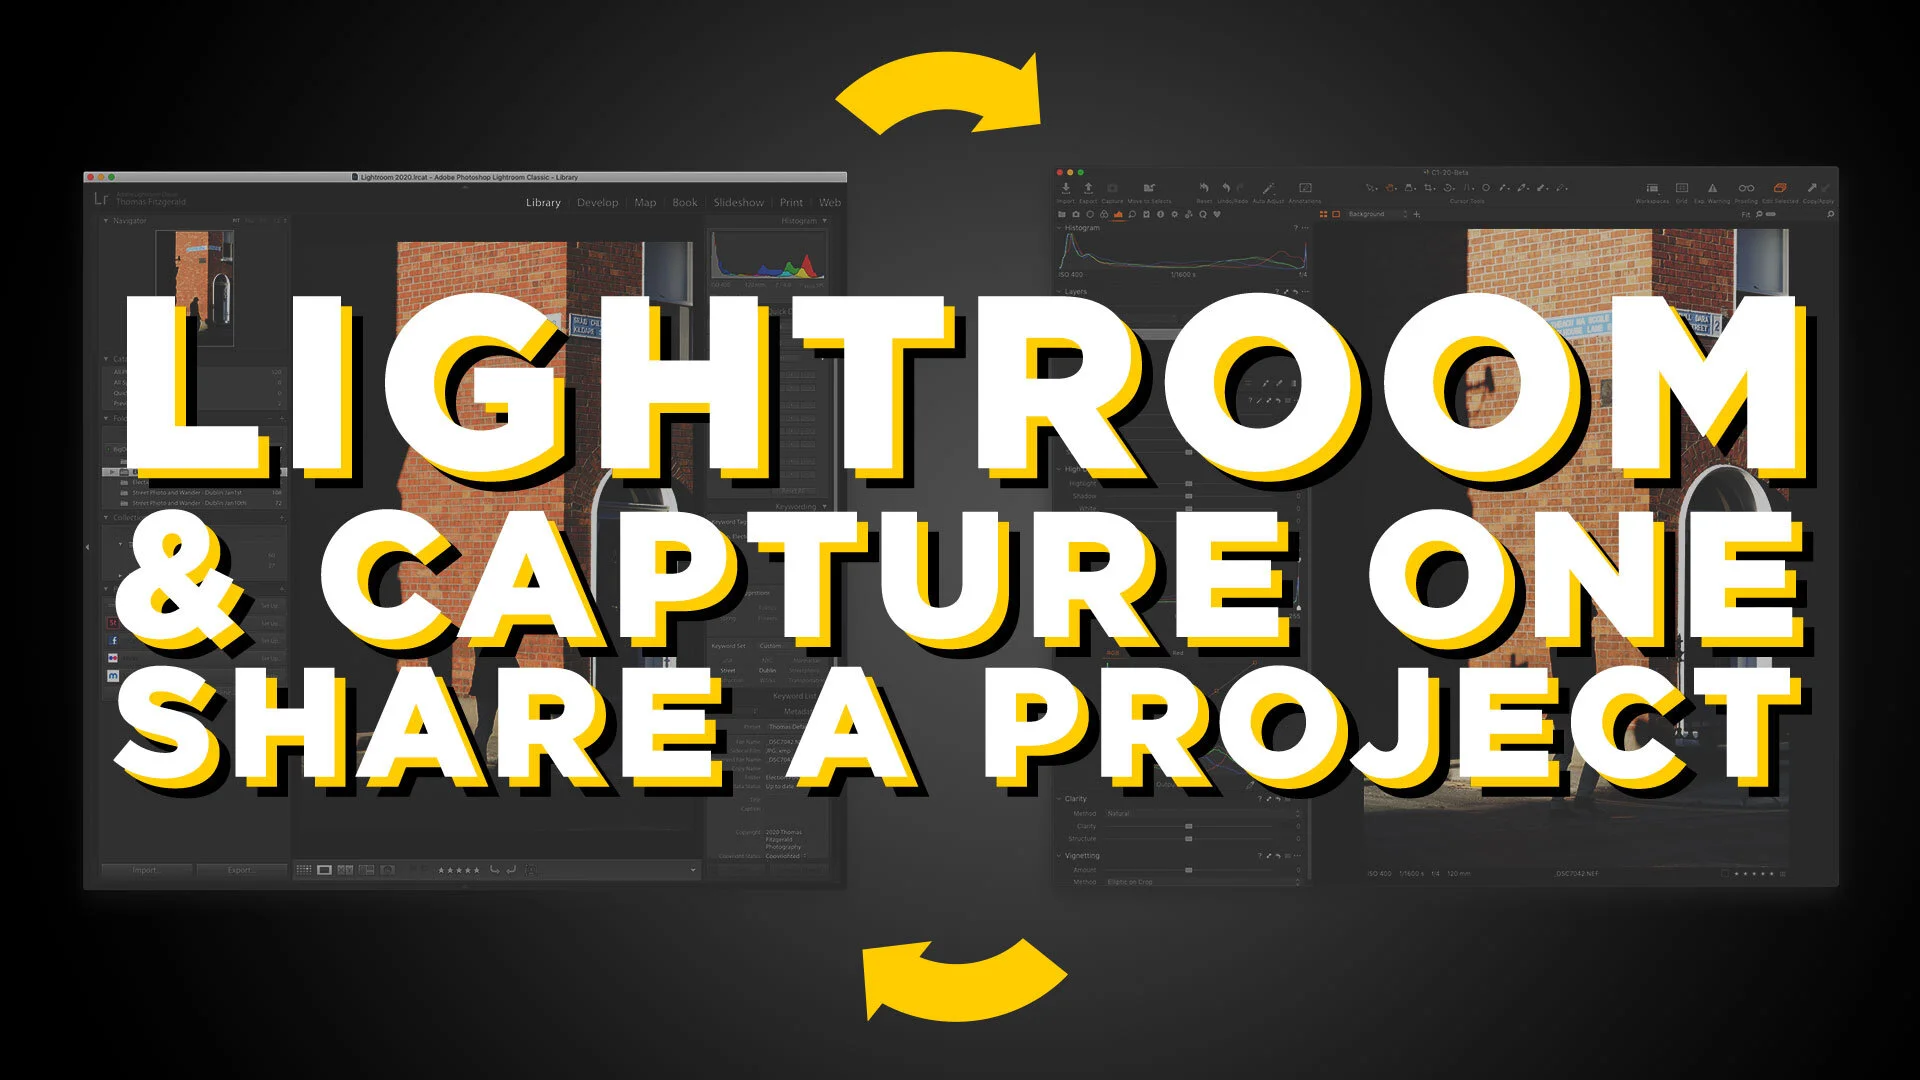
One of my Patreons (is that a word?) wanted to know if there was a workflow to rate and sort your photos in Lightroom and do your editing in Capture One. So I made a video to show you my workflow for doing this.
One of the things I hate doing, and I’m terrible at, is keywording my photos. So when I read about this new plug-in that uses AI to automatically tag your images I thought it was definitely something worth giving a look.
A little while ago I wrote a post about my frustration with the amount of memory Lightroom was using, and how I suspected that it was a memory leak bug of some kind. After a lot of trying different things, I seem to have found a potential solution.
Yesterday, Adobe released a new set of updates across the Lightroom family, and of particular interest is the new version of Lightroom mobile. This release brings one of the most requested features to the software, and finally allows you to directly import images from a memory card into Lightroom without any workarounds. They also added new controls for exporting your images and improved shared albums.
Ever since upgrading to Lightroom Classic 9, and even with the previous version, it seems as if Lightroom has been a real memory hog. The pattern suggests a memory leak bug, as it seems to get worse the longer Lightroom is running, even if you’re not actually doing anything. Either way, this memory usage problem is making running Lightroom a real pain for me at the moment.
While photo workflow applications like Lightroom or Capture One have been around for a while now, there are still some new users who are confused by how these applications work. One of the most common questions I see from beginners or people not familiar with this way of working is “how do I save in Lightroom?”, as there is no save function in the menu. To answer that and other questions, let’s take a look at how this class of “photo workflow” applications actually work.
One of the most frustrating things about working with Lightroom on an iPad is having to import images to the camera roll first before then importing them to Lightroom. Luckily, thanks to changes in iOS 13 this should soon be at an end. Adobe published a video showing an upcoming change to Lightroom on iPad which will allow direct importing of photos.
When Adobe first introduced the syncing feature in Lightroom, which let you sync to its cloud services, it only synced smart previews, and at the time this wasn’t a big deal, as there was limits to what you could do on the mobile applications. Now, many versions later and Lightroom has become a whole eco system, and the mobile versions are much more powerful. We now also have the desktop version of the mobile applications, so it is odd that Lightroom Classic is still stuck syncing only smart previews. But what if you want full res versions that you can edit on another device but still synced to your classic library? Well, there is a workaround.