Processing Fujifilm x-trans raw files in Aperture
This it the latest instalment in my ongoing series looking at how various raw converters handle raw files shot on one of Fuji’s cameras with an X-Trans sensor. In the past I’ve written a good bit about using Iridient Developer and Lightroom for Processing, but a reader asked if there was a workflow for getting good results with just Aperture. I’ve been working on it over the last few weeks, and here’s the results of my experimentation.
Overall, Aperture does a good job with X-Trans files in my opinion. I don’t think it’s quite as good as Iridient Developer, which of all the raw converters that I’ve tried, still gives the most natural and clean looking files. (I’m still testing Photo Ninja by the way). Aperture is a close second, or third mind you. I’ve spent the last few weeks playing around with settings to see just how close I can get it, and while I still can’t match the clean and sharp output of Iridient Developer, I can get it pretty near.
Problems and Solutions
There are a few issues with Apple’s raw decode in my opinion. Fortunately you can overcome most of these inside of Aperture with a few adjustments. Most of these issues relate to sharpening in one way or another. There is a degree of artifacting present in images due to the decoding method and x-trans’s unique sensor layout. This can lead to what I can only describe as colour speckles on areas of fine detail. I think this is caused by a combination of fine aliasing and moire due to the lack of an anti-aliasing filter, coupled with the way the Apple raw engine uses a relatively weak method of pre-processing the files. The problems are generally not too bad, and they only occur in certain images, but when you start to add sharpening into the mix you can exacerbate the issue. However there are ways to minimise it.
The other problem is what looks like a fine scattering of pixels along edges. You can only really see this zoomed in at 1:1 and it doesn’t really affect the image, but it’s an artifact that’s not present in Iridient Developer, or even the supplied Silky Pix based Raw converter. Again, the settings we use here will minimise the issue, although it’s not something that you should be too worried about unless you’re cropping or blowing up an image.
Sharpening
The main issue is getting your sharpening just right. You want the right amount of sharpening to give a nice crisp image, but you also don’t want too much or you’ll start emphasising some of the artifacts of the demosaicing process. The default settings actually aren’t bad in Aperture, but in my opinion they can be improved upon.
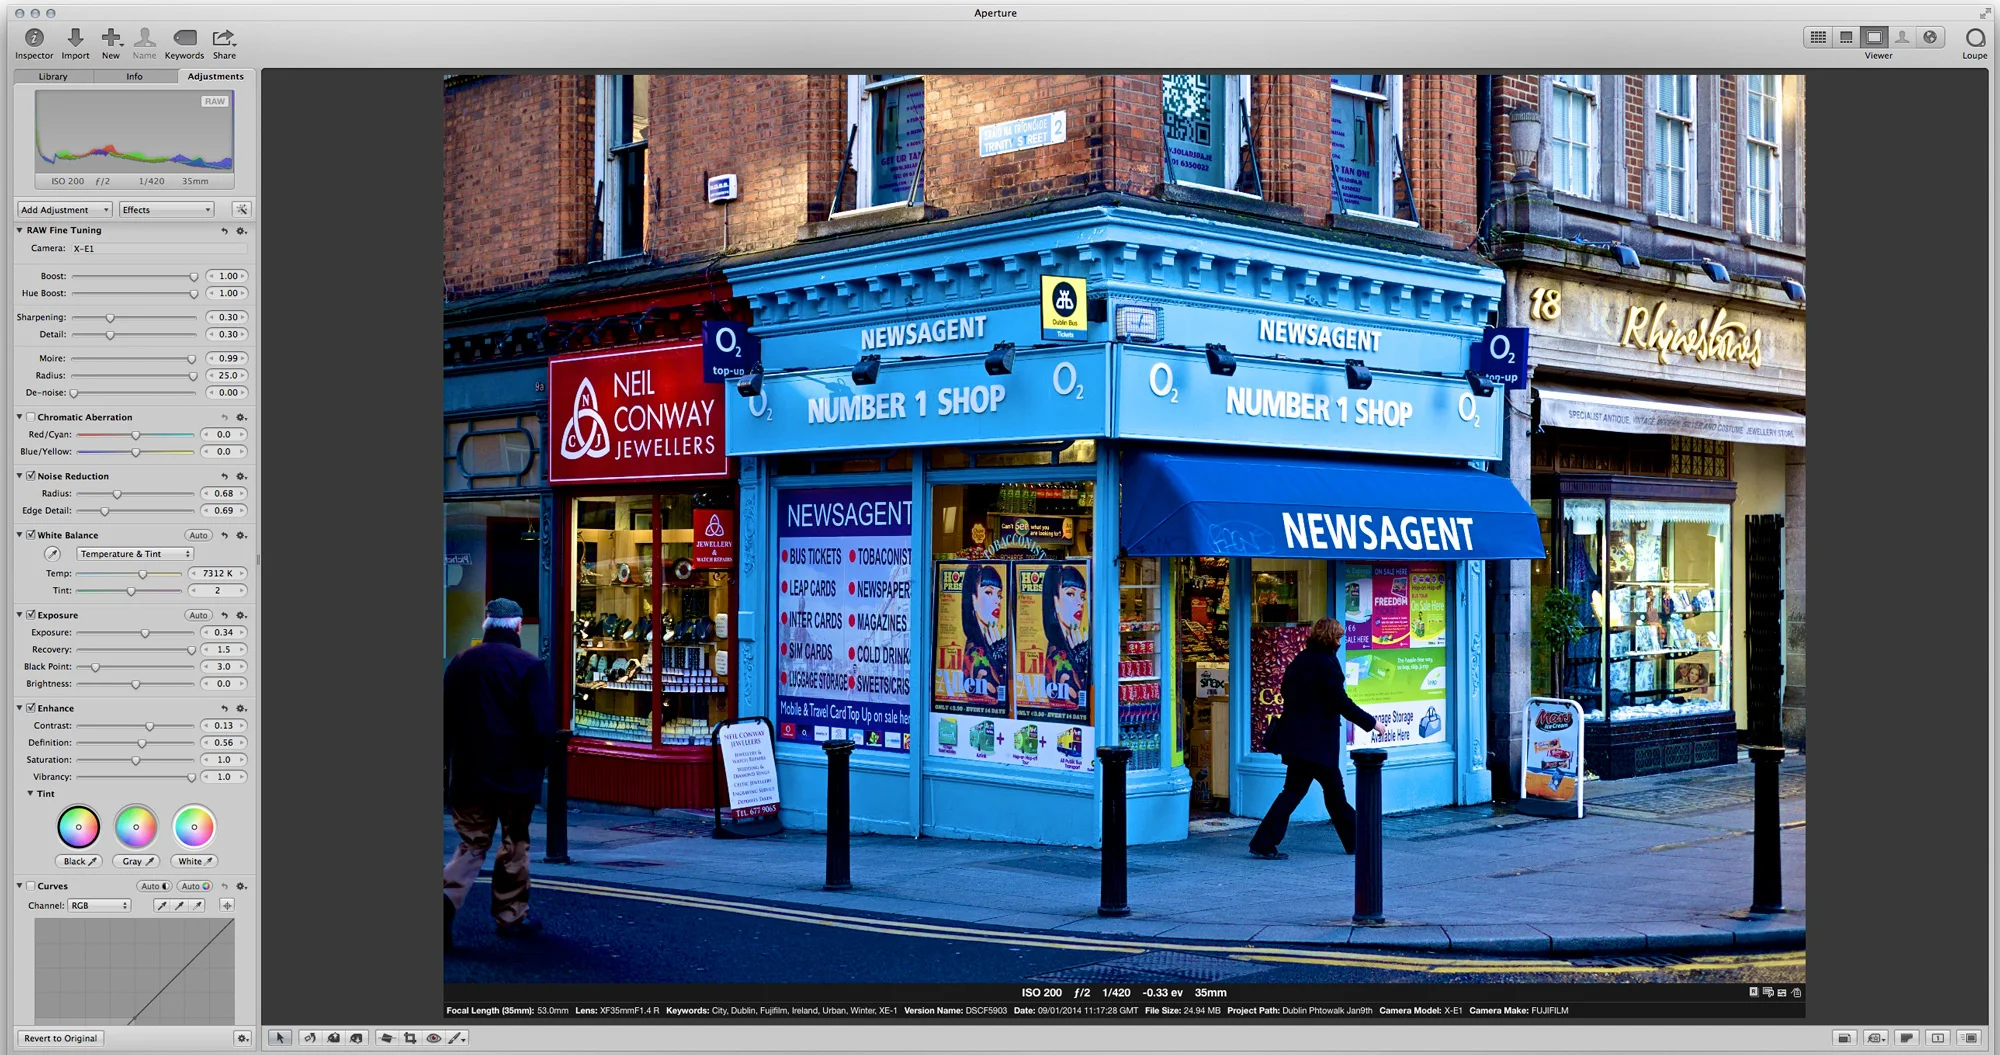
I sometimes find that the sharpening in Apple’s raw fine tuning, which is added at the demosaicing stage can be a little harsh and I find that it also can make any aliasing or moire in the image worse, so I often turn this down when working with x-trans files. If you don’t already have the Raw fine tuning brick added by default, you can enable it by adding it from the Add Adjustment pop up in the adjustments tab of the Inspector. I usually set it to about a quarter of the slider, and if I’m getting problems in the image, I bring it down further, or turn it off altogether.
The next thing to do is add some edge sharpening. In fact I add two edge sharpen adjustments to my image. One to add a wide low intensity sharpen, and a second for a tighter finer pass. I’ve discussed this in the past on The Aperture Blog, and I’ve made a preset that adds both of these with one click. I’ve included a link to this again at the bottom of this post. I find this combination works particularly well with X-Trans images, but it can bring out the underlying artifacts of Apples raw decode. To address this you can do a couple of things. Turning down the raw fine tuning sharpness as mentioned earlier often helps.
The second thing to do is add a small amount of noise reduction. I find that this reduces the colour speckles to a point where they’re not really an issue any more. I’ve included this small amount of noise reduction in the sharpening preset.
Before Noise Reduction
After Noise Reduction
Setting up an Import Preset
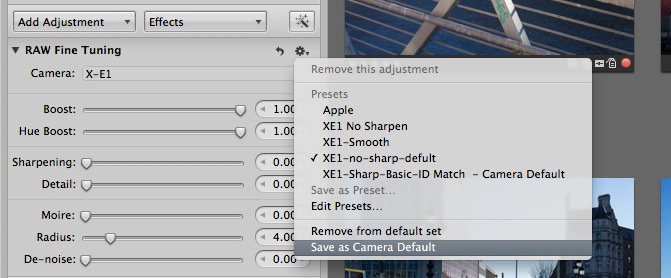
The settings outlined above are what I use for pretty much every X-Trans image, so I have set these up as the defaults. To do this you need to make two changes. The first thing to do is to set your new raw fine tuning settings as the camera default. You need to do this separately from the sharpening preset, as the the raw fine tuning settings aren’t included when you save an adjustment preset (or “effect” to use the newer terminology). To save your adjusted raw fine tuning settings go to the cog pop-up menu in the raw fine tuning brick and choose “Save as camera default”. This will bring up a new dialog and ask you to name your new preset. Once you do this, these settings will be used from now on for every image you import that is taken with the same camera.
To apply the sharpening settings by default, you simply set it as an effect when importing. This is under the “Effect Preset” section of the import dialog box. If you don’t see this on your import dialog, then you may need to enable it. You can do so by ticking it on from the “Import Settings” dialog in the top right hand corner of the Import window.
Final Steps
This should be fine for most images. However you may still encounter a few images that still have excessive artifacting. Another problem that you might encounter is some excessive colour fringing. This can be an issue when shooting wide open with the 35mm lens for example. If you have Photoshop CC there’s an easy fix for this, and that is to send the file to Photoshop and then use the camera raw filter as a filter on the layer. This way, you keep the better Apple demosaicing but you can still use the tools in camera raw to clean up any problems that might be in the image.
I find that adding a tiny bit of colour noise reduction in the camera raw filter in Photoshop can go a long way to cleaning up any remaining speckles and other issues in the image if they’re a problem.I posted a video recently demonstrating this technique.
Conclusion
I think that Aperture works reasonably well for processing X-Trans images, and certainly gives a better detail than the unfortunate state of Adobe’s X-Trans demosaicing algorithms. It’s not perfect though, but if you have Aperture and want to get the best from your Fuji X-Series camera then hopefully these tips will help you.
In my testing of various raw converters, Iridient Developer still gives the best, most natural results for my tastes. Capture one is a close second, but it’s expensive, and Silky Pix (or Raw Converter Prop) also gives good results, but it has difficulty in recovering highlights, and also it leaves weird scaling artifacts thanks to it’s inbuilt and mandatory lens distortion correction. Aperture is not to far from these in terms of quality if you tweak the defaults a bit, and I hope the advice here is of some help to you. The advantage that Aperture has over some of the smaller software offerings is that’s it’s a relatively self contained workflow, and you can use it as a complete end to end solution as it includes more processing options as well as a powerful database and library system.
At the end of the day though, a lot of this is subjective, and you have to go with what works for you in terms of your own tastes. You also have to evaluate the tradeoff between getting better image quality with the hassle of using a different piece of software, and the increased storage requirements of having to render out a lot of tiff files.
I still have another few articles to come in this series. I’m working on a way to get the best results with just Lightroom and Photoshop, and I’m also working on my full review of Photo Ninja.

Thomas currently writes a blog dedicated to Aperture, called “The Aperture Blog”;. He has also written a book on Aperture called “Mastering Aperture” from Packt Publishing. It’s available now from Amazon, Direct from Packt, or other good retailers.


