Sharpening and Finishing Fuji X-Trans Files in Photoshop and Lightroom

This is the long awaited final (for now) part of my series on Processing X-Trans files. In my ongoing quest to get the best from Fuji’s raw files, I’ve previously discussed the issue with Lightroom’s processing, some alternative ways of developing raw files using Iridient Developer and Photo Ninja. I’ve also offered some Lightroom sharpening presets that help mitigate the demosaicing issues a bit.
Many of the comments I’ve received have been wondering if there’s a way to get close to the output of Iridient Developer or Photo Ninja using a combination of Lightroom and Photoshop. Surprisingly, the answer is almost. I’ve been working on this for a while now and I believe that by combining Lightroom and a little bit of Photoshop you can get close. The advantage of this is that you can get clean and natural looking results without having to learn a new piece of software, and by using the droplet as a plug-in approach I blogged about last week, you don’t even have to leave Lightroom.
Before I get into the solution, just as a recap, let me go back over what I believe the problem is. Here’s a snippet from my original post on the issue:
Despite an earlier fix which addressed the demosaicing of X-Trans files, Lightroom still has problems with fine textural detail. It’s especially noticeable in areas of trees or other foliage, or other repetitive textures. The problem is that Lightroom seems to generates false detail around high contrast edges. It looks like an additional line around objects, almost like an embossing or an outlining effect. When this occurs repetitively on fine textures, you end up with mushy detail. It seems to be exacerbated by Lightroom’s sharpening algorithms, and that’s why I spent quite a bit of time trying to come up with those sharpening settings to try and mitigate the problem. However, no matter what you do, you may be able to reduce how noticeable it is, but you can’t get rid of the false detail that Lightroom is creating. Iridient Developer on the other hand (and some other third party developers) doesn’t have this issue. Here’s what I hope is clear example of this false detail effect that I’m talking about:

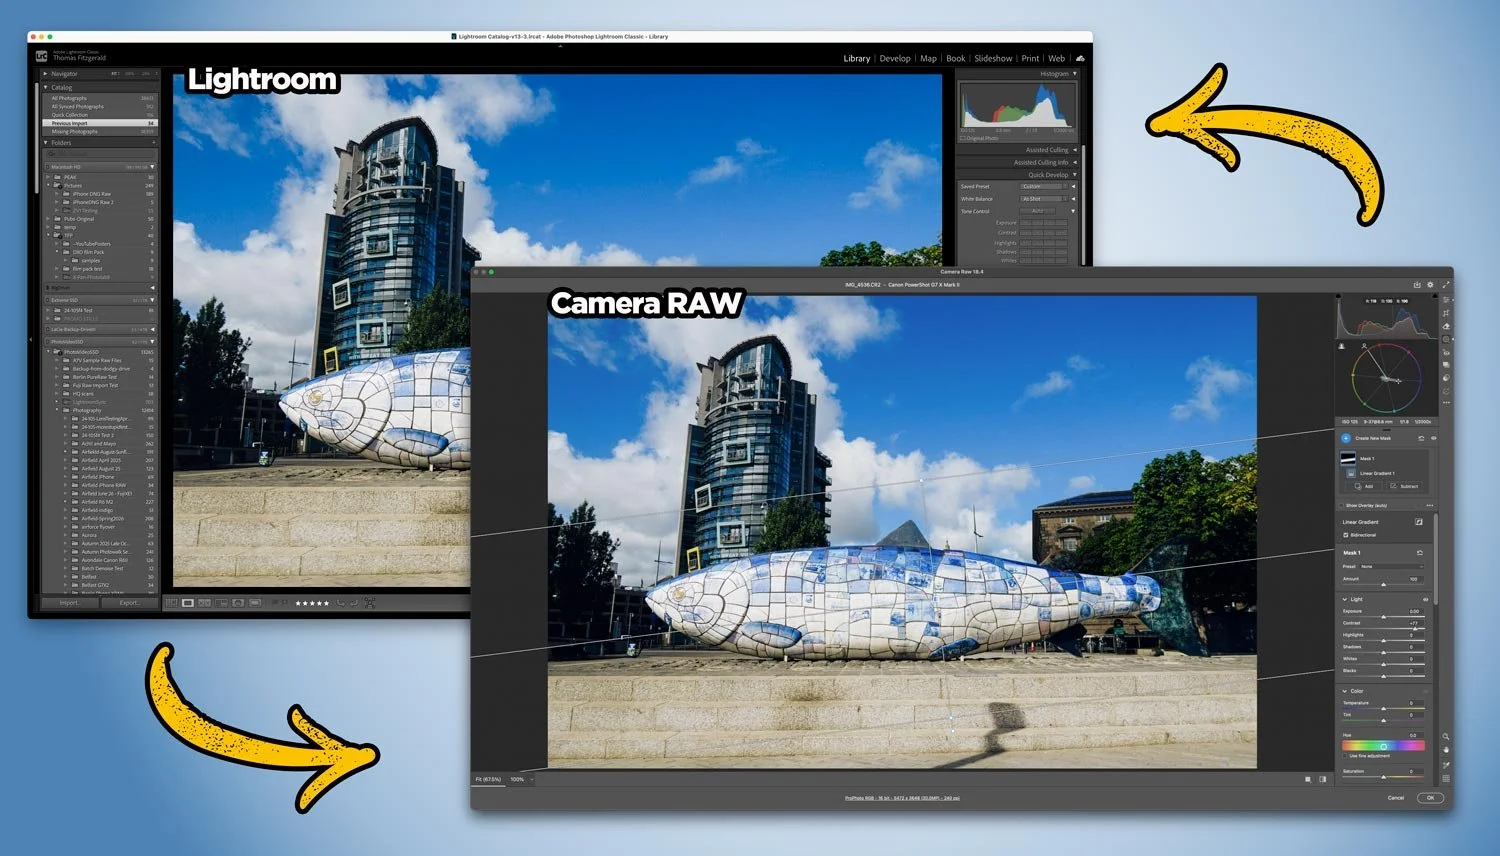
you need to click on the image to view large to see what I’m talking about. The image on the right is Lightroom’s conversion and the one on the left is from Iridient Developer.
Here’s a crop up of the vent area. The first is Lightroom.

Lightroom
You can see the outlining effectI’m talking about around the edges of the vents on the refrigeration unit. Here’s the same section from Iridient Developer. In this case it’s a perfectly natural looking and there’s no sign of the false detail that Lightroom is generating.
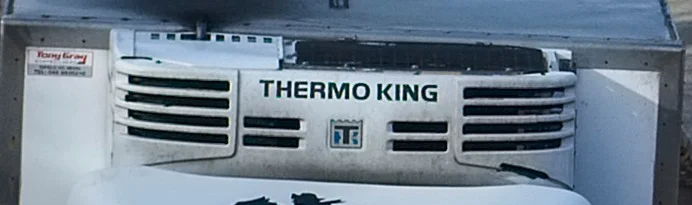
Iridient Developer
It’s hard to convey this with a small crop on a website, but when you’re looking at your image on a large monitor like I am, it’s pretty obvious. Some people will inevitably argue that you can only see this while pixel peeping, but I don’t think that this strictly true. You may only see what is causing the problem when zoomed to 1:1 but all these artefacts add up, and even if you can’ make out exactly what it is, when I view these files on my 27” monitor, zoomed out (not at 1:1) I can still see that something isn’t quite right with the Lightroom version. Of course, you don’t have to take my word for it, and if you’re perfectly happy with your Lightroom conversions, then that’s great. On the other hand, if you have an issue with your X-Trans files and Lightroom, you don’t need me pointing it out because it’s probably already frustrating you.
Since I wrote that originally, I’ve discovered something interesting. The problem doesn’t seem to be entirely down to the demosaicing algorithm. The problem seems to be Lightroom’s sharpening, or more specifically the interaction of the two. If you turn the sharpening off entirely in Lightroom, the images from X-Trans files are very soft. Much softer than they are when you turn the sharpening off in other software. I can only assume Adobe is using an aggressive demosaicing algorithm to avoid aliasing and moire issues caused by the x-trans sensor’s lack of anti-aliasing filter, and to compensate the sharpening is having to work overtime, leading to sharpening artefacts. (I could be completely wrong mind you, but this is my best guess)
Of course the look of images can be a subjective matter, and some people have very strong feelings on the issue, so if you’re of the opinion that the files are perfect as they are, that’s great and you don’t need to do anything else. I absolutely respect that opinion, so you don’t need to read any further!
So what is the solution then? Well, I’ve come up with two approaches.
Solution 1 - Clean up the edges in Photoshop
The first solution is to sharpen the image in Lightroom to a reasonable amount and then once you’ve finished, send the image to Photoshop and clean up the edges. Doing this involves the use of find edges to make a mask, and then a combination of blurring and sharpening. Luckily, I’ve done all the hard work for you and I have a set of Photoshop actions that you can download at the end of this post. For this method, the Action in my set (called “Thomas Set” - hey, keeping it simple!) that you want to use is called “Fuji Quick Fix”. What this will do is clean up the edges and then sharpen the image using my somewhat unorthodox sharpening method.
You can turn this into a Lightroom Plug-in by saving the action as a droplet, and then setting up an external editor preset in Lightroom. I’ve posted instructions on how to do this here. Before you send it to Photoshop or run the action, you should set up sharpening in Lightroom first. I suggest using one of the sharpening presets I’ve provided before, as I’ve designed the action based on using these first.
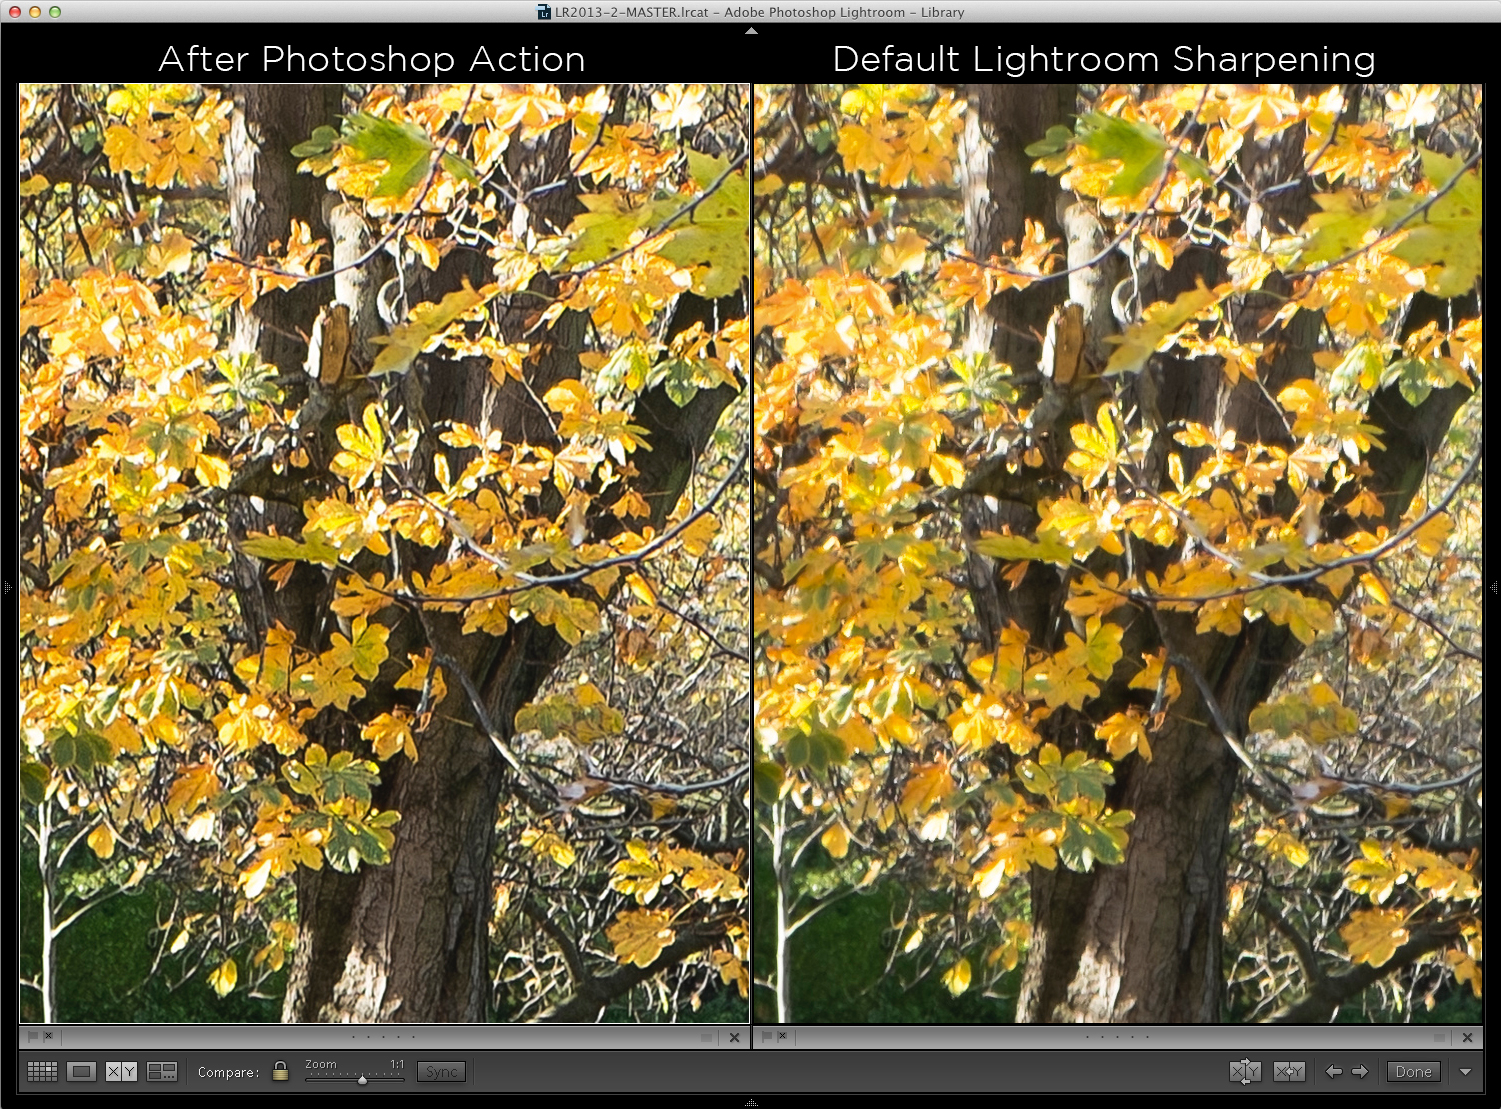
The way I’ve designed this is to give a more organic look and take the weird painterly like patterning out of the image. It may technically be slightly softer on a pure edge level, but I think it’s more film like and natural looking. Of course, this is all very subjective so you may not agree, but anyway, I’m providing all the bits you need to try this, so if you don’t like it, then don’t use it. Here’s an example of standard Lightroom sharpening, and cleaned up using this method. These are 1:1 crops, but you’ll need to click on the image to see it big so you can actually see it at 1:1
So, just a quick re-cap of the workflow to use when trying this method.
- Process the image as normal in Lightroom
- Sharpen it to a satisfactory amount (I suggest using one of my X-Trans sharpening presets)
- Run the photoshop action “Fuji Quick Fix” on the image, either by sending it to Photoshop or by creating a droplet based Lightroom Plug in. This should be the last step.
About my unorthodox sharpening method
I came up with an unusual method of sharpening an image in Photoshop that I think does so in a relatively natural and less processed looking way. Basically, what I do is up-res the image slightly, then smooth and sharpen the edges. I then do a little overall high pass sharpening before scaling it back to the original resolution. This may seem a bit crazy but by up-resing first you have more data to work with when sharpening and smoothing, and then when you down-res it again, your’e smoothing tit back out. Again, it’s a matter of taste, but I think it works. In the Photoshop Action set I’ve included below, there are additional sharpening Actions that use this method, including one for 12mp images and one for 24mp images. Feel free to try them and use them if you want.
Solution 2: Turn off Sharpening in Lightroom, Sharpen in Photoshop
The second method involves turning off the Sharpening in Lightroom altogether and sharpening the Image entirely in Photoshop. This gives similar results to the first method, but it varies from image to image as to which works better. The advantage of this method is that it can actually take a bit more sharpening after the fact, but the disadvantage is that you must set your sharpening to zero in Lightroom first. Oh, and if you have any grain on the image, you need to turn that off too. I recommend creating a Lightroom preset for setting sharpening and grain to zero.
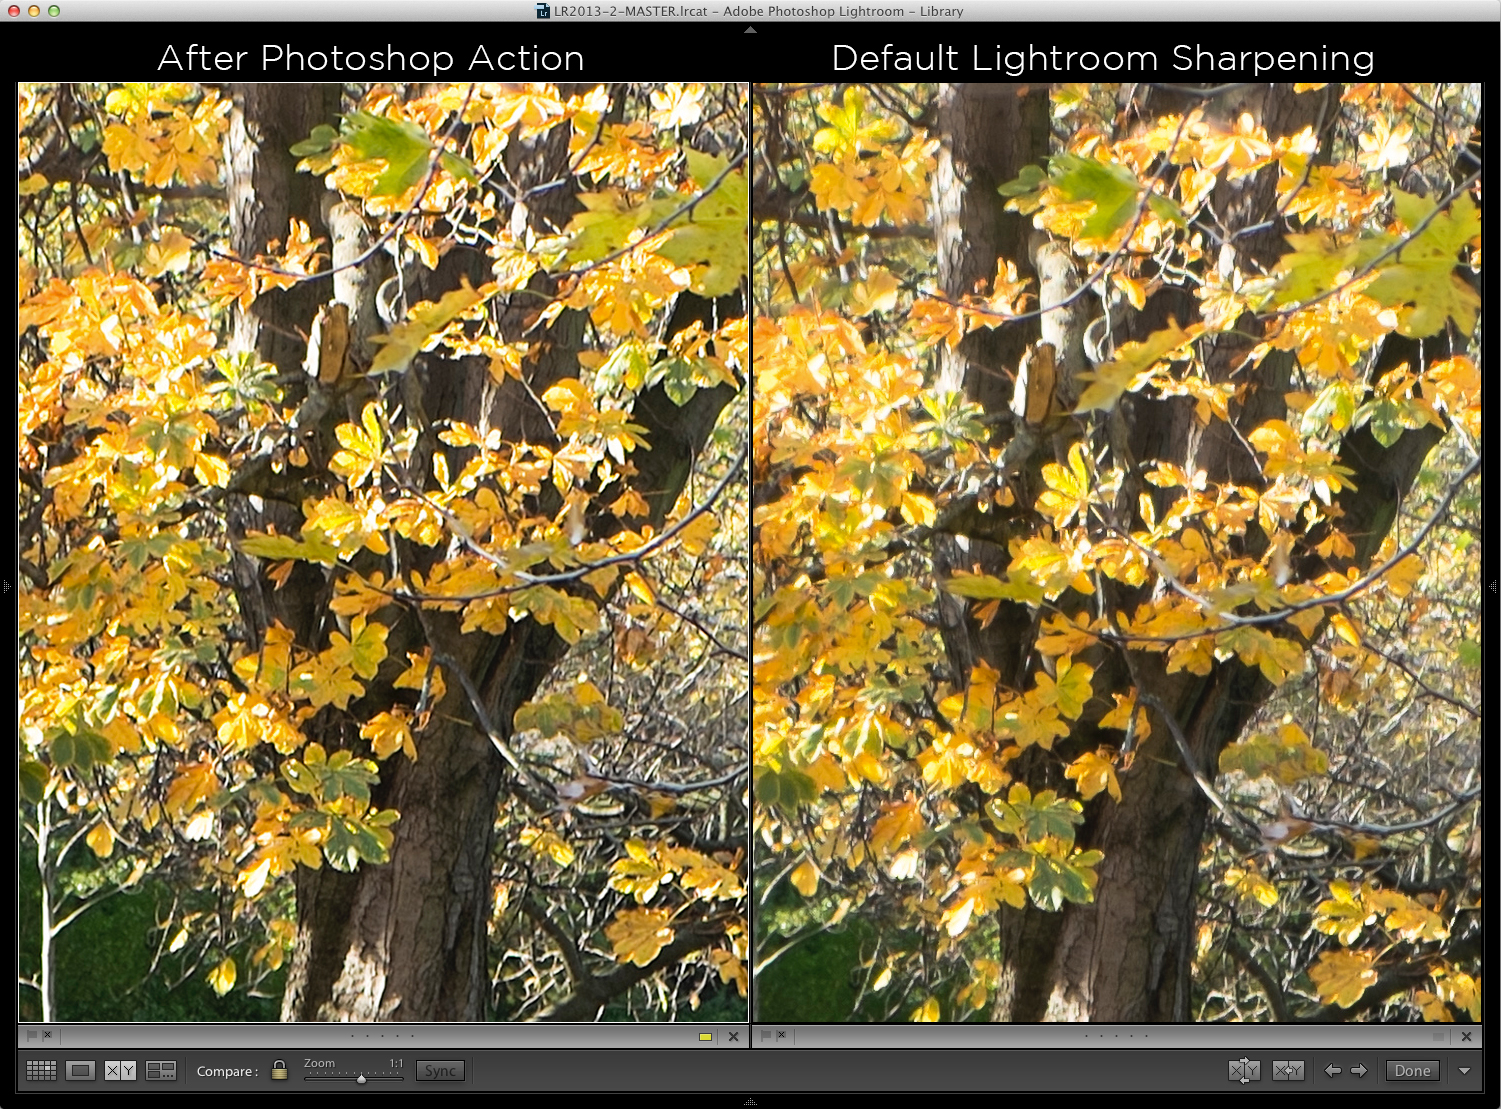
Again, I’ve created an action for this and it’s included in the set. The one to use is called “Fuji Sharpen from Zero” and it does what it says on the tin. Again I would recommend creating a Photoshop droplet and setting it up as a Lightroom plug-in to make this a seamless(ish) task. Here’s the same image as before sharpened using this method. You can actually add some additional sharpening back in Lightroom if you want it even sharper, but I would recommend being careful with this and only adding a tiny amount if you do.
So, to recap the workflow for this method:
- Process and adjust your image as normal in Lightroom
- Turn sharpening and Grain off
- Run the Photoshop action “Fuji Sharpen from Zero” (either from Photoshop or as a droplet based plug-in)
- Add any grain back and add any additional sharpening if necessary
Some Notes
Just a few things to note about the way these actions work:
Firstly, My unorthodox sharpening method which involves scaling up and back down again, is based on the normal resolution of Fuji's 16mp files. This is what I use to scale it back to. The down-side of this is that if you have cropped the image before hand, the final result may be slightly up-ressed still.
Secondly, when viewing images in Lightroom to accurately judge sharpening you need to view at 1:1 (100%) 1:2 (50%) or 1:4(25%) because when set to fit to fill Lightroom is interpolating the images using it's own algorithms and they excessively (in my opinion) soften the image. I know there's the whole anti-pixel peeping movement, but you can't accurately judge the technical quality of the image at intermediate resolutions.
Thirdly, you still need to apply some output sharpening if scaling the images to different resolutions when outputting. I usually set my out presets to use low output sharpening.
If you're confused about all this sharpening malarky Matt Kloskowski has a descent course on sharpening over on Kelby One.
Download the Actions
I’m providing the actions as a courtesy, and I don’t offer any technical support. (although let me know if there’s a problem) You use these at your own risk. Also please don’t re-distribute these. I’ve put a lot of work into them, and if you want to share them, please point back to this page or this website.
These were made using Photoshop CC on a mac. I have not tested them on any other version of Photoshop or on a PC, so they may not work (although they should work on a PC ok)
I’m not sharing the Droplets because they are executables, and there’s lots of issues involved in doing this, but it’s really easy to create and set them up yourself, so if you want to do this, I have detailed instructions in this post.
Ok, now that I’ve gotten all the disclaimers out of the way, finally, here’s the download for the Actions.
Summary
I hope this series on X-Trans processing has been useful. I’ll provide a summary page and direct links to all the articles at a future date. (for now you can see them all on this category page) I’m also considering putting all these parts into an e-book to serve as a kind of manual for getting the best out of X-Trans files, so if you would like to see that let me know. I’m still hopeful that Adobe will improve the demosaicing/sharpening issue in the future, so hopefully at some point all of this will be un-necessary. Thanks again for all the support and kind comment’s from everyone who has contributed throughout the series.
[UPDATE] Added some notes regarding this method and sharpening in general.
[UPDATE 2] I have new versions of these Actions now available. See the new post for details and download links to the updated versions.
PLEASE READ COMMENT POLICY BEFORE COMMENTING
Please Help Support the Blog
I am a fine art Photographer and do not shoot commercial projects. I do my best to keep this site regularly updated with lots of tips, reviews, news and photography advice, all for free. If you like what you read here and want more, then sign up for our newsletter to get regular site updates and occasional special offers. You can also follow my photographic exploits on Facebook and Twitter
If you're a Lightroom user check out my original Lightroom Presets