
DxO PhotoLab 5 for Fuji shooters - how to get the best results
When DXO Photo Lab 5 was released a few weeks ago, it came as a pleasant surprise to many that they had finally decided to support Fuji cameras. Fujifilm support is currently in beta, but the software is capable of producing some really good results. However, to get the best quality, you need to jump through a few hoops first. In this article, I’ll talk you through how to get the best results and some of the options you need to consider.
DXO Modules
If you haven’t used Photo Lab before, the software uses “modules” to apply corrections for lens and camera combinations. When you first select an image for which you don’t already have a module, it will ask you to download it. Just click the download button to download and activate the module.
The modules provide both geometry and sharpness corrections for lenses. They have profiled many, many combinations of lenses and cameras, and created complex profiles for lens defects to correct for them. So, when you so see the pop-up dialog asking you to download the module, don’t be surprised (and click download!)
Film simulations and DXO Film Pack
Unfortunately, at least for now, you seem to need the extra application DXO film pack to get the full range of film simulation modes for Fuji cameras. Even at that, some of these are based on the corresponding analogue films rather than the digital modes in Fuji X-series cameras. The upside is that once installed, you can apply the film simulation modes to any camera, whether an actual Fujifilm camera or not, and the results are pretty good.
To get and activate Film pack, you can find a link to download a trial version in the DXO Lab 5 application menu on a Mac or the Help menu on a PC. If you have already bought the application, you can activate it here.
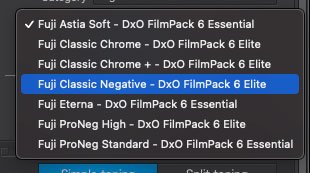
Once Film Pack is installed, you can now access the film simulation modes. To find these, go to the colour tab of the adjustments section and activate the panel for Colour Rendering. Under the pop-up for category, select “Digital Films”. This will give you the majority of the Fuji film simulation modes, such as Pro Neg, Classic Chrome etc. To get the slide film-based options, you need to choose “Colour Positive Film” as the category.
Deep Prime, Demosiacing and DNGs
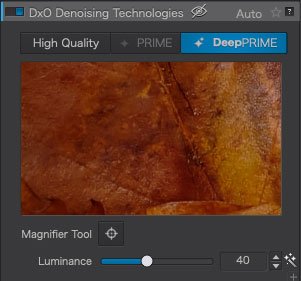
This is where things get complicated. DXO introduced a new AI-based demosiacing algorithm in the previous version of DXO Photo Lab. This applies artificial intelligence to de-noise an image at the demosiacing stage, and the results on regular raw files can be really impressive. For Fuji files, they tapped into the deep prime technology to provide a better result with Fuji’s x-trans sensor colour array. The upshot of this is that, in order to get the best results, you need to use Deep Prime.
So, what’s the catch?
Deep prime only renders when you export. If you had been playing around with the software and wondered why you didn’t see a difference between turning it on or off, this is why. You can get a preview in the preview window, but this is quite small. If you want to see what it’s actually going to look like on your whole image, you need to export first. It’s kind of like how the “Enhance” function works in Lightroom (previously called “Enhance Details”)
This gives you two options:
You can not worry about it, work on your image, do all the adjustments you want and then export at the end to a JPEG or Tiff with DeepPrime enabled.
Alternatively, you can export as a DNG in a way that bakes in DeepPrime and the optical and sharpening corrections, and then edit that.
The first option is more economical in terms of disk space and time, but some people like to have a clean and artefact free image as a starting point, and in that case, using a DNG solves the issue.
If you do want to go the DNG route, It’s quite straightforward to do, so here’s how to go about it:
- Make sure you have turned on Deep Prime in the Detail tab of the corrections interface. If you want to adjust the sharpness amount, you should do that now too. (More on sharpening in a minute)
- Don’t do any other edits, or they will be lost.
- Click on the export button at the bottom of the adjustments panel
- Select DNG from the options on the left.
- Under the “Format” heading, select the Action pop-up menu and select “Export as DNG (Denoise and optical corrections only)
- If you want the files to stay in the same folder as the original, leave this setting in the folder section.
- Click Export
- The new DNG should appear in the browser next to the RAW file. (If you are in a Project - you’ll need to go back to the folder view to see the DNG)
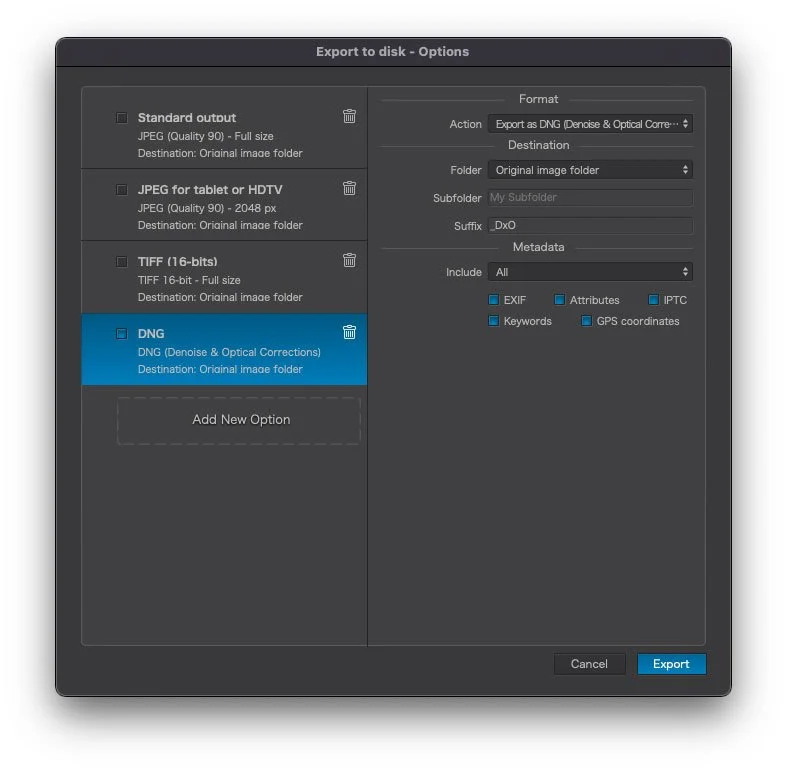
This DNG will now have the de-noise and demosiacing baked in, but you should still be able to fully edit it, including recovering highlights, changing the colour rendering and so on.
Personally, unless I’m doing testing or really want to see what it looks like first, I don’t bother with the DNG route, and just save the Deep Prime application for the final export. I make my adjustments on the image, then save it out as a Tiff or a Jpeg, and then double-check the details on that to make sure they’re OK.
But occasionally, I will create a DNG, especially if I plan to do a lot of editing and I need to know how much my editing will affect the overall quality of the image. In this case, it can be helpful to apply the conversion first.
The upshot is: there’s no right or wrong answer, and you need to do what works best for you.
Sharpening
Ah, sharpening my old friend, we meet again!
There are two types of sharpening in DXO Photo Lab. The module based “lens sharpening” and an additional unsharp mask. The lens based sharpening is turned on by default, and should be all you need in most situations. This uses the module profiles to apply sharpening based on how the lens performs across the frame. So for example, if a lens is softer in the edges, it will sharpen more at the edges and so on.
You can find the controls for this in the Detail tab, just below where you found the Deep Prime option.
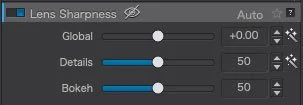
In fact, if anything, it might be a little too strong. Personally, I turn this down a little depending on the lens. For Fuji’s super sharp prime lenses, I think the default is a little high, so I set the Global lens sharpening to -1. For the softer zooms, I leave it as standard.
A few other notes
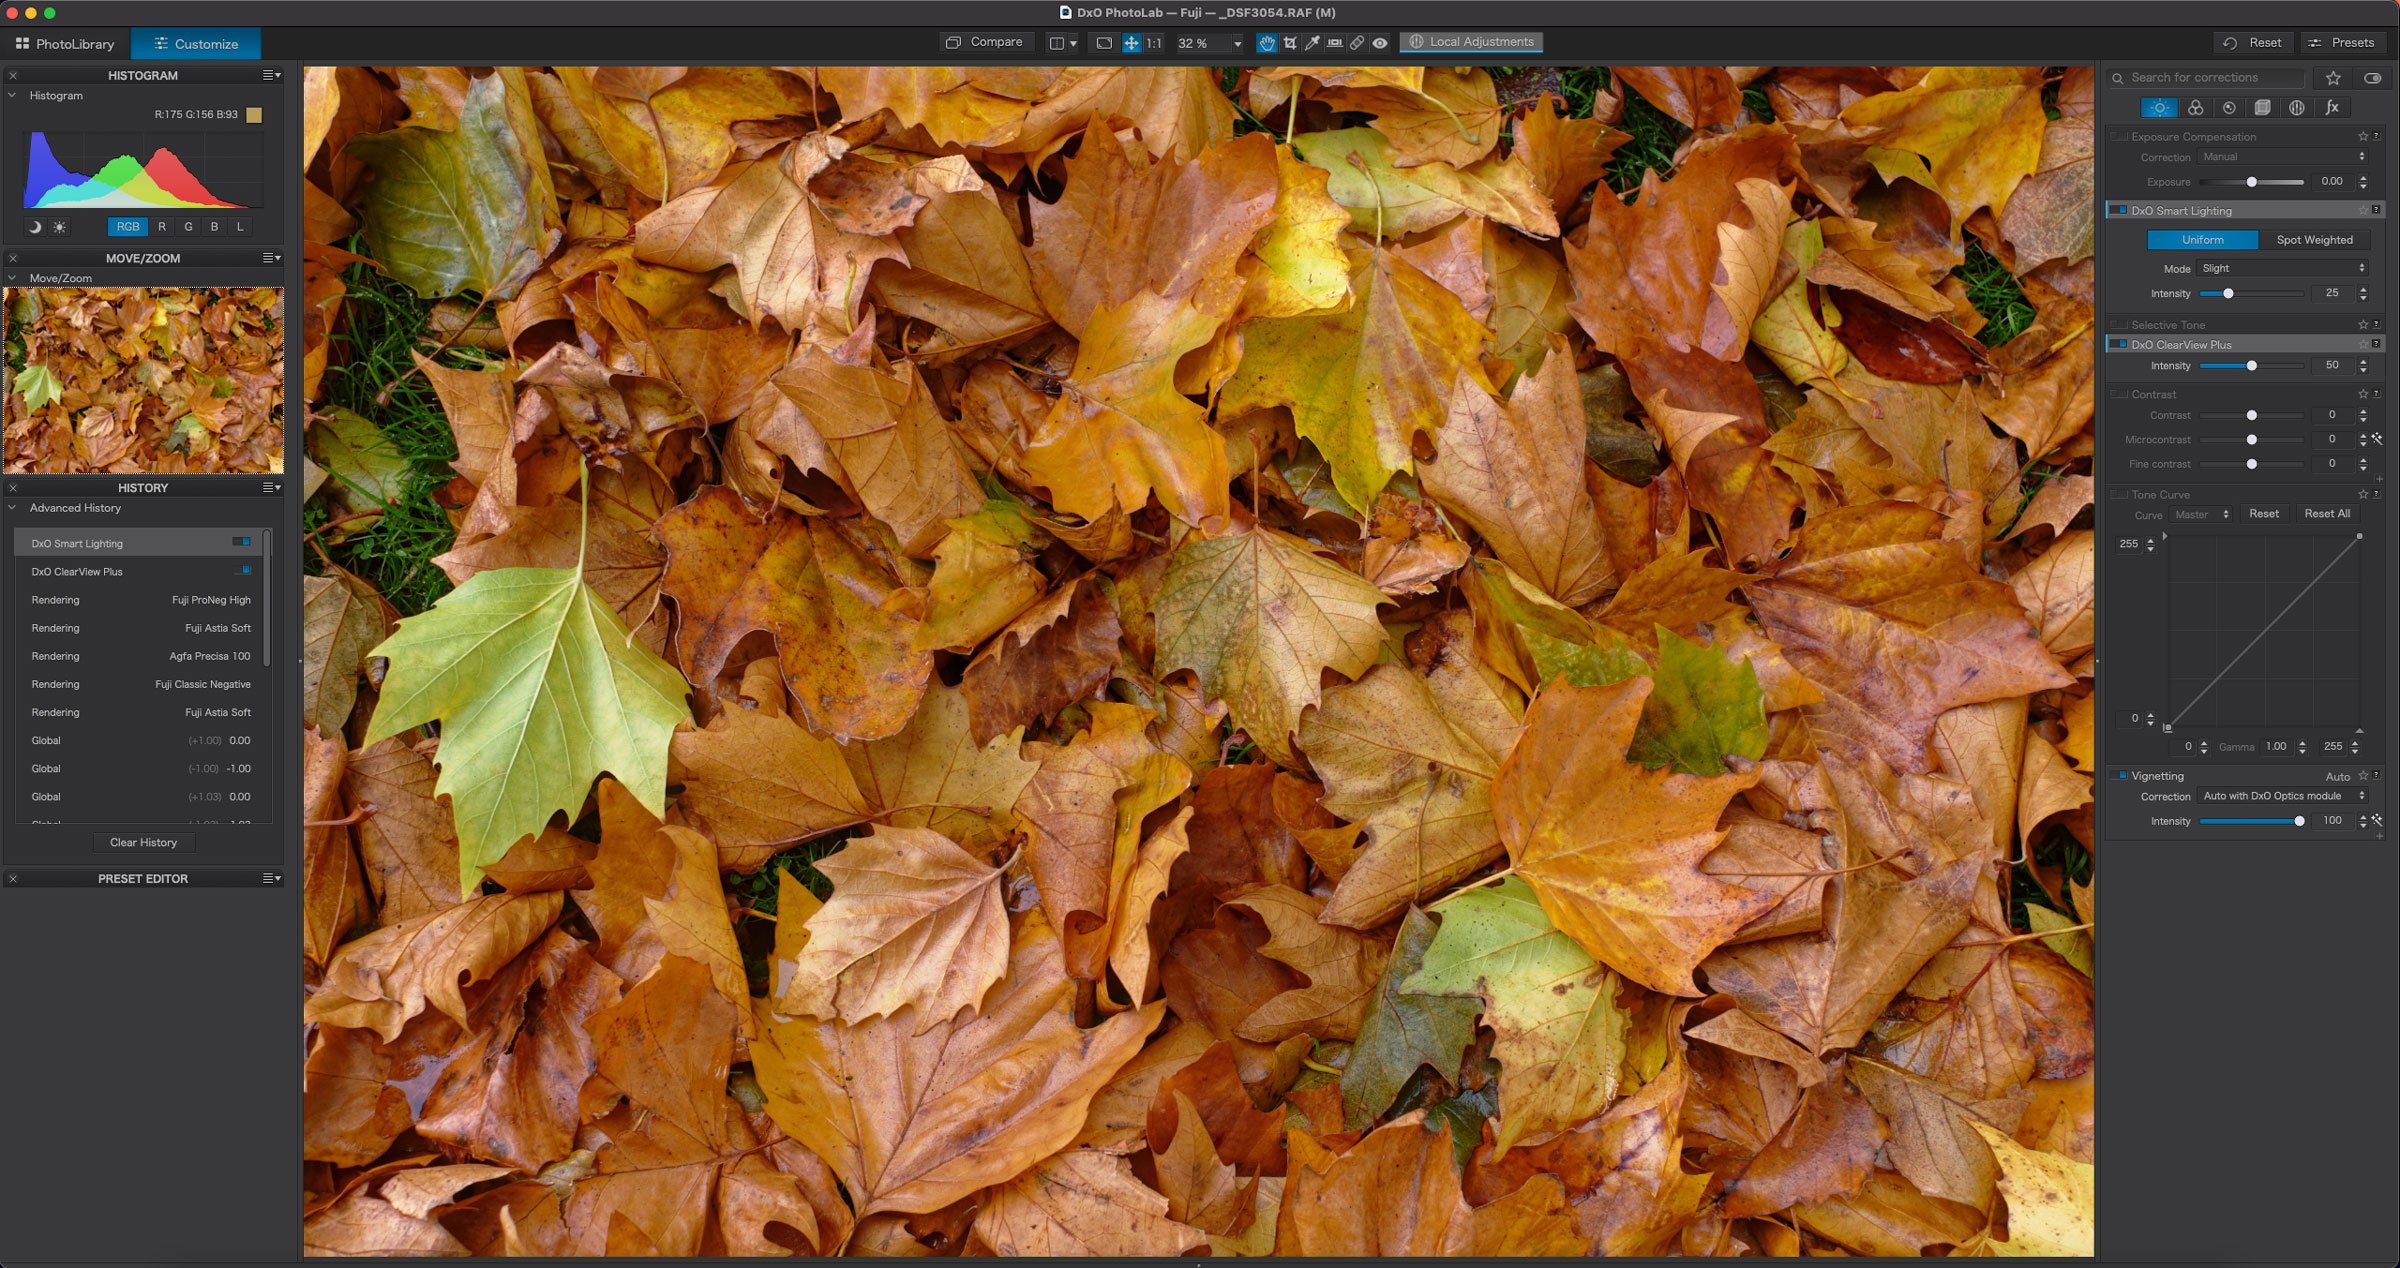
If you’re new to DXO Photo Lab, it can be a bit daunting at first with all the options, but it’s not too difficult to navigate once you get used to it. Two of the functions that I really like in the software is DXO Smart Lighting and DXO Clear View plus.
The first is like an auto-tool for the lighting n the image, and can quickly fix exposure issues without clipping or having to adjust highlights, shadows etc, and without having to make lots of tweaks. It doesn’t work all the time, but it can be a handy one click option to improve your image.
Clear View Plus is a really interesting tool. It’s like a combination of Dehaze and Clarity rolled into one, and can be useful as a kind of “make good” button. If you’re trying out the software, check out these options.
How does it compare to other solutions
I’ve had a lot of questions from people wondering how it compares to other solutions, such as Capture One or Lightroom. The truth is, it’s very close, and a lot of it comes down to subjective opinion, and choice of image and so on.
If I were to get into the nitty-gritty of it, then in terms of pure quality, Photo Lab with Deep Prime enabled, is probably is a tiny bit cleaner and more detailed than Capture One or Lightroom when using Enhance. But it’s very close. In my experience, when it’s this close, subjectivity comes into play, and it really is down to your preference. Some people might look at the same Image I am looking at and think it’s worse.
For that reason, I’m not going to get into a huge debate over the minutia of the details and post lots of comparison crops and so on. There is a free trial available, so the best way to determine if this is an option for you or not is to download it yourself and give it a try on your own images. Just follow the guidelines above to get the best results and then compare those to you, current workflow.
Regarding overall workflow, Capture One still has the edge, as it’s much more straightforward to use, doesn’t require pre-processing and so on. For this reason, even with a tiny edge in pure quality (which isn’t really visible in normal use) Capture One is still probably a better overall solution. However, there are some nice tools and options in DXO Photo Lab, and so it comes down to personal choice. If nothing else, it’s worth the time to try it out and see how it works for you.
Availability
DxO PhotoLab 5 (PC and Mac) is available now from the DxO online store
The DxO PhotoLab 5 license does not require a subscription and can be installed either on two workstations (DxO PhotoLab 5 ESSENTIAL Edition) or three workstations (DxO PhotoLab 5 ELITE Edition).
You can find out full details including localised an upgrade pricing by visiting the DXO website. There is also a 30 day trial version available.
If you buy through the above links, we get a small commission, which helps run this site.