
Two Quick Lightroom Tips
I’ve been busy processing a backlog of photos in Lightroom recently, and while working with the software, I noticed a couple of things that I do, of which people may not be aware. These are pretty small tips, and you may already be aware of both of these, but if not, I hope they will be helpful to your workflow in the future. So, without further ado…
Tip 1: Speed Captioning
The first tip is a wait to speed up captioning a large number of images. Captioning is one of the things I hate doing in Lightroom, for several reasons, not the least of which is the fact that the interface is pretty terrible. The tiny little data entry fields down the bottom corner of the interface are not conducive to writing captions, nor is the small font (and yes, I know you can make it bigger)
However, there is one sort of hidden feature that makes this process go a little quicker. Before I get to that, one of the things that I normally do is change the view preset to “Quick Describe” or “Large Caption”. This just hides most of the extraneous information that you don’t really need when captioning, although it doesn’t show all the fields.
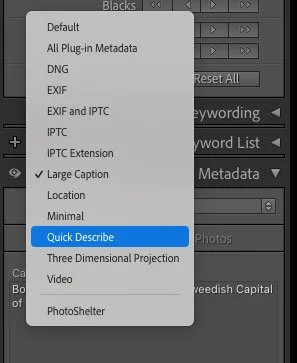
To change the view preset (not the actual metadata preset, which is a different thing) by clicking on the pop-up menu which is beside the word Metadata at the top of the metadata panel and selecting one of the options. Note that you can also toggle the view/edit button, which hides the non-editable fields when in edit mode.
OK, now for the actual tip.
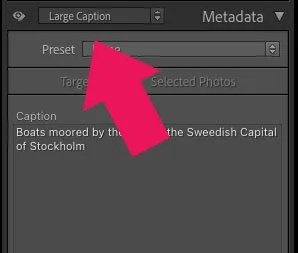
When you’re entering information into the Caption filed, if you hold down the command key and press the next or previous arrow (I assume this is the Control key on the PC) you will jump to the next or previous image, with the caption filed still selected. (This works for any field in the metadata panel)
This way, you can quickly go through numerous images and write captions for them without having to take your hands off the keyboard. You would be surprised at how much this speeds up workflow. Now, obviously if you are working on different fields in the single image this doesn’t work as well, although you can tab between them, but it gets messy. What I often do, for example, is go through a set of images and do the Title field, for example, and then go back and do the captions using his technique. I actually find it quicker than tabbing between fields in each image and then going to the next image.
Tip 2: Send an image to Photoshop without Returning
This might seem like an odd thing to want to do at first, but hear me out. Occasionally, you may want to send an image to Photoshop from Lightroom, but you don’t necessarily want to get that image back into Lightroom. Say, for example, you want to add borders to an image for posting to social media, or you want to prep an image to send to a client, but you don’t need that specific version stored in your Lightroom database.
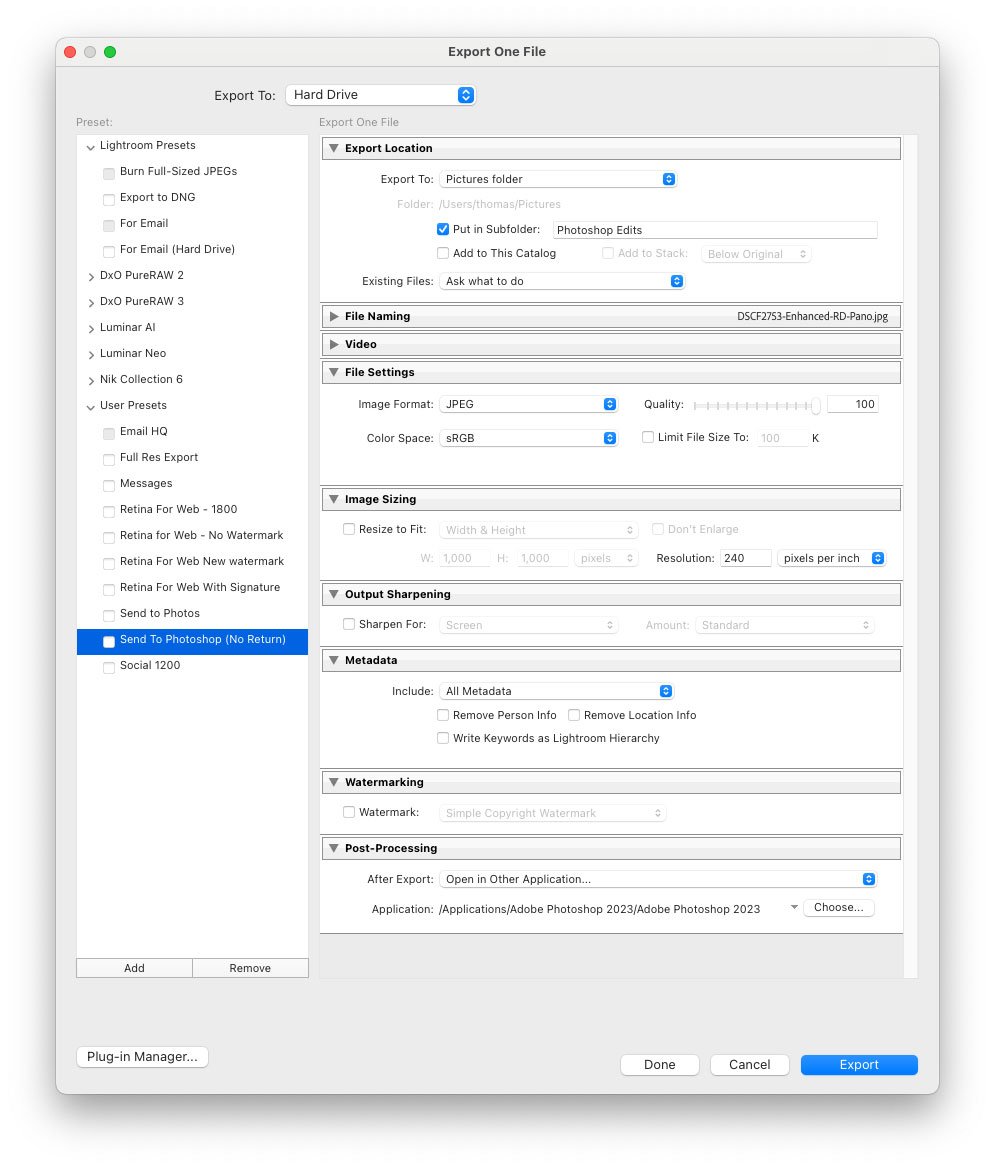
In this case, instead of using the “Edit with Photoshop” function, you want to export the image first and then load it into Photoshop. Luckily, it’s relatively trivial to set Lightroom up to do this in one command.
All you have to do is create an export preset, and using the option to open the resulting file in an application – choose Photoshop.
Here’s what to do:
Step 1: Select an image to work with
Step 2: Choose “Export” from the file menu Step 3: Under Export – Choose “Hard Drive”
Step 3: Set the various parameters for the export. You can set a specific folder or have it asked when you export. You can set a size or have it set to full size. The screenshot below is the settings I use on my preset.
Step 4: Under Post Processing, set “After Export” to “Open in Photoshop”. If you have multiple versions of Photoshop Installed, then pick “Other Application” and manually select the version of Photoshop you want to use.
Step 5: Save this as an Export preset using the “Add” button at the bottom of the Presets Panel on the left-hand side of the export window.
Once you save this as an export preset, you can call it at any time by choosing File > Export with Preset > The name of your Preset
Incidentally, you don’t have to use Photoshop for this either, it can be any Application, such as Affinity Photo.
You may be thinking, why not just use the normal “Edit With Photoshop” option and just not save it, or save it elsewhere – but this can leave extraneous PSD or Tiff files in your Lightroom library. This way, one you export, the file will no longer be linked to Lightroom.
Conclusion
So there you have it – two quick tips for Lightroom. You may have already known about these, or you may have no use for them right now, but hopefully this knowledge will be useful to you at some point. By the way, if you’d like me to do more quick tips like this, just let me know in the comments below.
Help Support the Blog
Check out my eBooks and Presets
Check out my photography eBooks , Capture One Styles and Lightroom Presets available on GumRoad.
Subscribe to my YouTube Channel
Check out my YouTube channel for tutorials, Vlogs, and more!
Buy me a coffee!
If you want to say thanks or help, then you can feed my caffeine habit and buy me a coffee via PayPal with a one off donation to my PayPal tip jar. (Please note that PayPal doesn’t make it easy to respond to these so just know you are thanked in advance)
Join our Facebook Group
If you want to discuss anything you’ve read here on my website, or saw on my youtube channel, or if you want to share images you’ve created using any of my techniques or presets, then I’ve started a Facebook Group just for that.
Note that this post contains paid affiliate links. We get a small commission for purchases made through these links, which helps run this site.