

Photo Editing, Tutorials, Photography News, and More
This blog covers a range of topics from Lightroom, Photoshop, Capture One, Fujifilm, Canon, Nikon, iPhone Photography, and more. If you want to see more of my actual photography work, visit my Portfolio and Photo Journal blog.
Featured Posts


Video - Luminar 4.2 AI Augmented Sky Tutorial and Mini Review
Last week I posted an image I had created using the new AI Augmented Sky feature in Luminar 4.2, and I promised a tutorial on how I did it. Well, here it is! In this tutorial, I walk you through the process of creating a nighttime image using an existing photo and the new AI Augmented Sky feature of Luminar 4.2.

Augmented Sky in Action in Luminar 4.2
When Luminar 4.2 was announced last week, I expressed my opinion on the software, and how I thought that the new AI Augmented Sky feature seems like its not something that should be a priority. I still stand by that assessment, but I also wanted to be a little more open-minded about it, so I’ve been playing around with it for the last week, and so here is a quick before and after.

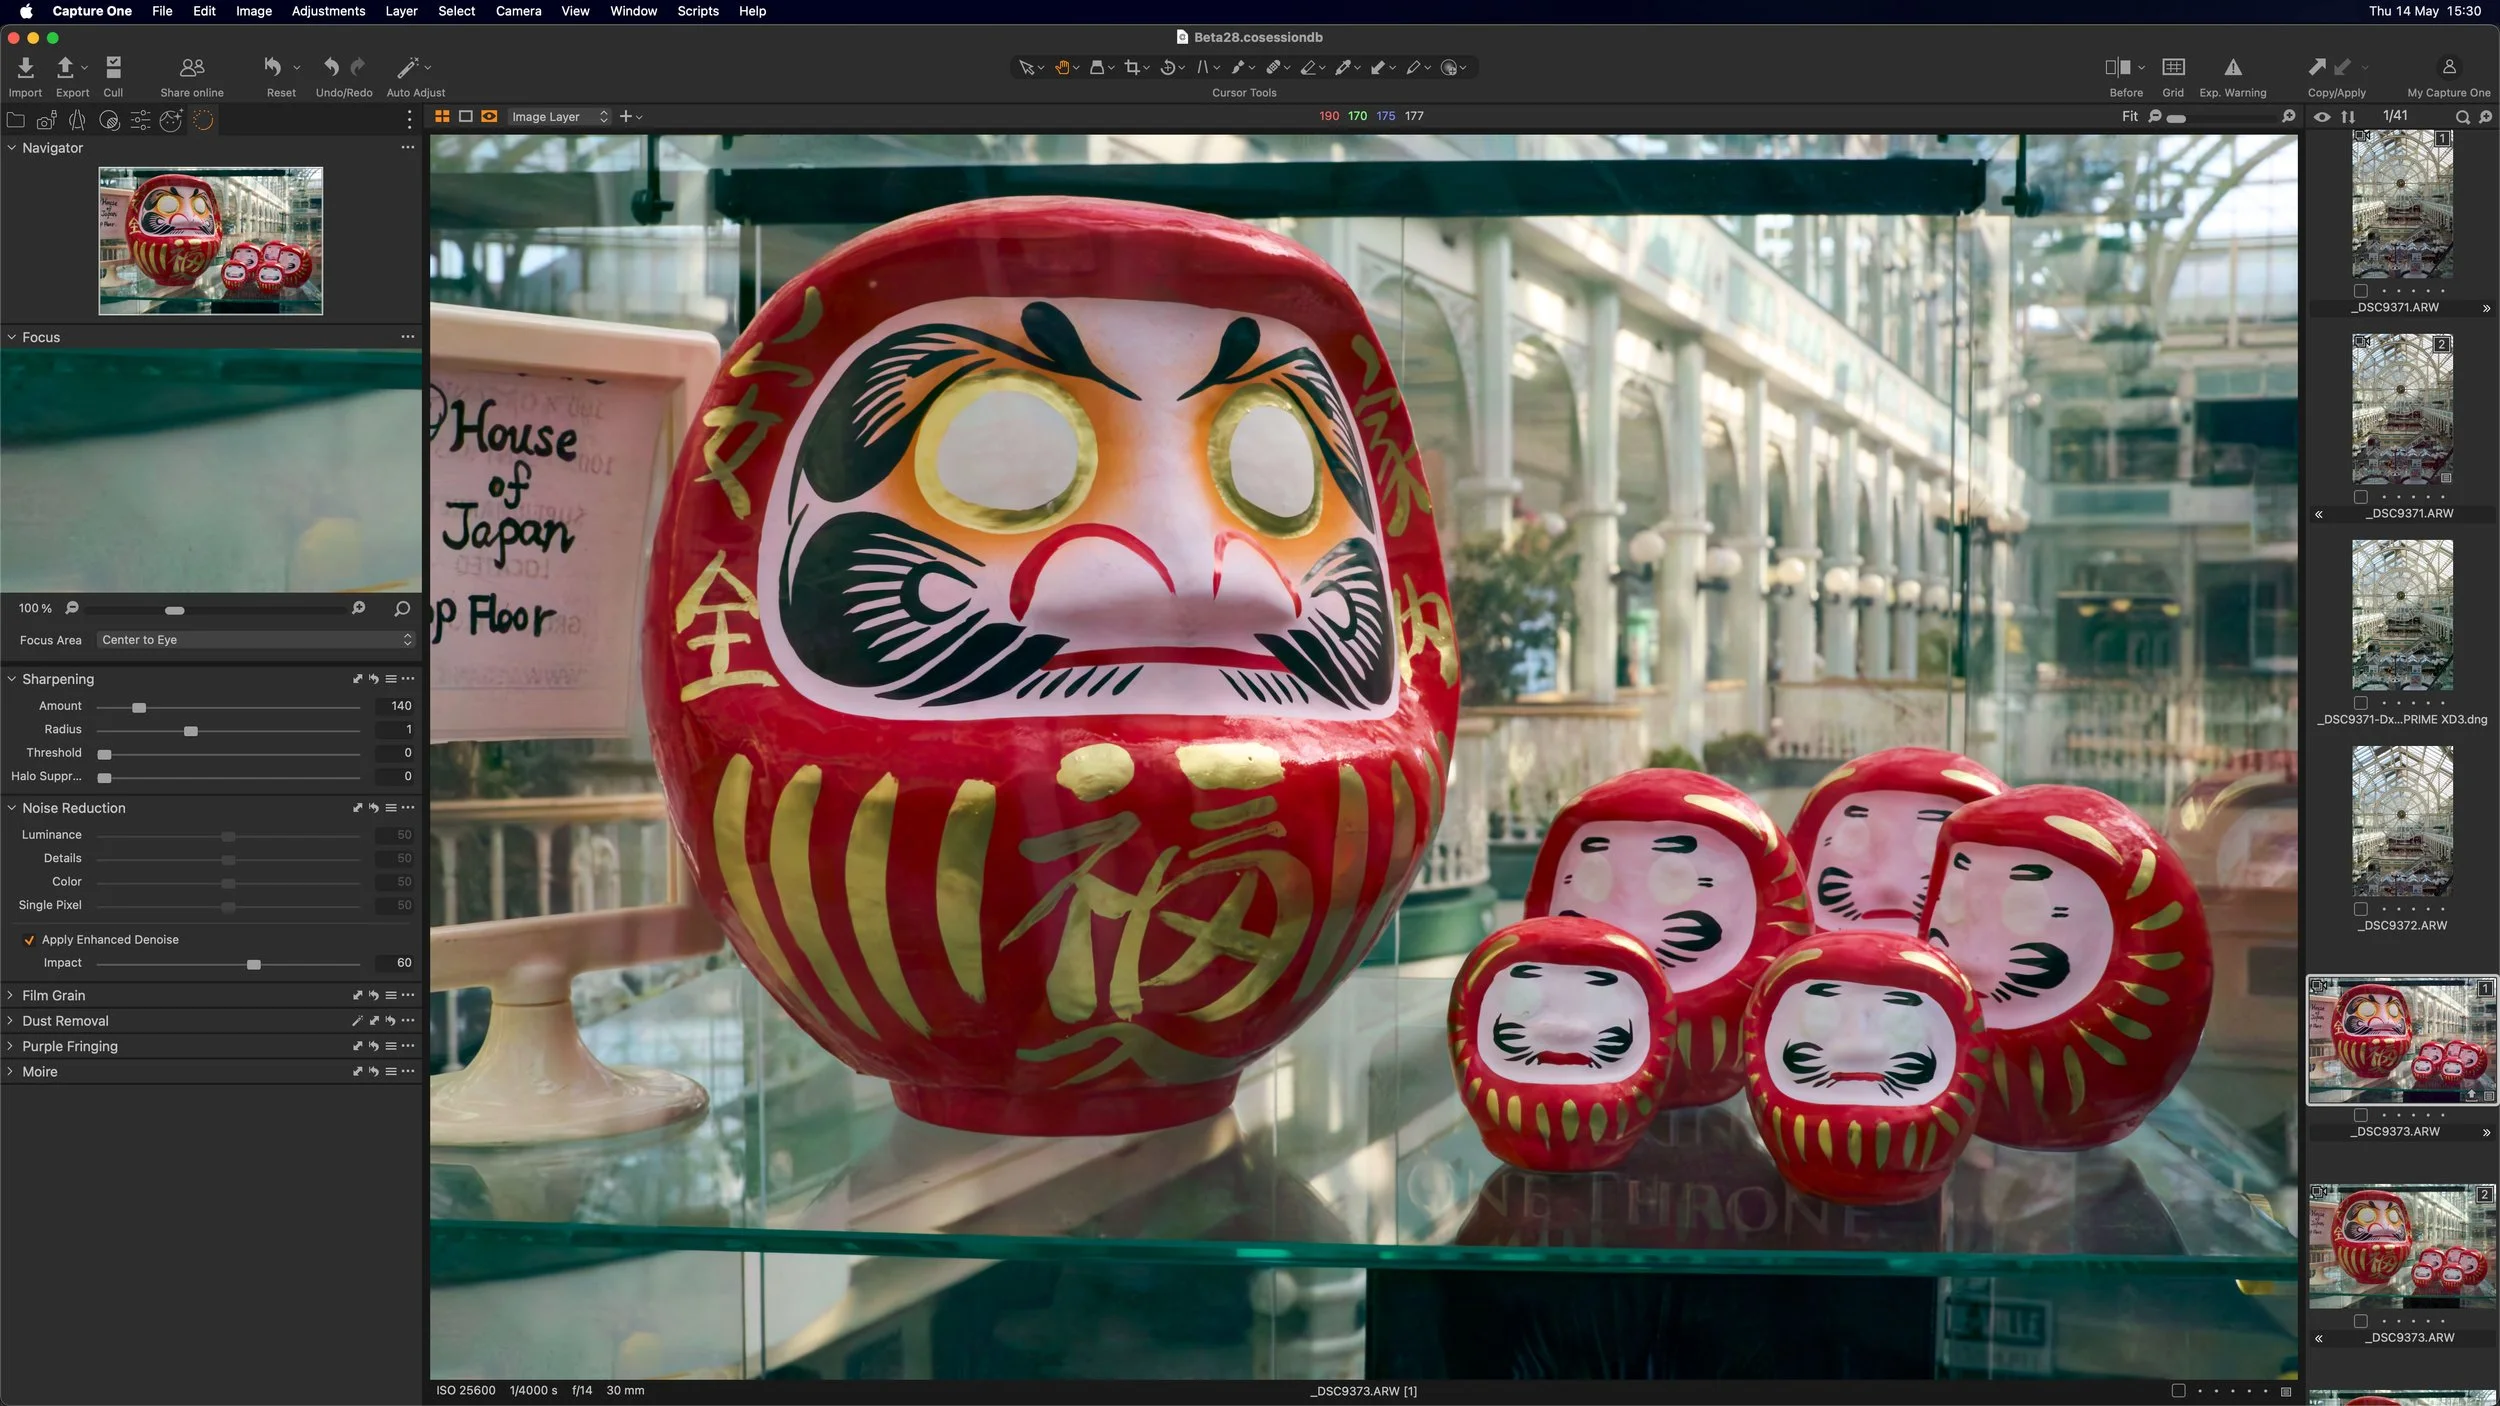
Capture One Basics - Exposure Tools & Controls
A quick tutorial on the basics of using the exposure controls in Capture One. I look at using the exposure, shadows, highlights, blacks and whites, and levels and curves control in Capture One on a real-world image. I took a “normal” image and walked through the process of “correcting” the photo, using various tools in the “Exposure” tab in Capture One.

Capture One is not Lightroom (If you struggle with Capture One, understanding how it’s different may help)
Whenever I read people struggling to get to grips with Capture One, one of the most common sources of frustration is generally from people trying to use Capture One like it is Lightroom, and expecting the same results. I can not emphasise this enough, but Capture One is not Lightroom. It’s a different application, and it behaves differently in a great many ways.

Tales of Social Distancing (Coronavirus Update)
I've been trying to write something about the current coronavirus situation all week, but I didn't know where to start. Life seems so oddly surreal at the moment. I've been trying to keep up some sense of normality and continue to blog and make YouTube content, but it feels weird to be doing such things in the light of what's going on. It feels like we're living in some science fiction movie.

Quick Note - Adobe offering 2 Months Free for Current Creative Cloud Members
I was trying to write the title for this post and make it not sound like a spam ad, which is what I thought when I first saw this, but its true. Adobe is offering two months off for creative cloud subscribers to help creatives deal with the current global situation. I read about this on a tweet, and I thought it was a joke or a scam, but it was from a reliable source, and I tried it and it works (at least it did a few days ago).

Luminar 4.2 Launched - New AI Augmented Sky Function
Luminar version 4.2 has just launched. The latest update adds a new “AI Augmented Sky” tool. This allows you to add objects into the sky without any masking and will allow you to compensate for things like lighting and colour.

Luminar 4 Quick Tip - A Better Way To Add a Watermark
“How to add a watermark in Luminar” is a question I see asked regularly on various forums and social media. In this video I show you my workflow for adding a watermark, that once set up allows you to add a watermark with just a few clicks.

How to get Classic Negative and Bleached Bypass on Unsupported Fuji Cameras (with Capture One)
When Fuji launched the X-Pro3 they added a new film simulation to the camera: Classic Negative. Some had hoped that this might also be added to the X-T3 and X-T30 cameras via a firmware update, but it never happened (at least, not yet). Well, there actually is a way to get Classic negative if you own any of the 26mp generation cameras - specifically the X-T3 and X-T30. Well, sort of. If you shoot RAW and use Capture One, it will actually let you select Classic Negative as one of the options. But, what about users of older cameras, and what about the even newer Eterna Bleached Bypass that comes with the X-T4? Well, read on for more…

Eos RP - Capture One vs Lightroom Follow Up (And Custom Lightroom Profile)
A little while ago I wrote a post about the Canon EOS RP and how the RAW files were looking in Lightroom compared to Capture One. I had noted that RAW images from the camera looked pretty flat in Lightroom and that for some bizarre reason, Adobe had not supplied camera matching profiles for the camera (or a number of recent Canon models) and if you opened the same image in Capture One they had much more impact before even doing any editing. At the time I was working with RAW files I downloaded from DP Review, and so couldn’t share my results. Since then a reader has kindly sent me some raw files that I can use, and so now I can show you what I mean.

Working With Capture One and Affinity Photo
One of the questions that I get asked a lot is about using Affinity Photo with Capture One. For those who want to cut the Adobe chord, Affinity Photo is the most popular alternative to Photoshop, and it makes a good companion to Capture One. Even if you still use Lightroom and Photoshop, many still like Affinity Photo for its modern user interface and speed. Round tripping between the applications is fairly straight forward, but there are still a few things to be aware of, which I will cover in this post.

Save 25% on Capture One Pro Sony or Fujifilm
Phase One has started a new spring promotion for Capture One, and you can now get 25% off any new licence of either the Fujifilm or Sony versions of Capture One. This applies to both subscriptions and perpetual licences.

Patreon Live Editing Sessions
A while ago I changed up my Patreon Tiers, and I added a new top tier which included “Live Editing Sessions” as part of the rewards. These aren’t actually live, but pre-recorded (live on tape!) - but they are essentially following along as I edit a group of images. They’re mostly unedited, and in some cases, I’m seeing the images for the first time out of the camera. So far they’ve been well received, but I wanted to give you an idea of what they entail, so here are some of the sessions I’ve posted so far. (These are normally only available to Patreon Subscribers).

Frame Photos for Instagram using Lightroom’s Print Module
If you post on Instagram, I’m sure you’ve come across the problem of getting your images to fit within the Instagram aspect ration. Instagram uses 5X4 (or 4X5) as the ratio for images posted to the platform, but most cameras shoot 6X4. There are many ways around this, such as cropping to the right ratio and making special Instagram versions. Another popular option is to fame your image in its default format inside a white frame that fits on Instagram. This is quite common, and I recently got a question from a reader asking if there was a way to do this from within Lightroom. There is, and it involves using the Print Module.

Changing the Default Tool Settings in Capture One
If you find that you’re constantly changing the same settings for every image in Capture One, then one way of remembering common settings in Capture One is to set new defaults. For most tool settings in Capture One, you can save defaults. These will be the settings that are then applied every time a new image is imported from the same make and model of camera. This can be very useful for things like sharpening and noise reduction, which you may want to change from the factory defaults. Rather than applying these changes every time, you can set new defaults.