My Fuji Jpeg Guide is coming Next Week
I’ve been working on my next Fuji guide for so long now, I can’t really remember when it started. I had wanted to write a guide on the specifics of working with Fuji jpegs, and I had a plan all laid out, but it ended up being more difficult that I had anticipated. I kept deciding to add parts, and then I would rewrite sections, and eventually the plan kind of went out the window. However, it’s finally nearly ready, and so I hope to be able to launch it next week. So what’s it about then?
Well, the idea was to create a guide about the quirks of shooting Fuji Jpeg files. I wanted it to be a mix of shooting tips and post processing tips. It covers a variety of things from explaining what the shadow and highlight tone options do, to giving you some tricks for creating various effects in camera. It talks about what I think are the ideal technical settings, such as sharpness and noise reduction, and I talk about the importance of getting things like white balance right in camera.
Here are a few quotes from the guide that describe what it’s about
There was a time when some people would probably have asked: “why shoot RAW?". But today many people who might typically only ever shoot RAW and may be tempted by the reputation of Fuji JPEGs. While shooting RAW will always give you the best image quality and the most flexibility, shooting JPEG has its advantages too.
As it's such a broad topic, and I have tried to create a guide that will appeal to all experience levels, both being informative to beginners, without being too boring for more advanced users.
From the post production side I discuss how to sharpen and process Jpeg files from Fuji cameras in Lightroom, Photoshop and Apple Photos. i also look at things like colour correction, adding grain and so on. I also briefly discuss using X-Raw studio and how to convert RAW file to Jpeg files inside the camera.
It might seem like a contradiction to shoot JPEG with the intent of doing some post-production on the images. However, there are advantages of doing a little editing on your photos after the fact, even with shooting JPEG. As with the in-camera settings, there are two types of editing you can do with images, technical and creative. In this context, I would consider technical edits to be things like sharpening and noise reduction, and creative editing would be techniques like using curves, adjusting colour, applying presets and so on.
There are lots of possible option, and this is a subject that could cover volumes all of its own. In this chapter, I'm going to focus primarily on the technical sides of editing, but I will also include some of the more creative types of adjustments too. I will specifically look at sharpening settings for a few different applications, and why you might want to sharpen JPEGs. I will also show you some tips for editing JPEGs that are not software specific.
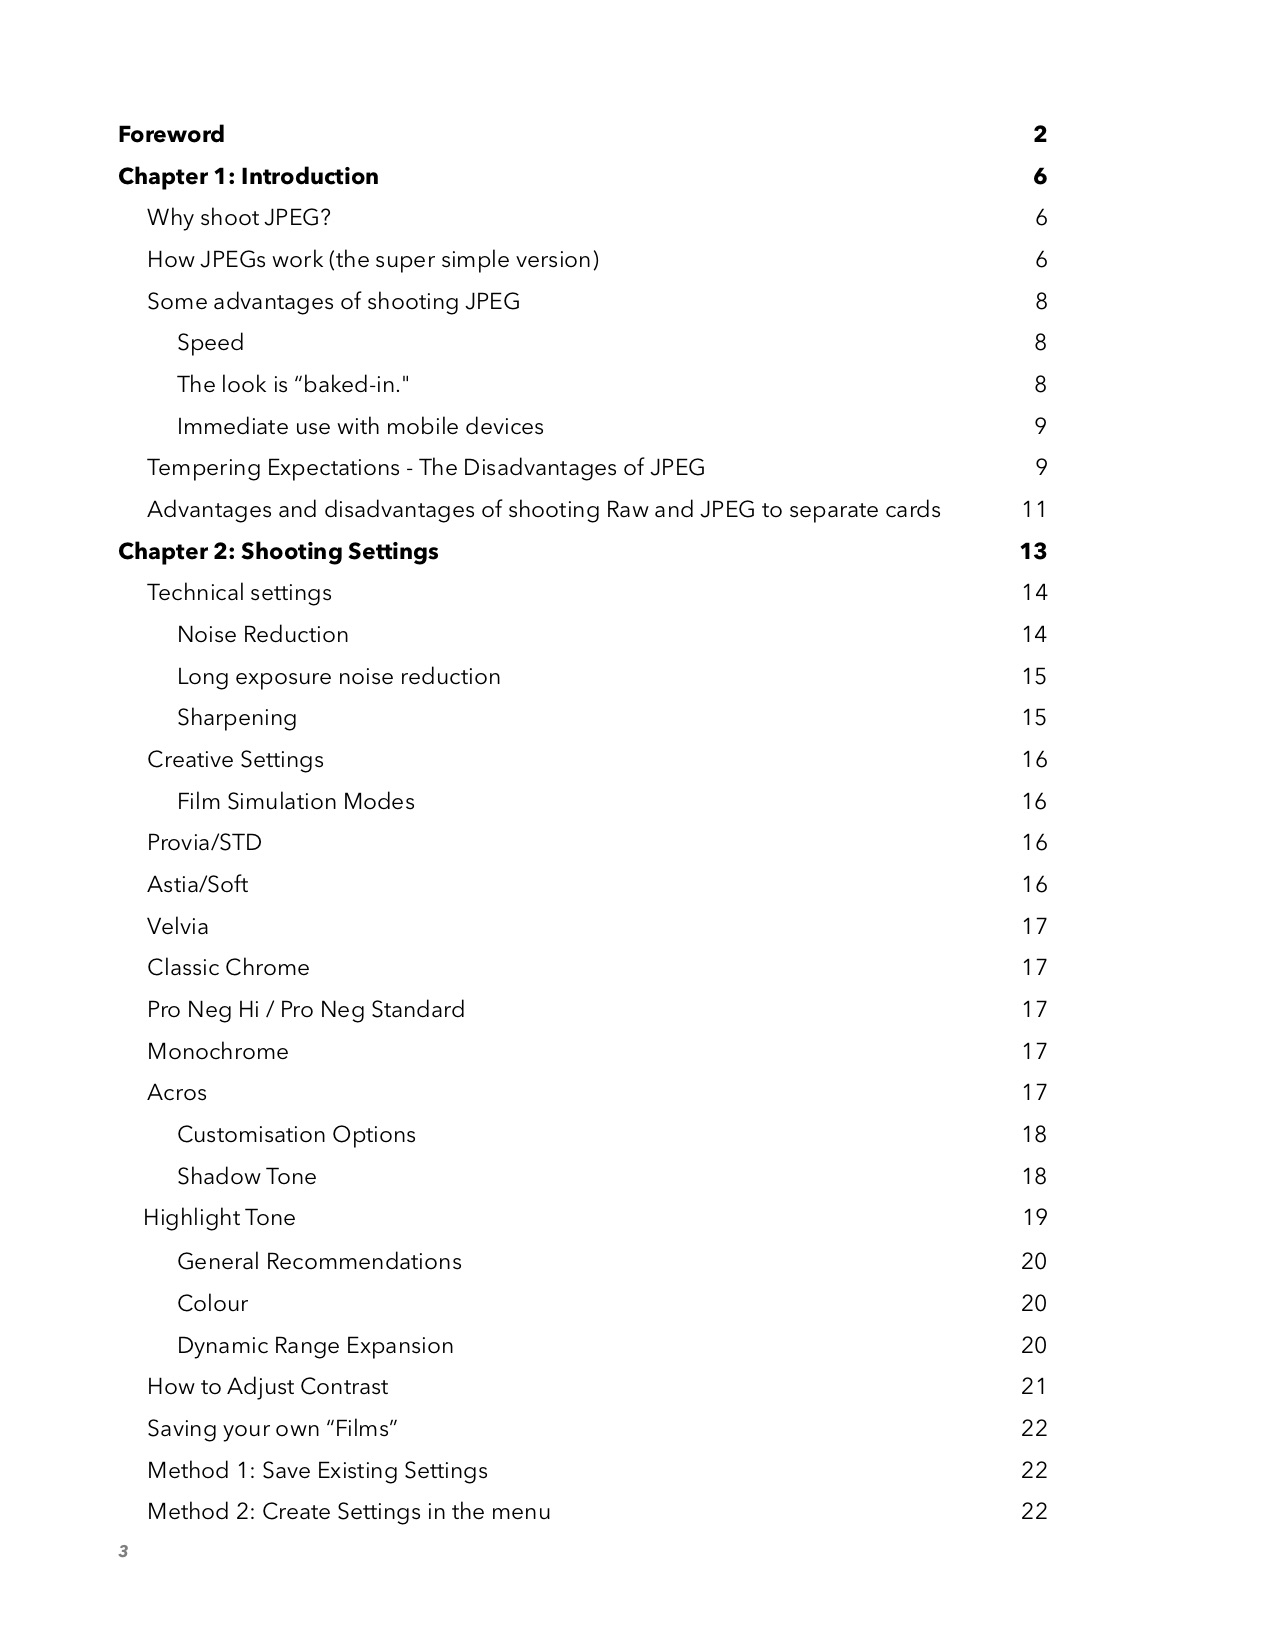
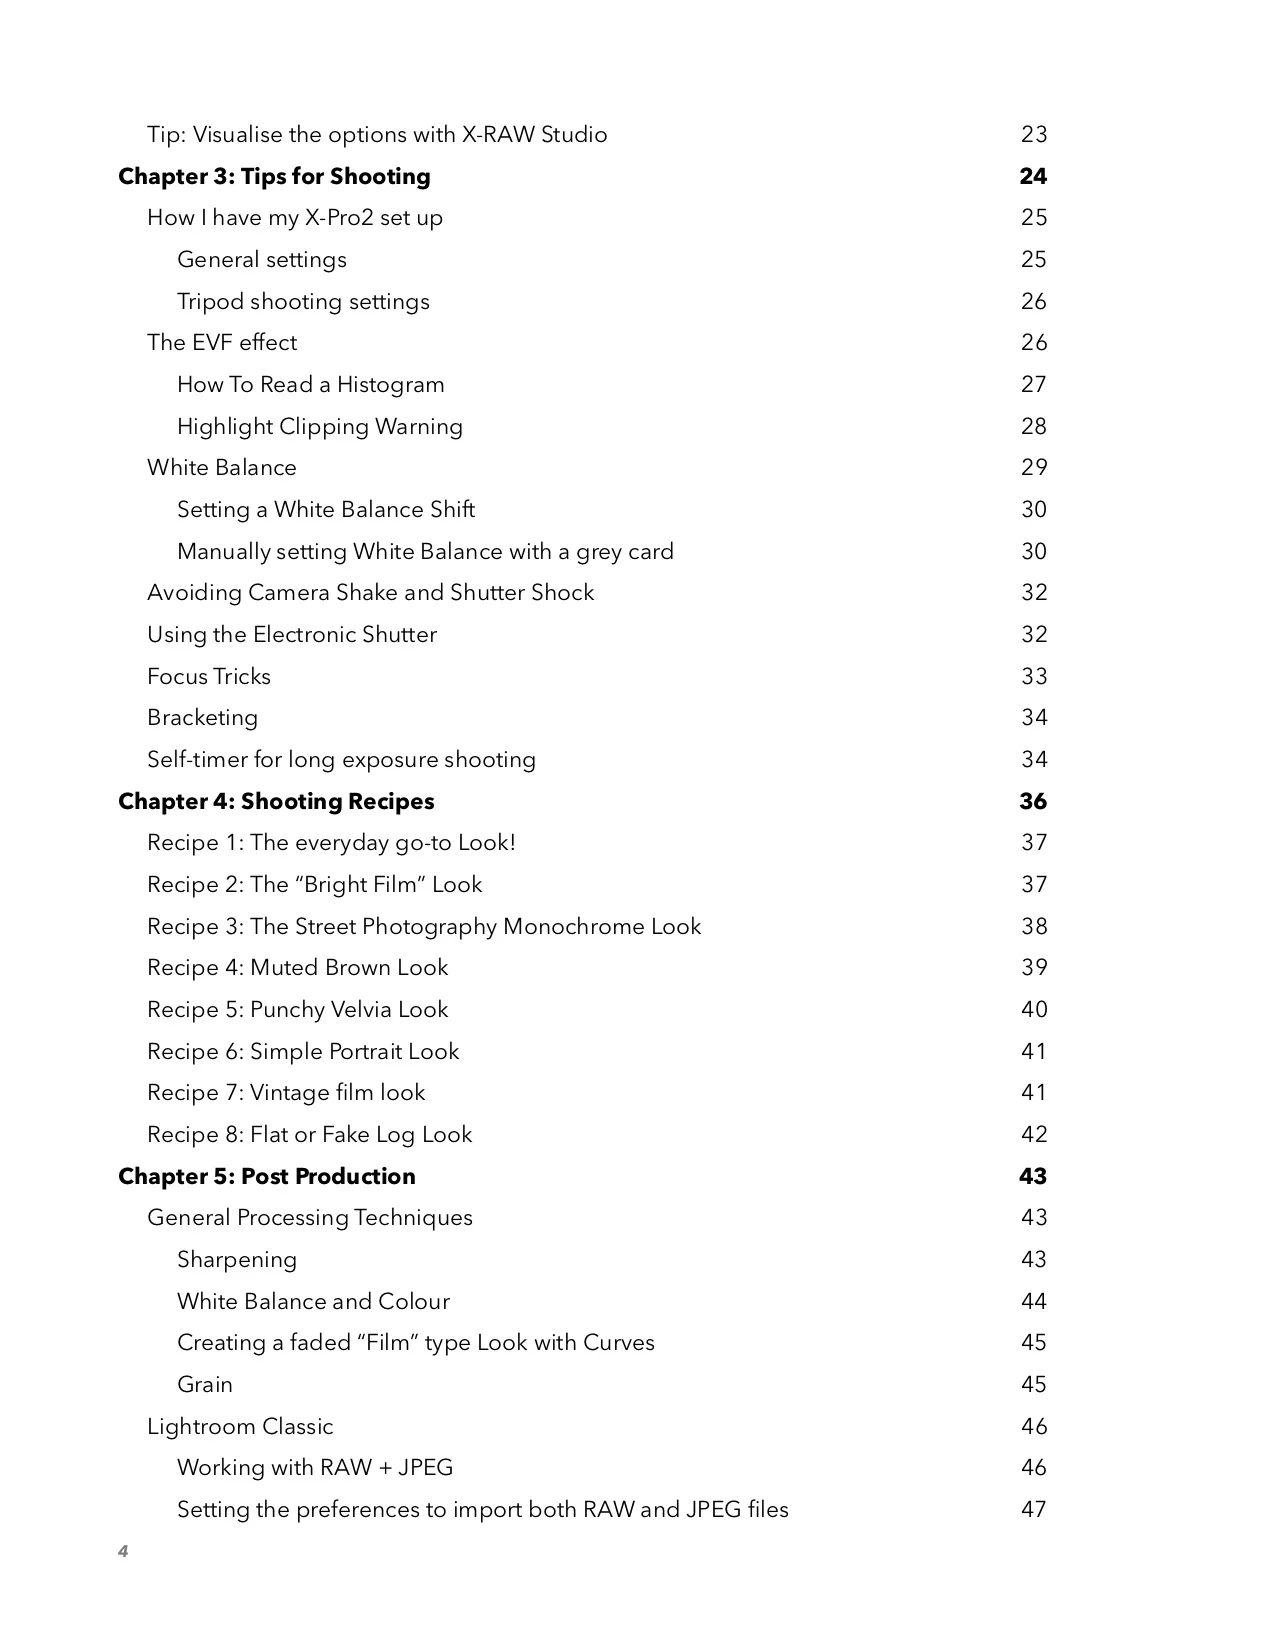
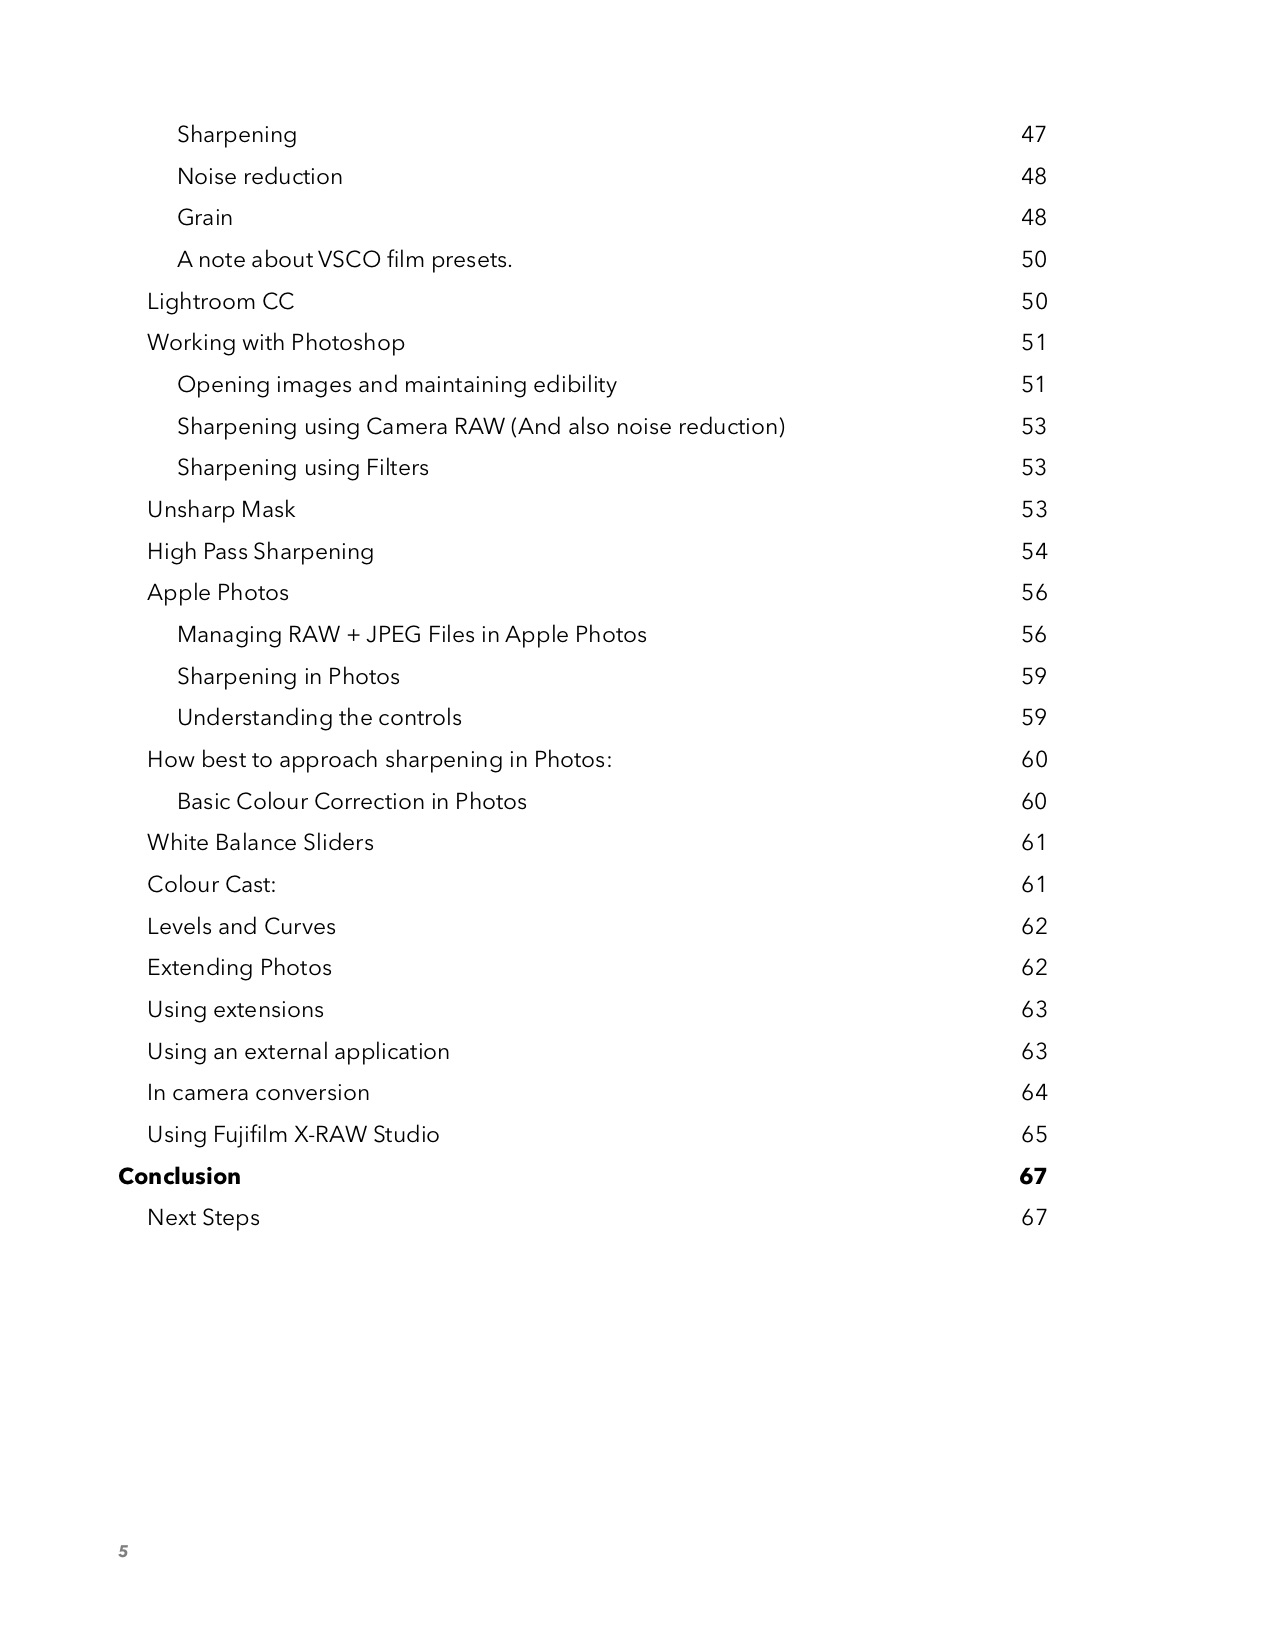
To give you an idea of the content, here’s a screenshot of the (draft) table of contents. (3 pages)
I’m in the final stages of adding screenshots, and diagrams, and then completing the final proofing pass. My tentative aim is to release the guide on Tuesday barring any unforeseen circumstances, and I’ll have an announcement post of course. If you’ve subscribed to the newsletter, I’ll send out a notification too. It ended up being the longest of these guides that I’ve done, and when it’s finished it will be around 80 pages I think (It's currently at 67 without diagrams, screenshots, and appendices, and I’m still tweaking the layout so it may be a little more or less).
I’ve been working on this for so long now that I’m really looking forward to getting it finished, although, I’ll be honest, I’m a little nervous about the reception. I have tried to cater to a broad range of experience levels, and its a hard thing to balance, but I guess I’ll see soon enough!


