
Capture One for Lightroom Users: Don’t forget about these two tools! (Brightness and Levels)
One of the things that I love about Capture One is the fact that there are often many ways to complete the same task. Sometimes multiple tools can achieve similar results, but they go about it in slightly different ways. If you’re coming from Lightroom, at first, my may stick with the typical Lightroom tools. However, there are two adjustments that are frequently overlooked by Lightroom switchers because they’re not in Lightroom. These tools can be really useful occasionally, and they are the Levels tool and the Brightness slider.
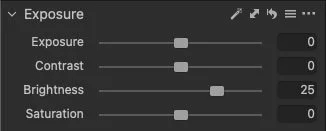
The Brightness Slider
Lightroom used to have a brightness slider in earlier versions, and then the company removed it in lieu of an exposure slider. An exposure slider more accurately mimics the way adjusting exposure on a real camera would be, and so this became the norm. A “brightness” adjustment is considered to be old-fashioned and out of date by many Lightroom pundits since then, however, in my opinion, both have their uses.
Capture One has both an exposure slider and a brightness slider. Both will adjust the overall brightness of a scene but do it in very different ways.
Adjusting the exposure will adjust the overall brightness and affects both the white and black levels of a scene. It uses algorithms that mimic how a real exposure increase or decrease would look. Adjusting the exposure by a stop or two on a scene can blow it out.
A brightness sider, however, is essentially what is called a gamma adjustment. It works the same way as having a centre point on a curve and dragging it up and down. It doesn’t affect the black and white points of a scene, and will appear less aggressive when adjusting the overall brightness than exposure.
The examples below shows the difference between adjusting the brightness compared to adjusting the exposure.

Original Photo

Adjusting the Exposure slider

Adjusting the Brightness Slider
If you’ve ever had to adjust the exposure on a shot and then had to bring the highlights back down because the exposure adjustment had caused them to blow out, then in this case a brightness adjustment might give you a better result. For the most part, you’ll probably mostly use Exposure and only have to use Brightness now and again, but it’s worth learning about.
While an exposure adjustment will always give a more photographically accurate adjustment, knowing how brightness works is really useful for those occasions when it might work better for what you’re trying to achieve.
Levels and Auto-Levels
Levels is another one of those tools that many Lightroom users will be familiar with (from Photoshop) but probably hardly ever use. While there isn’t a straight-up levels tool in Lightroom, the black and white sliders sort of do the same thing. These are equivalent to the black and white points on a levels tool, except you can adjust them above and below what would be the limits on a normal levels tool. In Capture One the black and whites sliders work differently than they do in Lightroom, so if you want a similar black and whites adjustment, then you will need to use the levels tool.
(It’s not exactly the same, as you can only go one way, but it gives you sort of similar result)
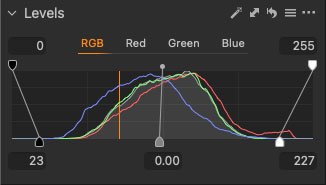
The levels tool can also be useful for fixing things like low contrast images quickly, or photos where the black levels are too high, which can happen with some RAW conversions especially on older cameras due to Capture One’s default tone curve. I actually covered this in a previous tutorial, so if you don’t know how to use the levels tool, check it out here.
There’s another useful feature of the Levels tool, and that’s Auto-Levels. Auto-Levels used to be the goto way of quickly fixing an image in Photoshop many years ago (showing my age here!) and it’s still a useful tool now and then when you just want to quickly adjust the overall brightness and contrast in an image with a single click.
To use Auto-Levels in Capture One, simply click on the little magic wand icon in the top corner of the Levels tool panel.
Auto-Levels has two modes. The default is RGB mode, and this basically performs Auto-Levels on the combined red green and blue channels at once. You can change this to apply it to each channel individually (more like how Photoshop works).
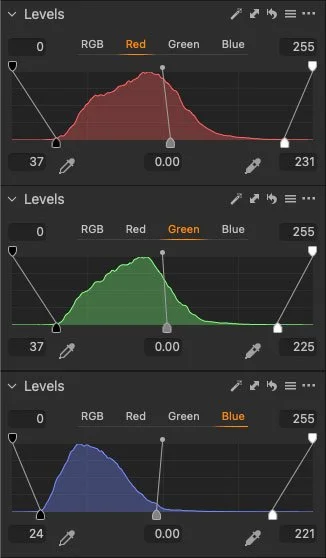
To do this, open the preferences and go to the Exposure tab. Under the Levels heading, change Channel Mode from RGB channel to Red, Green, and Blue Channels.
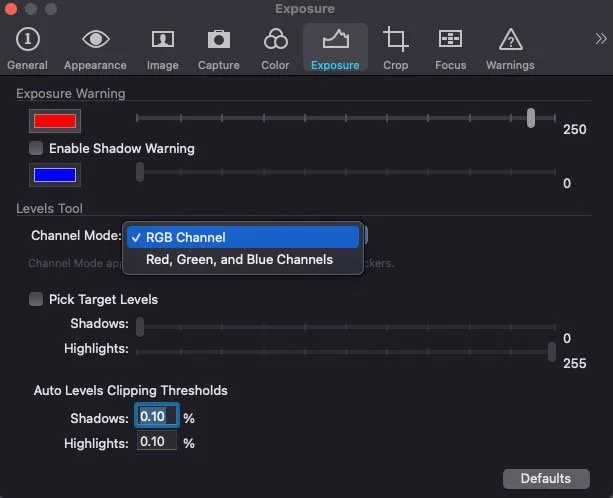
When you do this, and apply auto-levels, it will now apply an auto-levels correction to each individual channel separately. This may result in the colour changing, but can sometimes also be a quick way to correct colour casts. Sometimes, though, it will give unwelcome colour shifts. I wish there was a way to change this on the fly within the panel, rather than have to go to the preferences, but unfortunately, there isn’t.

Original Image
Auto Levels on RGB channel
Auto Levels on Separate Red Green and Blue Channels
Conclusion
While you may never use either of these tools, or only use them occasionally, I think it’s useful to know how they work. I think many people switching from Lightroom might just ignore them because they’re not functions that are in Lightroom, but to do so would be denying yourself some useful tools for your virtual tool chest. If nothing else, it’s worth spending a bit of time to play around with these and understand how they work.
Help Support the Blog
Buy from our affiliates
If you want to help support our blog, you can do so if you buy anything from our affiliate partners:
- Capture One Pro is available in both subscription and perpetual licences available, in versions for all cameras, Fuji specific , Sony specific or Nikon specific.
- Capture One Professional Style Kits from Capture One.
- Luminar AI is available from Skylum Software. Get a 10% discount using the following code: TFP10
- Nik Collection from DXO Labs
- DXO Photo Lab
- DXO Pure Raw
- My Amazon Photo Recommendations
- My Favourite Mac Utility Application: Clean My Mac X from MacPaw
- The VPN I use regularly - Nord VPN - Save on 2 year deal (valid at the time of posting)
If you buy through the above links, we get a small commission, which helps run this site.
Check out my Capture One Style Packs
If you’re looking for some Film Effect, or black and White style packs for Capture One, check out my Capture One styles on my Gum Road Store.
Buy me a coffee!
If you’d rather not use Patreon, but still want to say thanks or help, then you can feed my caffeine habit and buy me a coffee via PayPal with a one off donation to my PayPal tip jar.
Join our Facebook Group
If you want to discuss anything you’ve read here on my website, or saw on my youtube channel, or if you want to share images you’ve created using any of my techniques or presets, then I’ve started a new Facebook Group just for that.
Note that this post contains paid affiliate links. We get a small commission for purchases made through these links, which helps run this site.