
How to fix “Stretchy People” when shooting with a wide angle lens
This is one of those things that you might only ever come across once in the blue moon, but when you do, it’s useful to know how to fix it. If you’re shooting with a wide-angle lens, something like a 24mm or wider, and you have people at the edge of the frame, they can be distorted. This is especially true when shooting in portrait orientation and looking up. Like I said, this is a very specific situation, and it’s only by chance that I knew how to fix this.

Original unedited image. Shot on a 24-105mm lens at 24mm. Notice the people under the tree look a bit weird, as if slightly stretched.
In the example above, I shot this image looking up at the cherry blossom, but there are still people in the frame at the bottom on the steps. If you look at them, you may notice that they look a bit funny. They look kind of stretched, as if they were taller and skinnier than they should be. This is an example of perspective distortion. You really only notice this on lenses wider than 24mm, but in this case, because of the angle I was holding it at, you can see it. Now, you may not even notice this, and it may be subtle enough that you don’t really need to care about it.
You can sort of fix this just within Lightroom. In the Transform panel, you can adjust the “Aspect” slider to stretch the image back out. This does fix the stretchy person look, but unfortunately it squeezes the whole frame uniformly, so objects in the centre are compressed, and it may alter the look of other subjects in the frame. Still, it will work in a pinch.
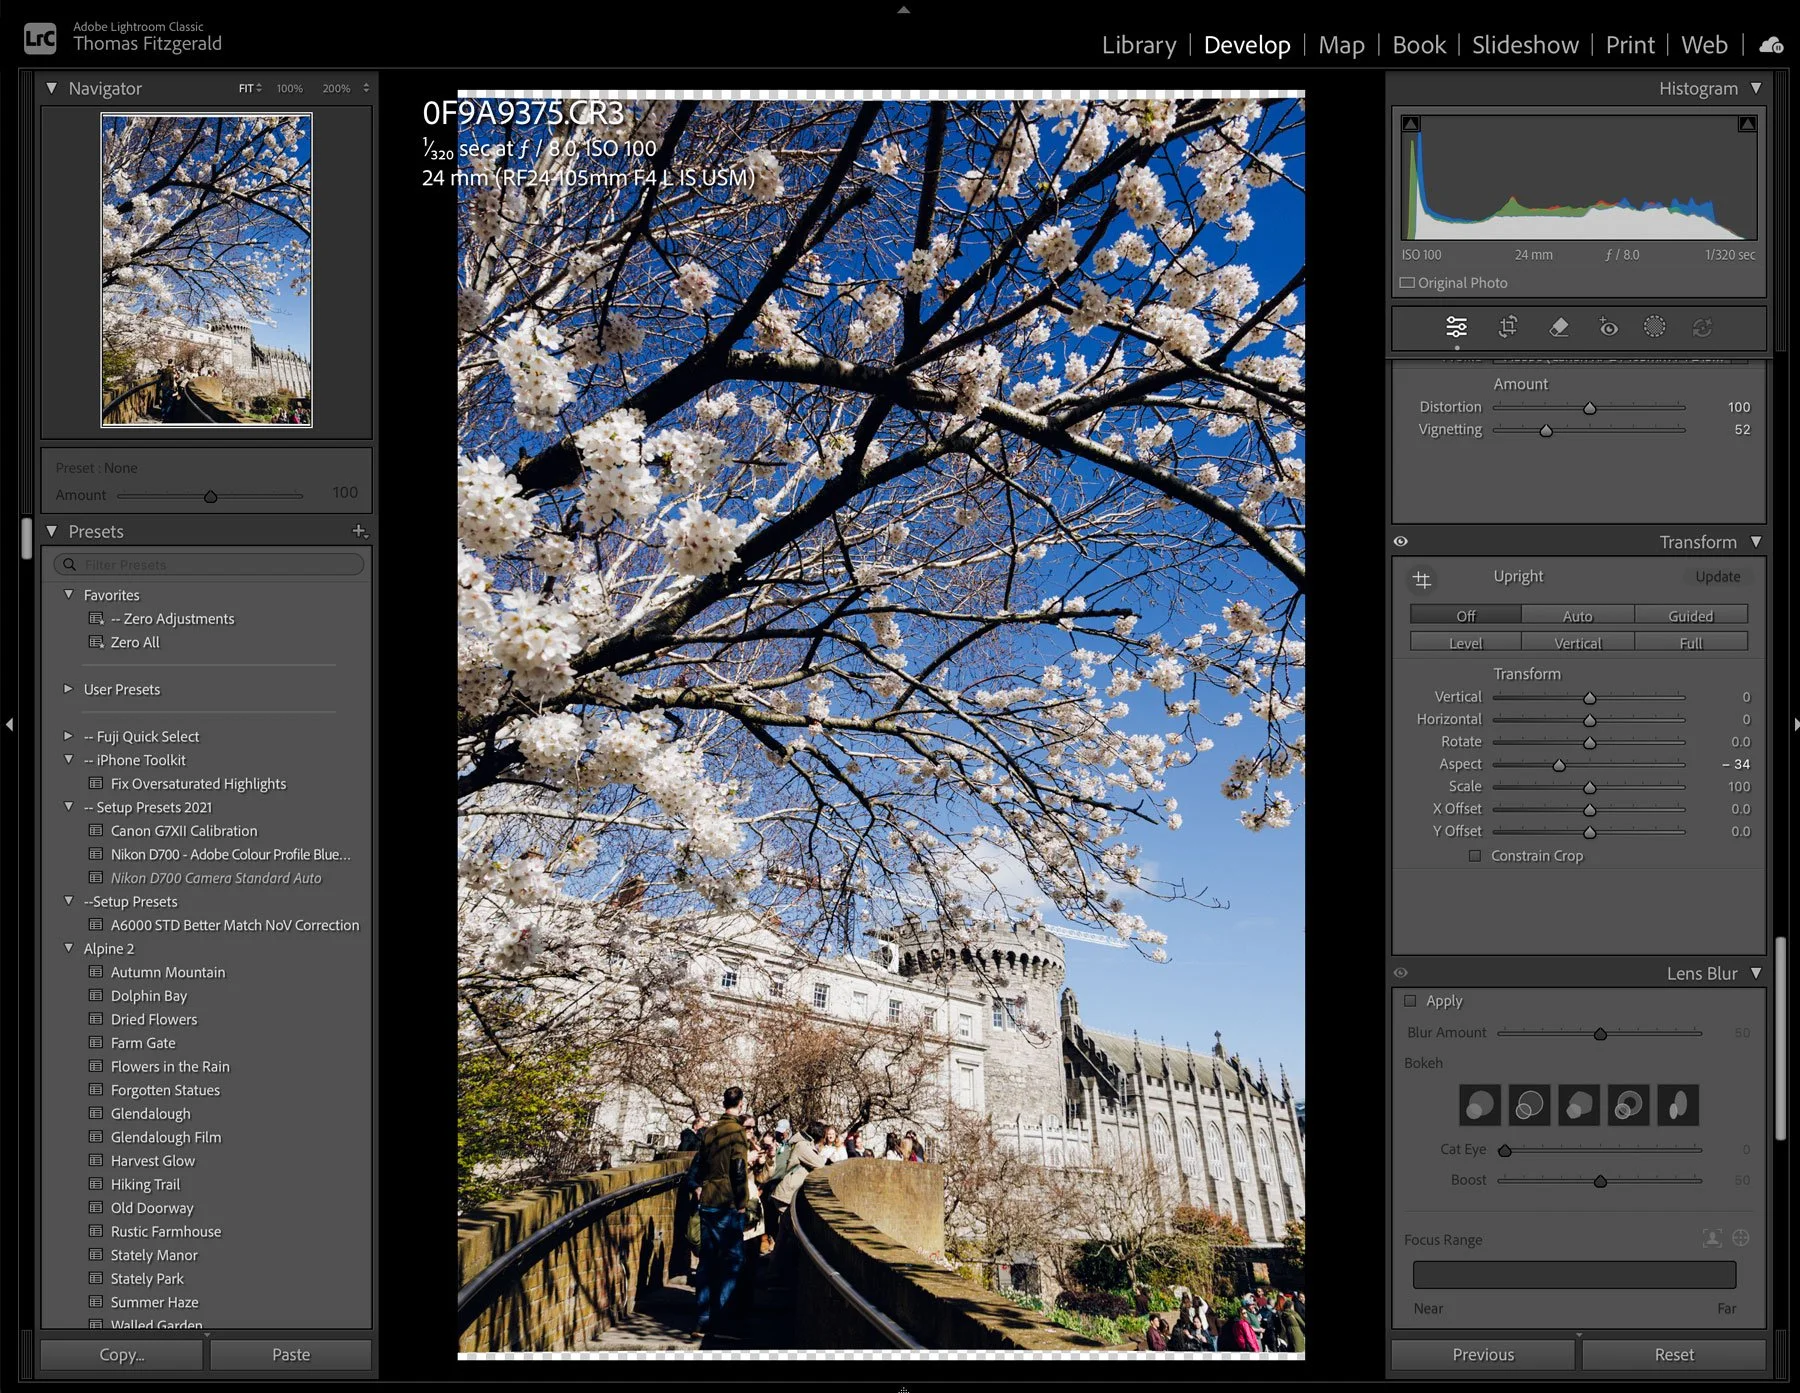
Using the Aspect slider to try and fix this
What you really need is a tool that will change the aspect at just the edges of the frame. Amazingly, this actually exists. It’s one of DXO’s applications that you may not know about, called DXO ViewPoint. I only know about this specific function because I made some tutorials for DXO a while ago for an earlier version. The software does a bunch of things, but it has a function to deal with this issue specifically.
So if you have DXO ViewPoint, just edit your image in ViewPoint using the menu command: Photo > Edit In > DXO ViewPoint. This will open up the application. From here, you need to go to the Volume Deformation section.
You want to use the first option here, the Horizontal and Vertical option. For this particular image, set the Horizontal to 100 (the default) and the Vertical to about 70. This immediately makes the people look less stretchy and more normal-looking. You can view the before and after by using the Before/After button at the top of the window. Once you’re happy, just hit Save to go back to Lightroom.
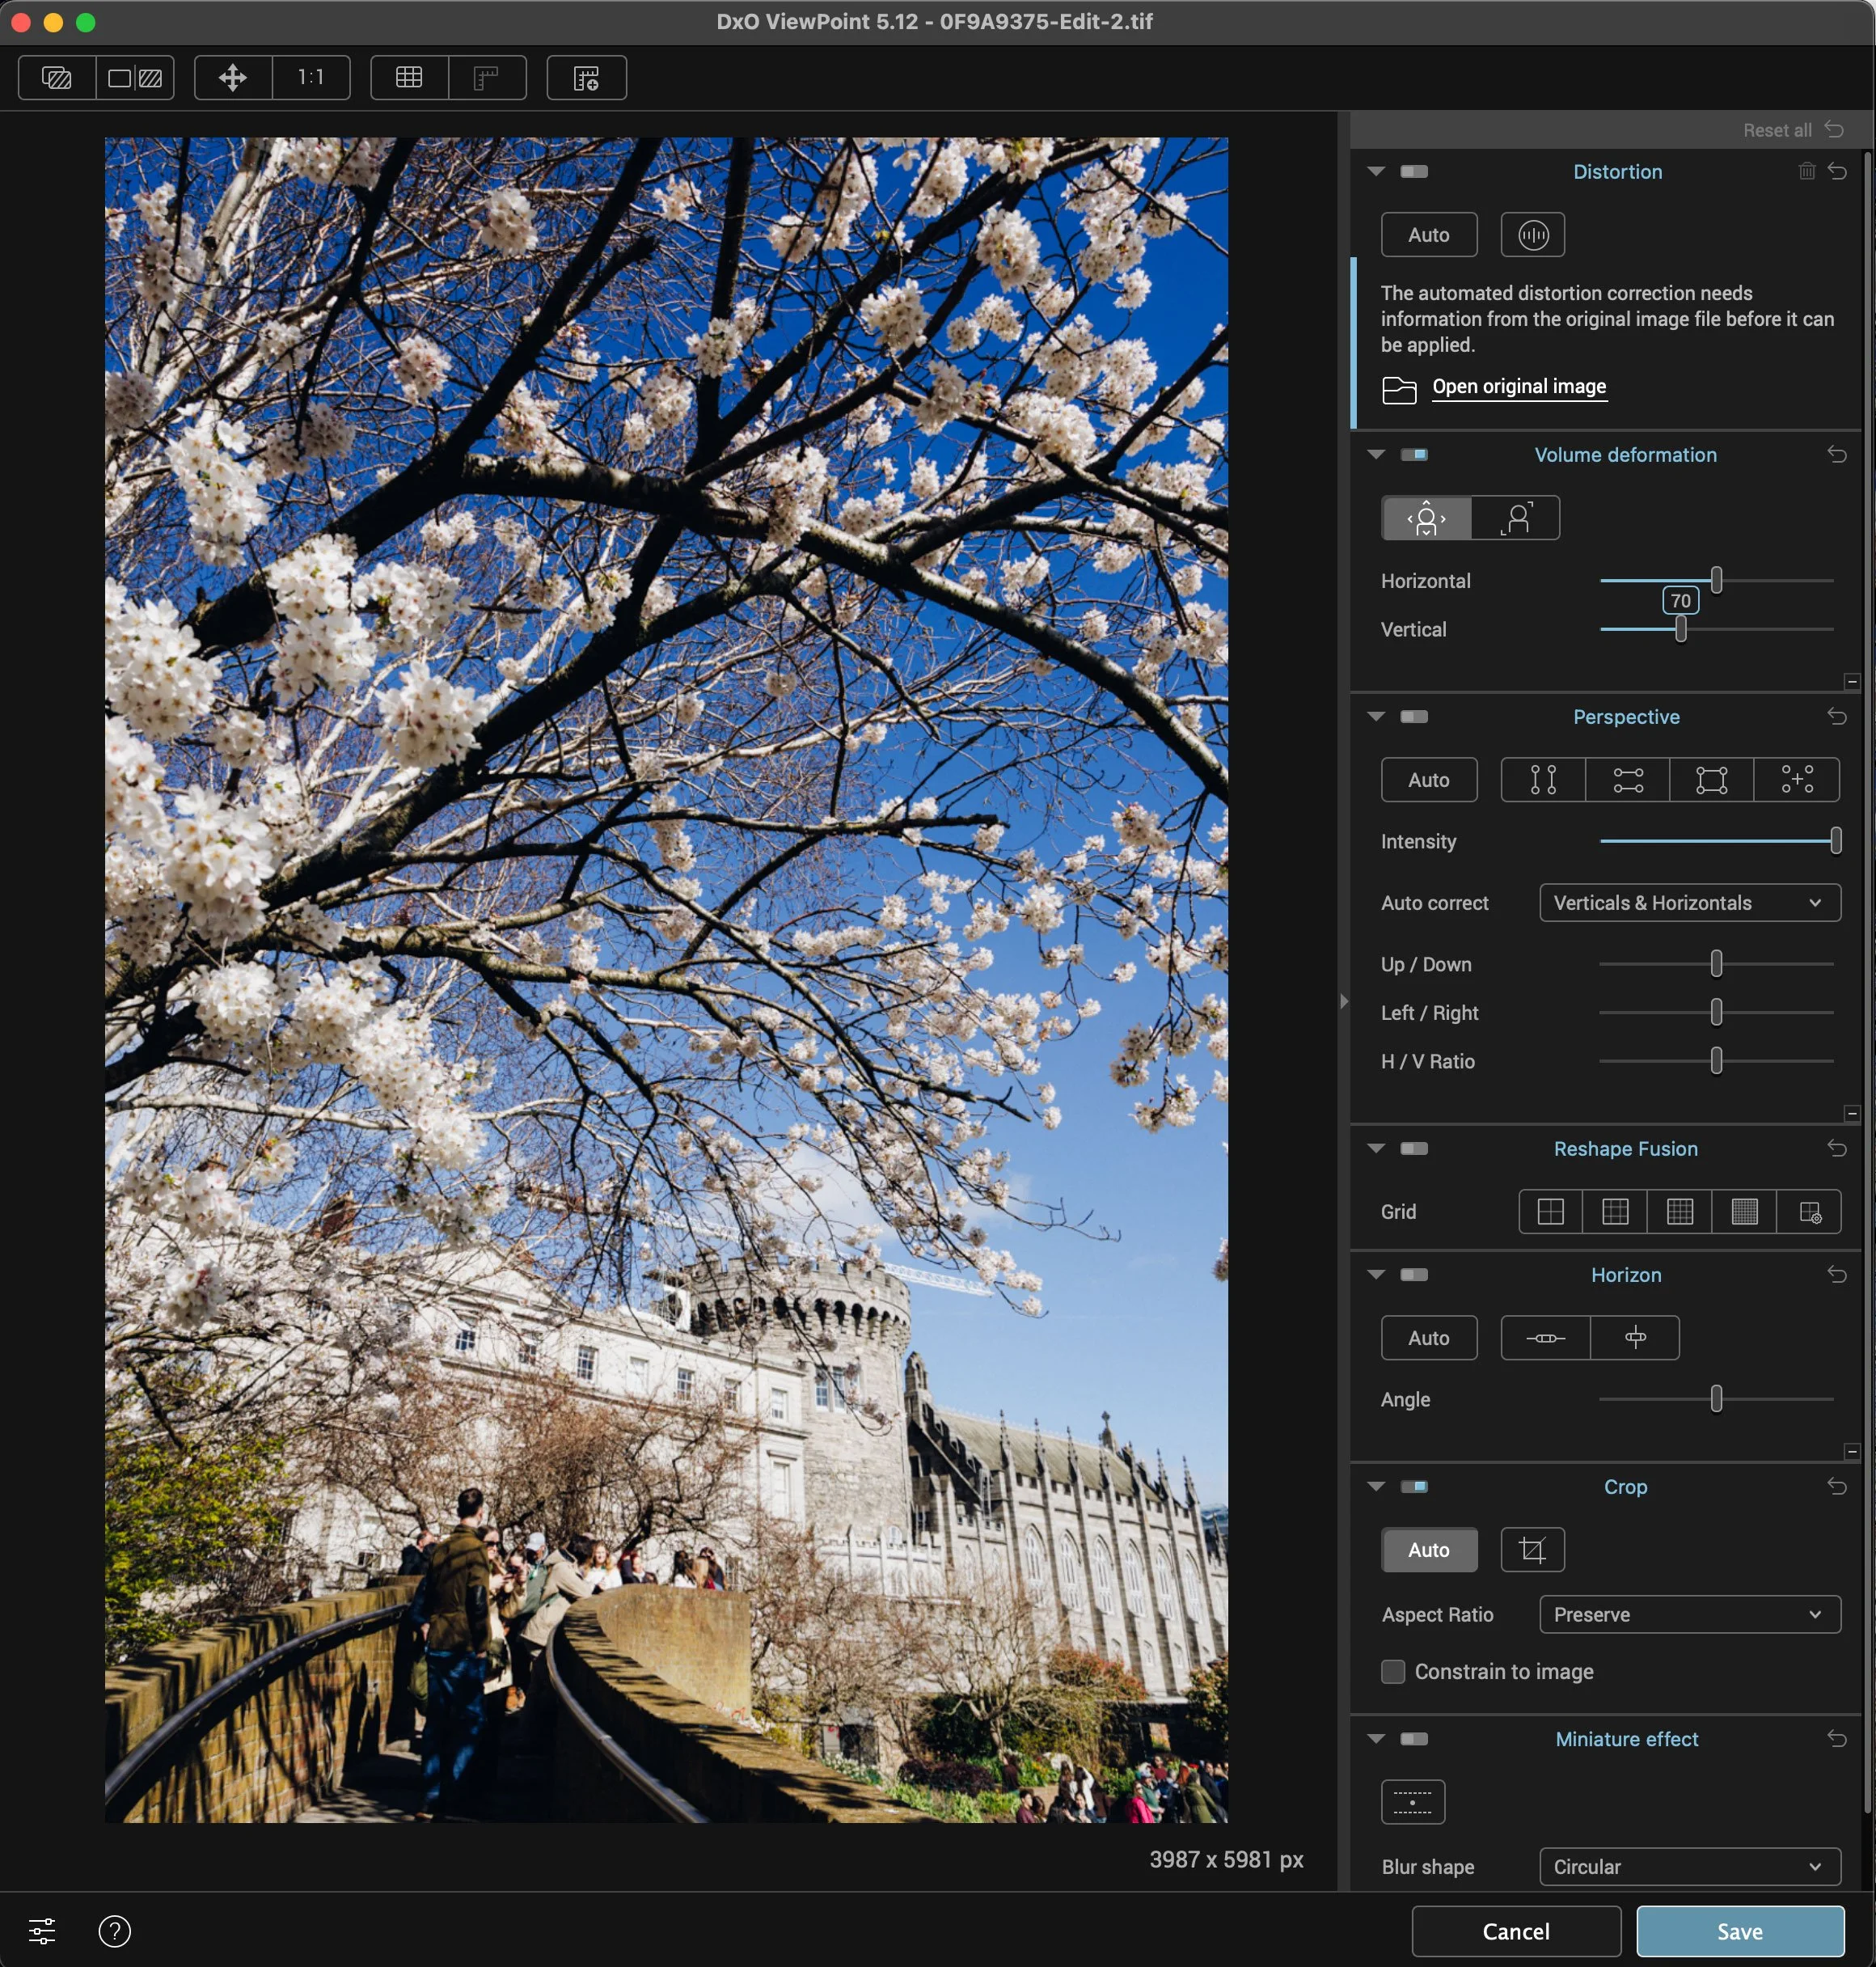
The settings to use in DXO Viewpoint
I don’t really know of any other tool that does this specific function. I tried doing it with the Puppet Warp tool in Photoshop, and it sort of works, but it’s tricky to get right. Another option is the Mesh Warp tool, which again could be used to fix this, but it requires some more manual work (although this is probably a better option than the Puppet Warp tool).

Edited Image, now less stretchy!
If you do want to try DXO Viewpoint, there is a trial version available, and if you do want to buy it, you can use my code: ThomasFitzgerald15 to get 15% off (new customers only, I’m afraid)
Incidentally, this is not a sponsored post by any means. While I am on their affiliate program, I am not being directly paid or even asked to write this. This post was entirely my own idea and DXO has no input into the content I make. If you use my affiliate code, I do get a small commission which helps pay for this site, and my coffee addiction.