

Photo Editing, Tutorials, Photography News, and More
This blog covers a range of topics from Lightroom, Photoshop, Capture One, Fujifilm, Canon, Nikon, iPhone Photography, and more. If you want to see more of my actual photography work, visit my Portfolio and Photo Journal blog.
Featured Posts


How to Export using Process Recipes in Capture One
I’ve talked before about importing images into Capture One, and now I want to cover the basics of exporting with Process Recipes. There are two different ways to export your images from Capture One. You can export using the “Export” command, or alternatively, you can “Process” your image with a Process Recipe.

A Few More Notes About Capture One for Nikon: Capture One Express for Nikon and New Profiles
With all of the announcements from Capture One yesterday, I missed a couple of points about Capture One for Nikon. In addition to the new Nikon pro version, there is also now a version of Capture One Express for Nikon. They have also added new colour profiles for selected Nikon Cameras.

Video: Capture One 20 Version 13.1 New Features Walk Through
In this video I take a look at the new features of Capture One Pro 20, version 13.1, including the new before and after tool, the new Cloning and Healing Tools, as well as details about the new Capture One Nikon version and a new Lightroom Importer.

Capture One Nikon Announced - Available Now!
Capture One has just announced a new version of the software specifically for Nikon users. Just like the versions available for Sony and Fujifilm users, the new Capture One Pro Nikon version will have all the features of the full version, but will be at a reduced price, and will only open Nikon RAW files. This release will also bring tailored profiles for selected Nikon cameras to Capture One.

Capture One 20 Version 13.1 Released
Capture One has just released the latest version of Capture One Pro. The new release of Capture One Pro 20, version 13.1, actually has a few significant new features, including a completely rebuilt clone and heal tool, and a new before and After Tool. The company also announced a new Nikon version of Capture One as well as a new branding for the company and for the software.

Some Resources To Learn Capture One
If there’s one issue I hear over and over again about Capture One is that its hard to learn. I actually don’t think that its a difficult application to use, but a big part of the problem is the difficulty people have in finding proper learning material. So, in this post, I’m going to do my best to point you in the right direction. I will also keep updating this as I find more valuable resources.

Capture One SmugMug Offer
Capture One is currently offering a free year worth of SmugMug with new purchases of Capture One Pro. More details after the jump.

Tips on Tricky Sky Replacements with Luminar & Photoshop
Luminar’s best-known party trick is its AI Sky Replacement, whether you love it or hate it, but it occasionally doesn’t work properly. I was recently playing around with an image from my archive, and I came across such a situation. Here’s the method I used to get around the problem.

Video: Stitching Panoramas with Capture One and Affinity Photo
I’ve had quite a few requests lately for tips on how to use Affinity Photo with Capture One for merging panoramas, and so I created a quick tutorial to show you my workflow for merging Panoramas using these two applications.

Capture One Offers a Sneak Peek at the Next Version: New Clone and Heal Tools
Capture One held a Livestream today in which they showcased some of what you can expect in the next update of the software. You can find the stream embedded after the jump.

Capture One Quick Tip - Controlling a Vignette with Layers and Luma Range
In this super short Capture One quick tip, I show you how to place a vignette behind an object in a scene using layers and the luma range tool.

Two Quick Capture One Tips for Fuji Shooters
Here are two quick tips for those working with Fuji Files and Capture One. The first is based on a question I got from a customer, regarding working with Jpeg files in Capture One. The second is about a quirk of the lens correction module and how to address it.
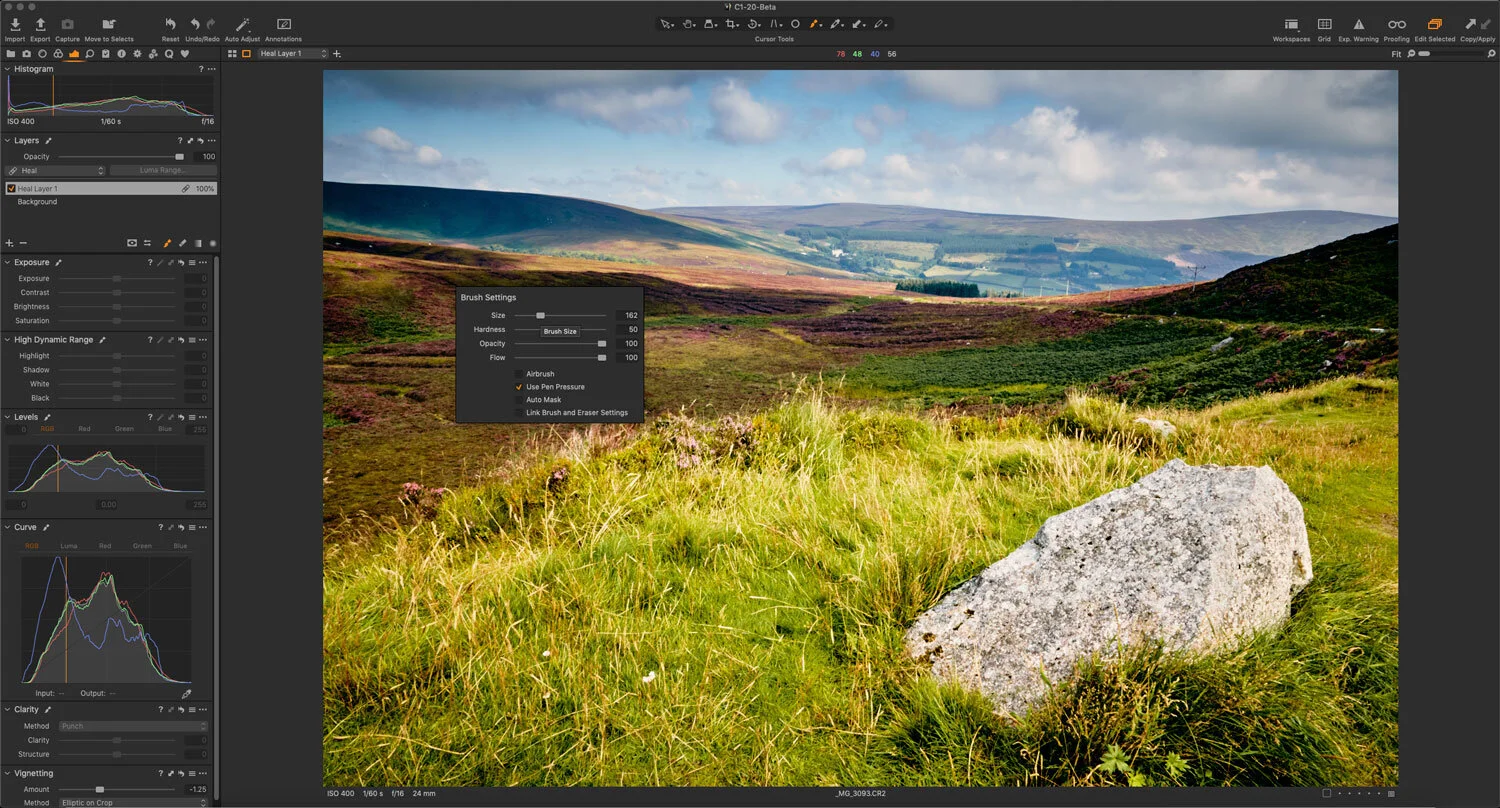
A Quick Tip to speed up Object Removal (Cloning and Healing) in Capture One
One of the areas that causes people some consternation and confusion when using Capture One is the task of removing objects. In particular, some users have issues with the way clone and heal layers work. I’ve seen a lot of complaints about the way you go about cloning and healing in Capture One, and how cumbersome a workflow it is. However, there’s one really simple tip that will speed up your workflow.

Capture One Basics - Exposure Tools & Controls
A quick tutorial on the basics of using the exposure controls in Capture One. I look at using the exposure, shadows, highlights, blacks and whites, and levels and curves control in Capture One on a real-world image. I took a “normal” image and walked through the process of “correcting” the photo, using various tools in the “Exposure” tab in Capture One.

Capture One is not Lightroom (If you struggle with Capture One, understanding how it’s different may help)
Whenever I read people struggling to get to grips with Capture One, one of the most common sources of frustration is generally from people trying to use Capture One like it is Lightroom, and expecting the same results. I can not emphasise this enough, but Capture One is not Lightroom. It’s a different application, and it behaves differently in a great many ways.

How to get Classic Negative and Bleached Bypass on Unsupported Fuji Cameras (with Capture One)
When Fuji launched the X-Pro3 they added a new film simulation to the camera: Classic Negative. Some had hoped that this might also be added to the X-T3 and X-T30 cameras via a firmware update, but it never happened (at least, not yet). Well, there actually is a way to get Classic negative if you own any of the 26mp generation cameras - specifically the X-T3 and X-T30. Well, sort of. If you shoot RAW and use Capture One, it will actually let you select Classic Negative as one of the options. But, what about users of older cameras, and what about the even newer Eterna Bleached Bypass that comes with the X-T4? Well, read on for more…

Eos RP - Capture One vs Lightroom Follow Up (And Custom Lightroom Profile)
A little while ago I wrote a post about the Canon EOS RP and how the RAW files were looking in Lightroom compared to Capture One. I had noted that RAW images from the camera looked pretty flat in Lightroom and that for some bizarre reason, Adobe had not supplied camera matching profiles for the camera (or a number of recent Canon models) and if you opened the same image in Capture One they had much more impact before even doing any editing. At the time I was working with RAW files I downloaded from DP Review, and so couldn’t share my results. Since then a reader has kindly sent me some raw files that I can use, and so now I can show you what I mean.

Working With Capture One and Affinity Photo
One of the questions that I get asked a lot is about using Affinity Photo with Capture One. For those who want to cut the Adobe chord, Affinity Photo is the most popular alternative to Photoshop, and it makes a good companion to Capture One. Even if you still use Lightroom and Photoshop, many still like Affinity Photo for its modern user interface and speed. Round tripping between the applications is fairly straight forward, but there are still a few things to be aware of, which I will cover in this post.