
Capture One 22 Review
I think it’s safe to say that Capture One 22 is one of the companies most hyped releases of recent times. They have publicly touted the main features in advance and two of those features – “Panorama Stitching” and “HDR Merging” have probably been the two most requested features for Capture One for a long time. They are the two big features that Capture One lacks compared to Lightroom. So now that the software is released, are these features any good, and what else is new in Capture One 22?
Overview
So, what exactly is new in Capture One 22? There are 4 main new features:
- Panorama Stitching
- HDR Merging
- New AI-powered Auto-Rotate
- Wireless Tethering for select Canon cameras
There are a few other minor improvements:
- Capture One now can use more Ram to cache images for improved performance, especially with larger files generated by the Panorama Stitching
- Catalog performance improvements on Windows
- The Edit All icon has been removed from the default interface to stop new users disabling it accidentally and leading to confusion (you can easily add this back)
- Notifications when exporting is complete, allowing you to click on the notification to go to the export folder. You also get notifications for panorama stitching and HDR merging.
Panorama Stitching
The first of the two headline features is probably the one that I would use the most, and that is Panorama Stitching. The idea is that you take a number of photos that you have shot in a line to combine into a single panoramic image. It’s a feature that has been in Lightroom for quite some time, and because of this, there are certain expectations as to what this should be able to do.
Based on my testing, Capture One’s panorama stitching does a good job most of the time, and works much like Lightroom’s with a few exceptions and one notable omission.
Much like Lightroom, the software can handle hand held panoramas, and you don’t really need to do anything special to shoot them, although it is reccomended to lock focus. It will compensate for different exposures (so long as they’re not too different) and so there’s no need to shoot everything manual ona tripod (but doing this will make your life easier and give you better results). They do say that it doesn’t work well with wide-angle lenses and recomend you shoot narroer than 35mm, but this is the case for most panorama stitching solutions.
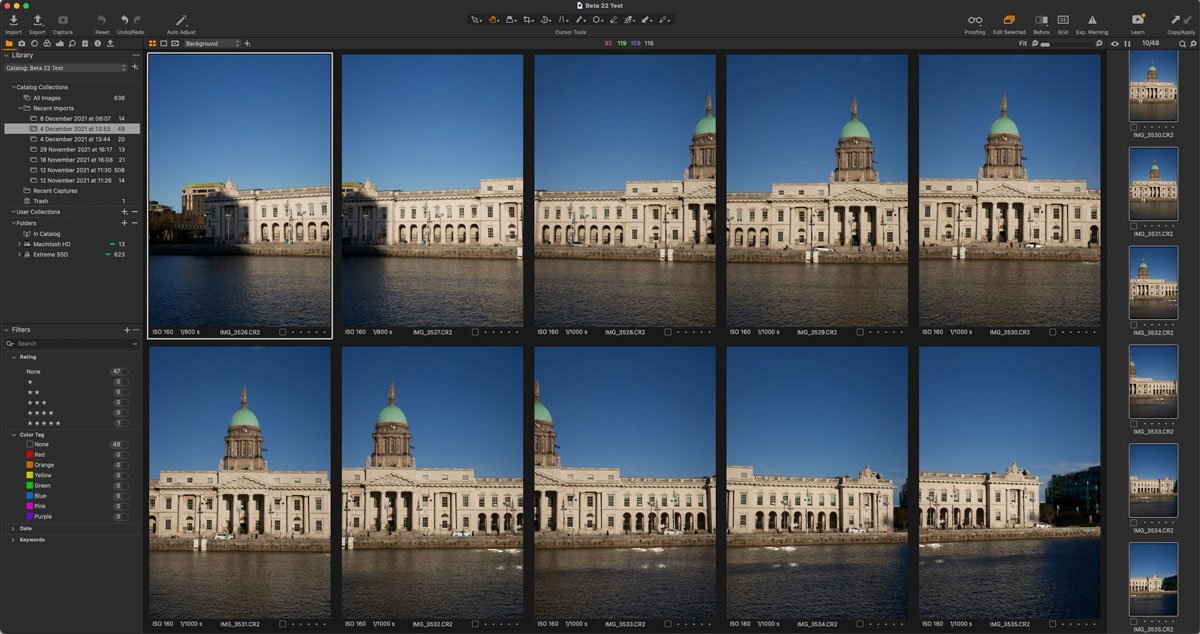
To stitch a Panorama, you select the images you want to combine, and then right click on them and select Stitch Panorama from the contextual menu. You can also find this command in the Image menu.
This will open up the options window where you can select the panorama type. The main viewer will give you a preview of the panorama, and across the bottom are thumbnails of the selected images. The weird thing here is that the thumbnails look like they have check boxes on them, but these don’t seem to do anything. I had thought that maybe it would let you deselect an image so that it's not included in the stitch, but they don’t seem to be selectable.
Panorama Merging Window in Capture One 22
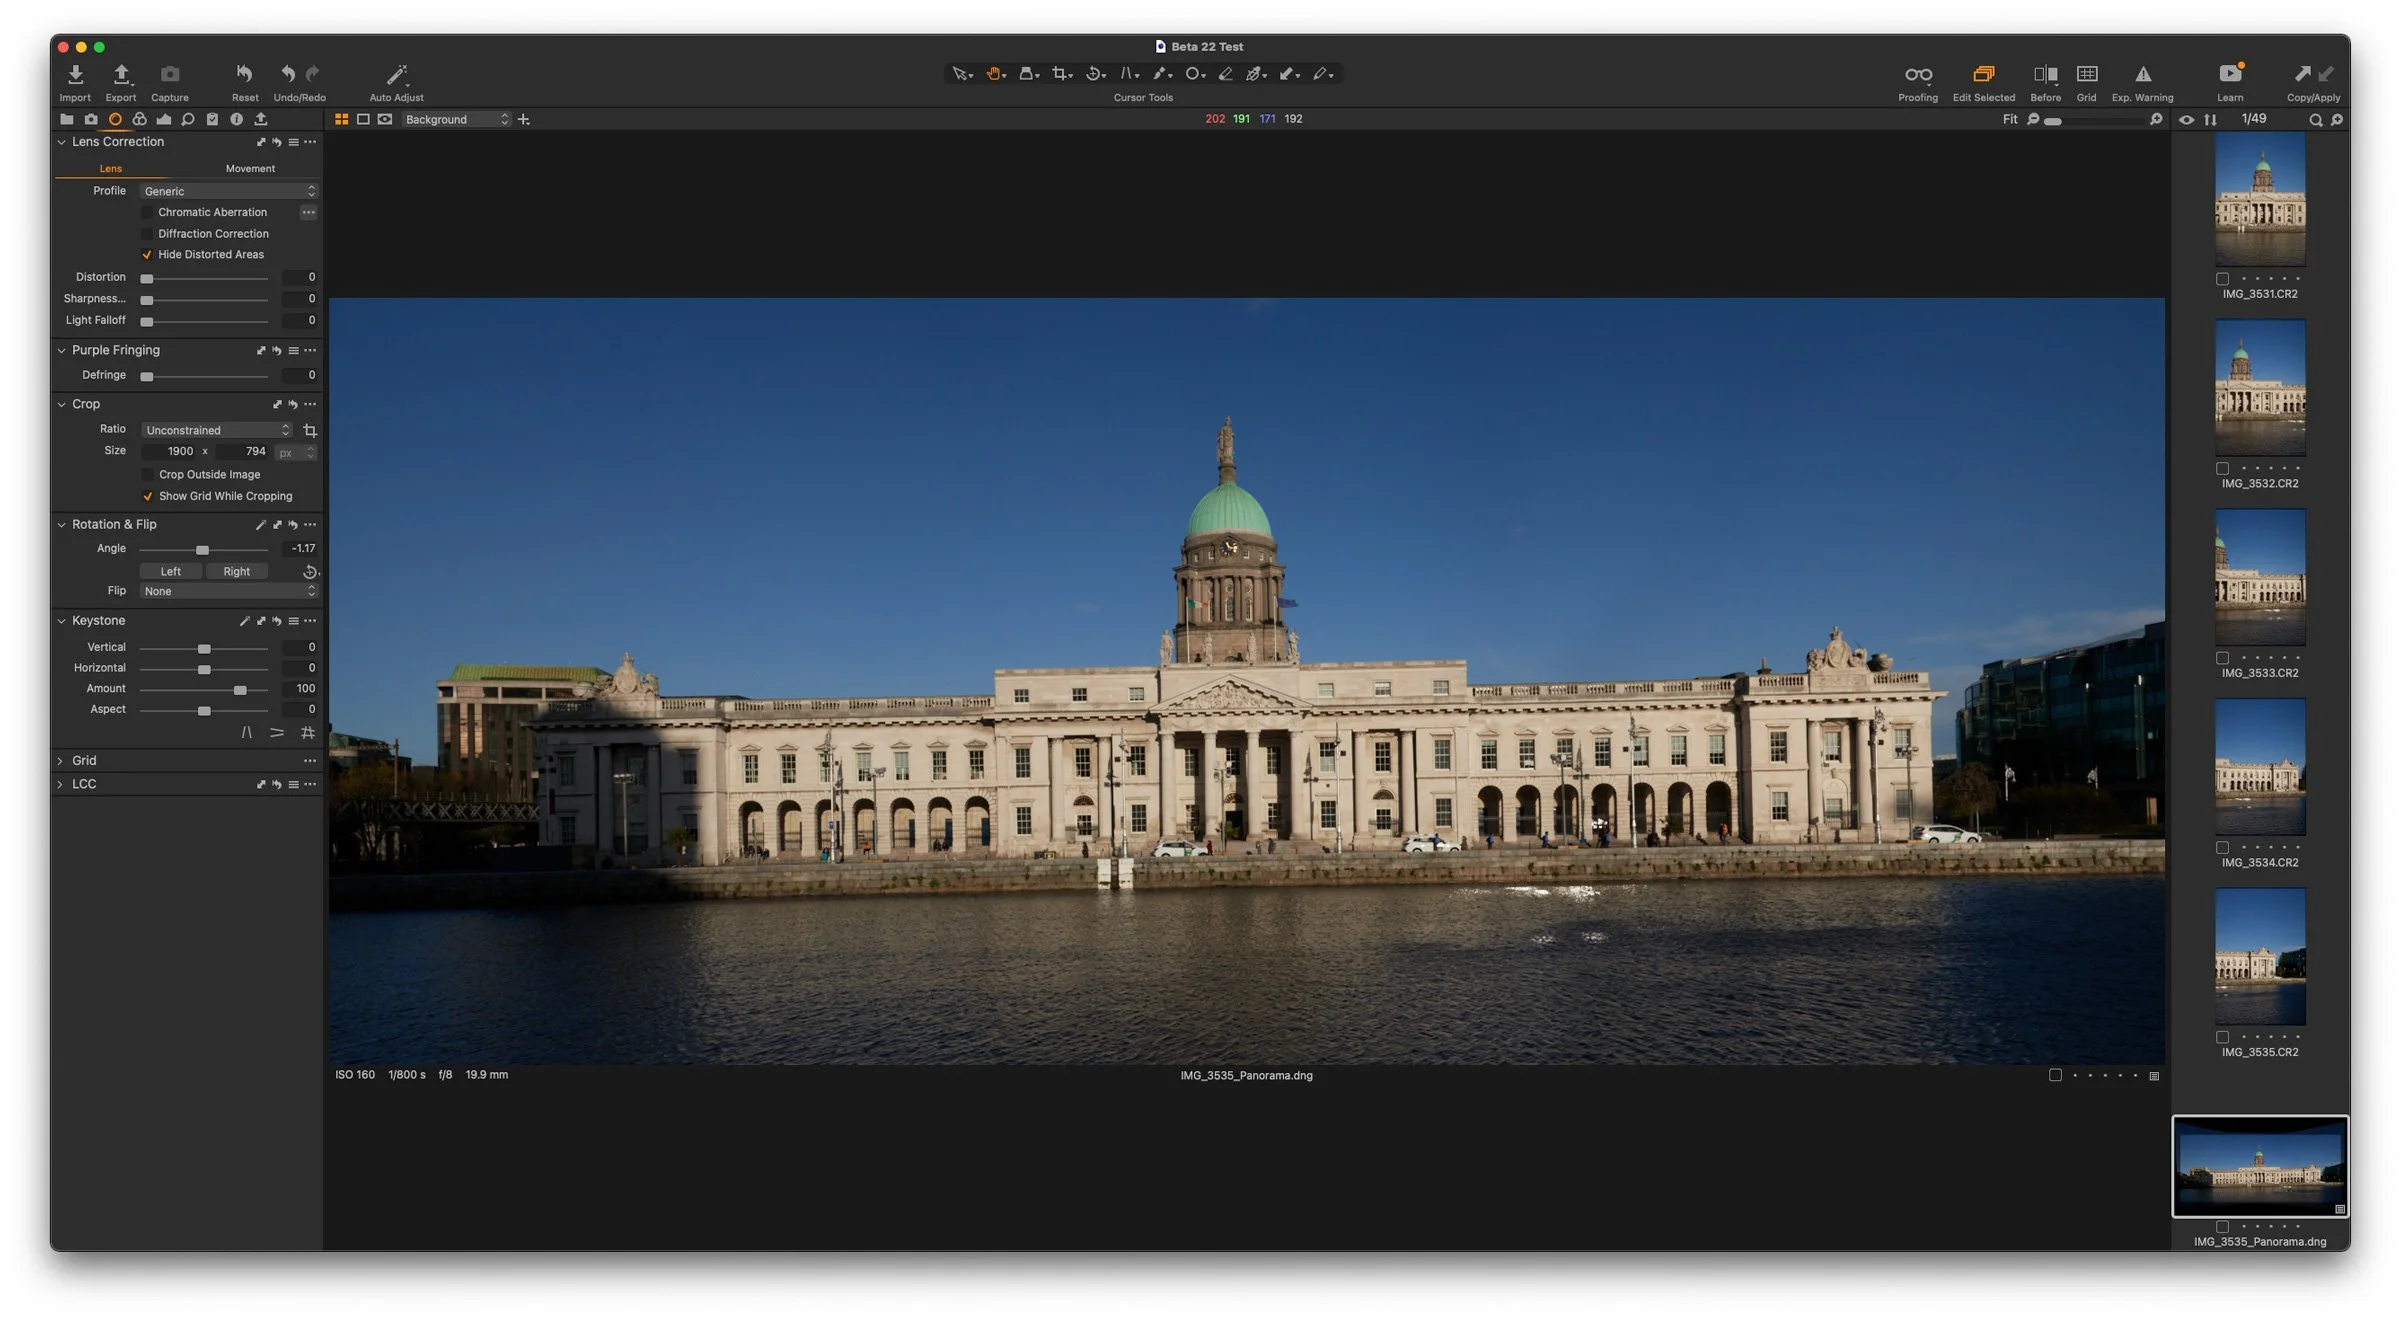
One option that it has that Lightroom doesn’t is the ability to scale the resulting panorama. If you have something like a 100mp camera, and you shoot a panorama with 6 images for example, the resulting panorama will be huge. This is a very useful option to make the resulting file more manageable.
At this point, you’ve probably noticed something missing from the screenshot above. It doesn’t auto-crop. You’re left with black empty areas around the image, and you have to then crop it manually. This seems like a glaring omission, and I’m not certain why they would leave this out, unless there’s some weird patent issue or something.
I’ve tried this on several sets of images over the past week. I had some from my archive, and I even went out and shot a few specifically. For the most part, the results were perfectly fine, and broadly in line with what you would get with Lightroom. I did find though, that sometimes, doing the same images in Lightroom and Capture One would give you slightly different results (different perspective on the final shot etc) but for the most part, they are pretty good.
Speed is pretty good too. On my M1 MacBook Pro, to merge 9 20 mp images it took about 15 seconds. On other tests with 5 images, it was somewhere between 5-10 seconds.
I did notice a few occasions where you would get issues with seams being a little visible. You do get this with Lightroom occasionally too, but on two of the shots I tested, this was noticeable.

Seam in Panorama

Note the seams and pattern in the water.
It’s easily fixed in most cases, and for the most part, I’d be happy with the results. In fact, one of the Panoramas I created to test this, I was so happy with it that I’m going to order a print of it for my wall. Here’s the image below with some additional editing and photoshop work (to remove the people and Silver Efex pro for the black and white conversion).
HDR
HDR merging is the other hyped feature, and like panorama stitching, this is a feature that Lightroom has had for some time and Capture One has been missing. Unfortunately, the implementation here isn’t as good as the panorama function.
Images to merge to HDR in Capture One 22
To merge a HDR, you select a few images and then choose the option to merge to a HDR. You get two options: Auto-Adjust and Auto-Align.
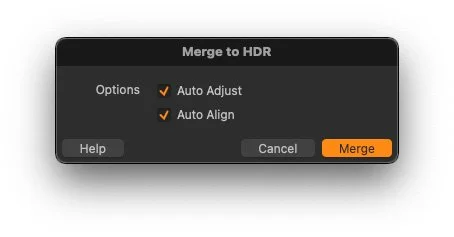
Auto-Align will align your images so if you had shot hand held it will align the individual brackets. This works fine most of the time and is similar to most HDR software.
Auto-Adjust will apply auto settings after the merge to give you some initial pleasing results, but to be honest, the results I’ve got with this almost always need significant editing afterwards.

Default results after merging HDR images

Results after some editing
There are no de-ghosting options, and this becomes apparent in the results.
This would be problematic enough, but the software doesn’t apply lens corrections to the HDR images. This can be a small or a big problem depending on your lens. You can manually apply a profile after you’ve merged it, but if you use a solution that takes the metadata from the camera, you’re out of luck. This is especially bad on compact cameras, which require a large amount of lens correction. Here’s what happened after I merged a set of bracketed images shot on a Canon G7X Mark II. To fix this, I had to manually apply the lens distortion profile but even then it wasn’t properly fixing the chromatic aberration. It’s not a massive deal, but I just seems like an oversight not to set this based on the original images. The list of lenses is quite long and can take a while to fins the right one when you have to set it manually.
Furthermore, if you shoot with a Fuji camera, you can’t apply the Film simulation profiles to a merged image. You can select them in the interface, but they don’t do anything – only the basic ones. I can understand why this wouldn’t work though.
The results I got from testing were varied. For the most part, they merge fine, but you do end ups with some fringing and ghosting, especially in areas where there are trees in the wind or water, or other fast changing textures. Here’s an example.
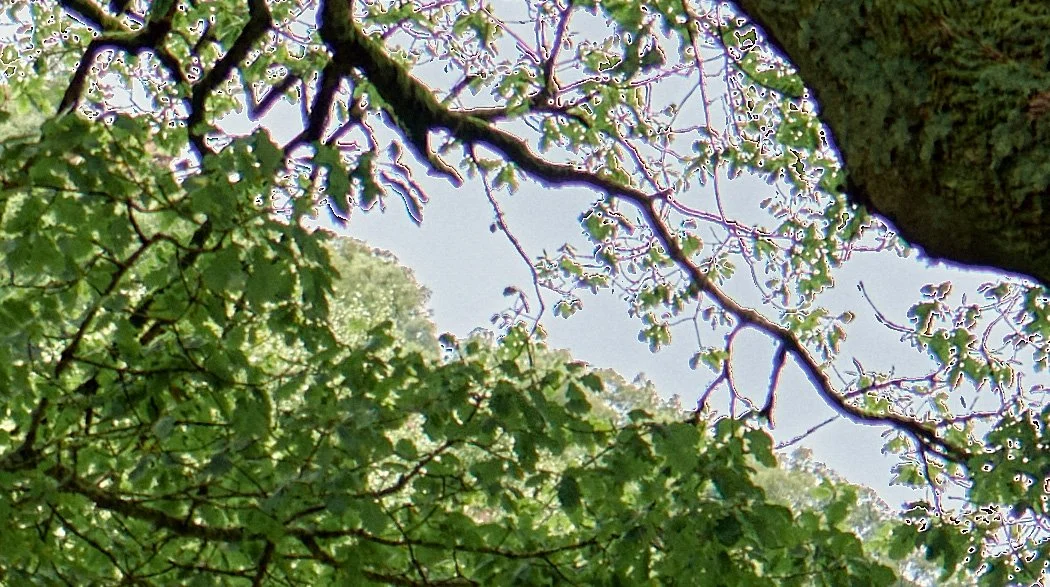
Ghosting in the image. Note that these brackets were shot on a Tripod with a timer so there was no vibration
Overall, I think the HDR merging could be better. It’s not unusable, but it needs some work to improve the interface (or give it one) and add key features like deghosting options and automatic lens corrections.
Auto-Level
Another new feature is a newly re-worked auto-level feature. The old one only worked with certain Phase One cameras (I’m guessing they had digital level information in the metadata) but the new one uses AI to automatically straighten your image. The idea being you can straighten a whole set of images at once. Well, that’s the theory. In practice, it’s almost comically bad at times.
In my experience it works about 50% of the time, but I haven't run hundreds of images through it, so its possible I’ve just been feeding it tricky examples, or been unlucky. If there is an obvious straight horizon it seems to work fine (but even then it sometimes gets it wrong – see below), but for other things, where you can clearly see where the horizon should be it has trouble. Considering it is AI-based, it should have this much difficulty, so I can only assume it hasn’t been trained on a large enough data set.
Capture One thinks that this is level
This is also level according to the software
Wireless Tethering for Canon Cameras
The last feature is wireless tethering for Canon Cameras. I don’t have a compatible model for testing it, but it currently supports the following cameras:
Full Support
- CanonR5 (WFT-R10 grip recommend for optimal performance)
- Canon1DxII (WFT-8B adapter recommended for optimal performance)
- Canon1DxIII (WFT-E9B adapter recommended for optimal performance)
Partial Support
- CanonR6
- CanonR
- Canon5DIV
- Canon90D
More cameras are expected to be added in the future.
New Camera and Lens support
There is also support for some new cameras and lenses. Details below:
New Camera Support
Sony A7 IV
Nikon Z9
Canon R3
New Lens Support
Canon RF 50mm F1.8 STM
Canon RF 85mm F1.2L USM DS
Canon RF 85mm F2 MACRO IS STM
Canon EF 70-200mm F4L IS II USM
Conclusion
That’s pretty much the round up of what’s new in Capture One 22. If the past few years have been anything to go by, we can expect more new features throughout the 22 releases, but this has at least addressed some of the biggest gaps in functionality compared to Lightroom. These are welcome additions, but both fall a little short of their Lightroom counterparts, and need some polishing. The auto-rotate feature was not ready for prime time, though, in my opinion. They should have saved this for when they had done a lot more training on the AI. As it is, it’s not good.
Someone asked me on my Facebook group if I would recommend an outright licence over a subscription version. In the past, I would have favoured the former, but now I’m beginning to think a subscription is the better option. It’s less expensive up front, and regardless of where you are in the release cycle, you’re not penalised for future updates. I do appreciate though that some people still prefer the permanent licence, so it’s good they offer both options.
Capture One 22 is available now from the Capture One store, and a 30-day trial version is available.
For a complete list of all the new features and bug fixes you can find the release notes here.