
How to use Super Resolution with Capture One
I’ve had a few readers ask me about using Adobe’s “Super Resolution” with Capture One. I had thought that this would be a relatively straight forward process, but unfortunately it seems to be a bit more involved that I first assumed. I had speculated that you could just open a DNG file created with Super Resolution in Capture One, but for whatever reason this doesn’t seem to work properly (more on this below). So, while you can’t use the DNG files directly, you can still use a Tiff or PSD. The workflow is a little more convoluted than perhaps it needs to be, but in this post, I’ll outline my suggested way of working with Super Resolution and Capture One.
Why don’t the DNGs work?
I had assumed that you could use Capture One’s “open in” command to send a file to Photoshop and Camera RAW, then use the enhance tool to create a Super Resolution DNG file, and then just sync that back to Capture One. However, when you try this, Capture One still loads the same resolution image as the original for some reason. I suspect that Camera Raw is embedding the original resolution file in the DNG as well as the enhanced version, and Capture One is opening that instead of the upscaled image. That’s the only thing I can think of as to why this would work the way it does.
To test this further, I tried opening the Super Resolution DNG file in a number of other applications, and I get similar results. Whatever they’re doing, it does not seem to behave as a standard DNG file. I couldn’t find any application that would open one of these files other than Photoshop and Lightroom.
[UPDATE] According to users on this thread on DpReview - this is a known problem, and the reason for this is that Capture One and most software is using an older DNG spec - where as Photoshop is using the latest, and the older version doesn’t support the embedded super resolution file. Hopefully this will change in a future release of Capture One.
If anyone knows of a way to get Capture One to open the super resolution enhanced DNG file and keep the upscaled resolution, please let me know.
The Solution
Because Super Resolution will work with Tiff and Jpeg files as well as RAW the simple solution, for the moment, is to send a tiff file to Photoshop and use that. Alternatively, you can still send the RAW file, and open with ACR but you will loose your Capture One edits, so the easiest and best solution in my opinion is to use a Tiff. But just to make this more complicated, you may need to change a setting in Photoshop first.
By default Photoshop will only open a Tiff file in Camera Raw (instead of just loading it straight into photoshop) if it detects a settings file to go with it (and XMP file). However you can change this behaviour. Here’s what to do:
Go to Photoshop
From the menu choose: Photoshop > Preferences > Camera RAW (On a PC this is Edit > Preferences > Camera RAW)
Select the file handling tab
Change the settings for Tiff to: Automatically open all supported Tiffs
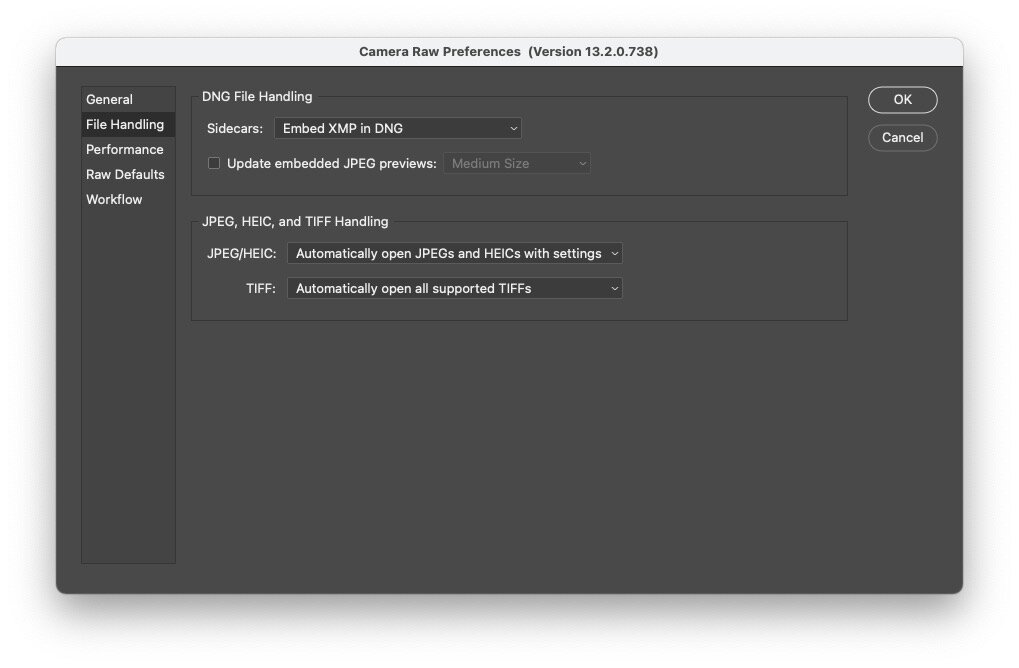
Note that this will now open Tiffs in Photoshop using Camera RAW all the time, so you may need to set this back when you’re finished.
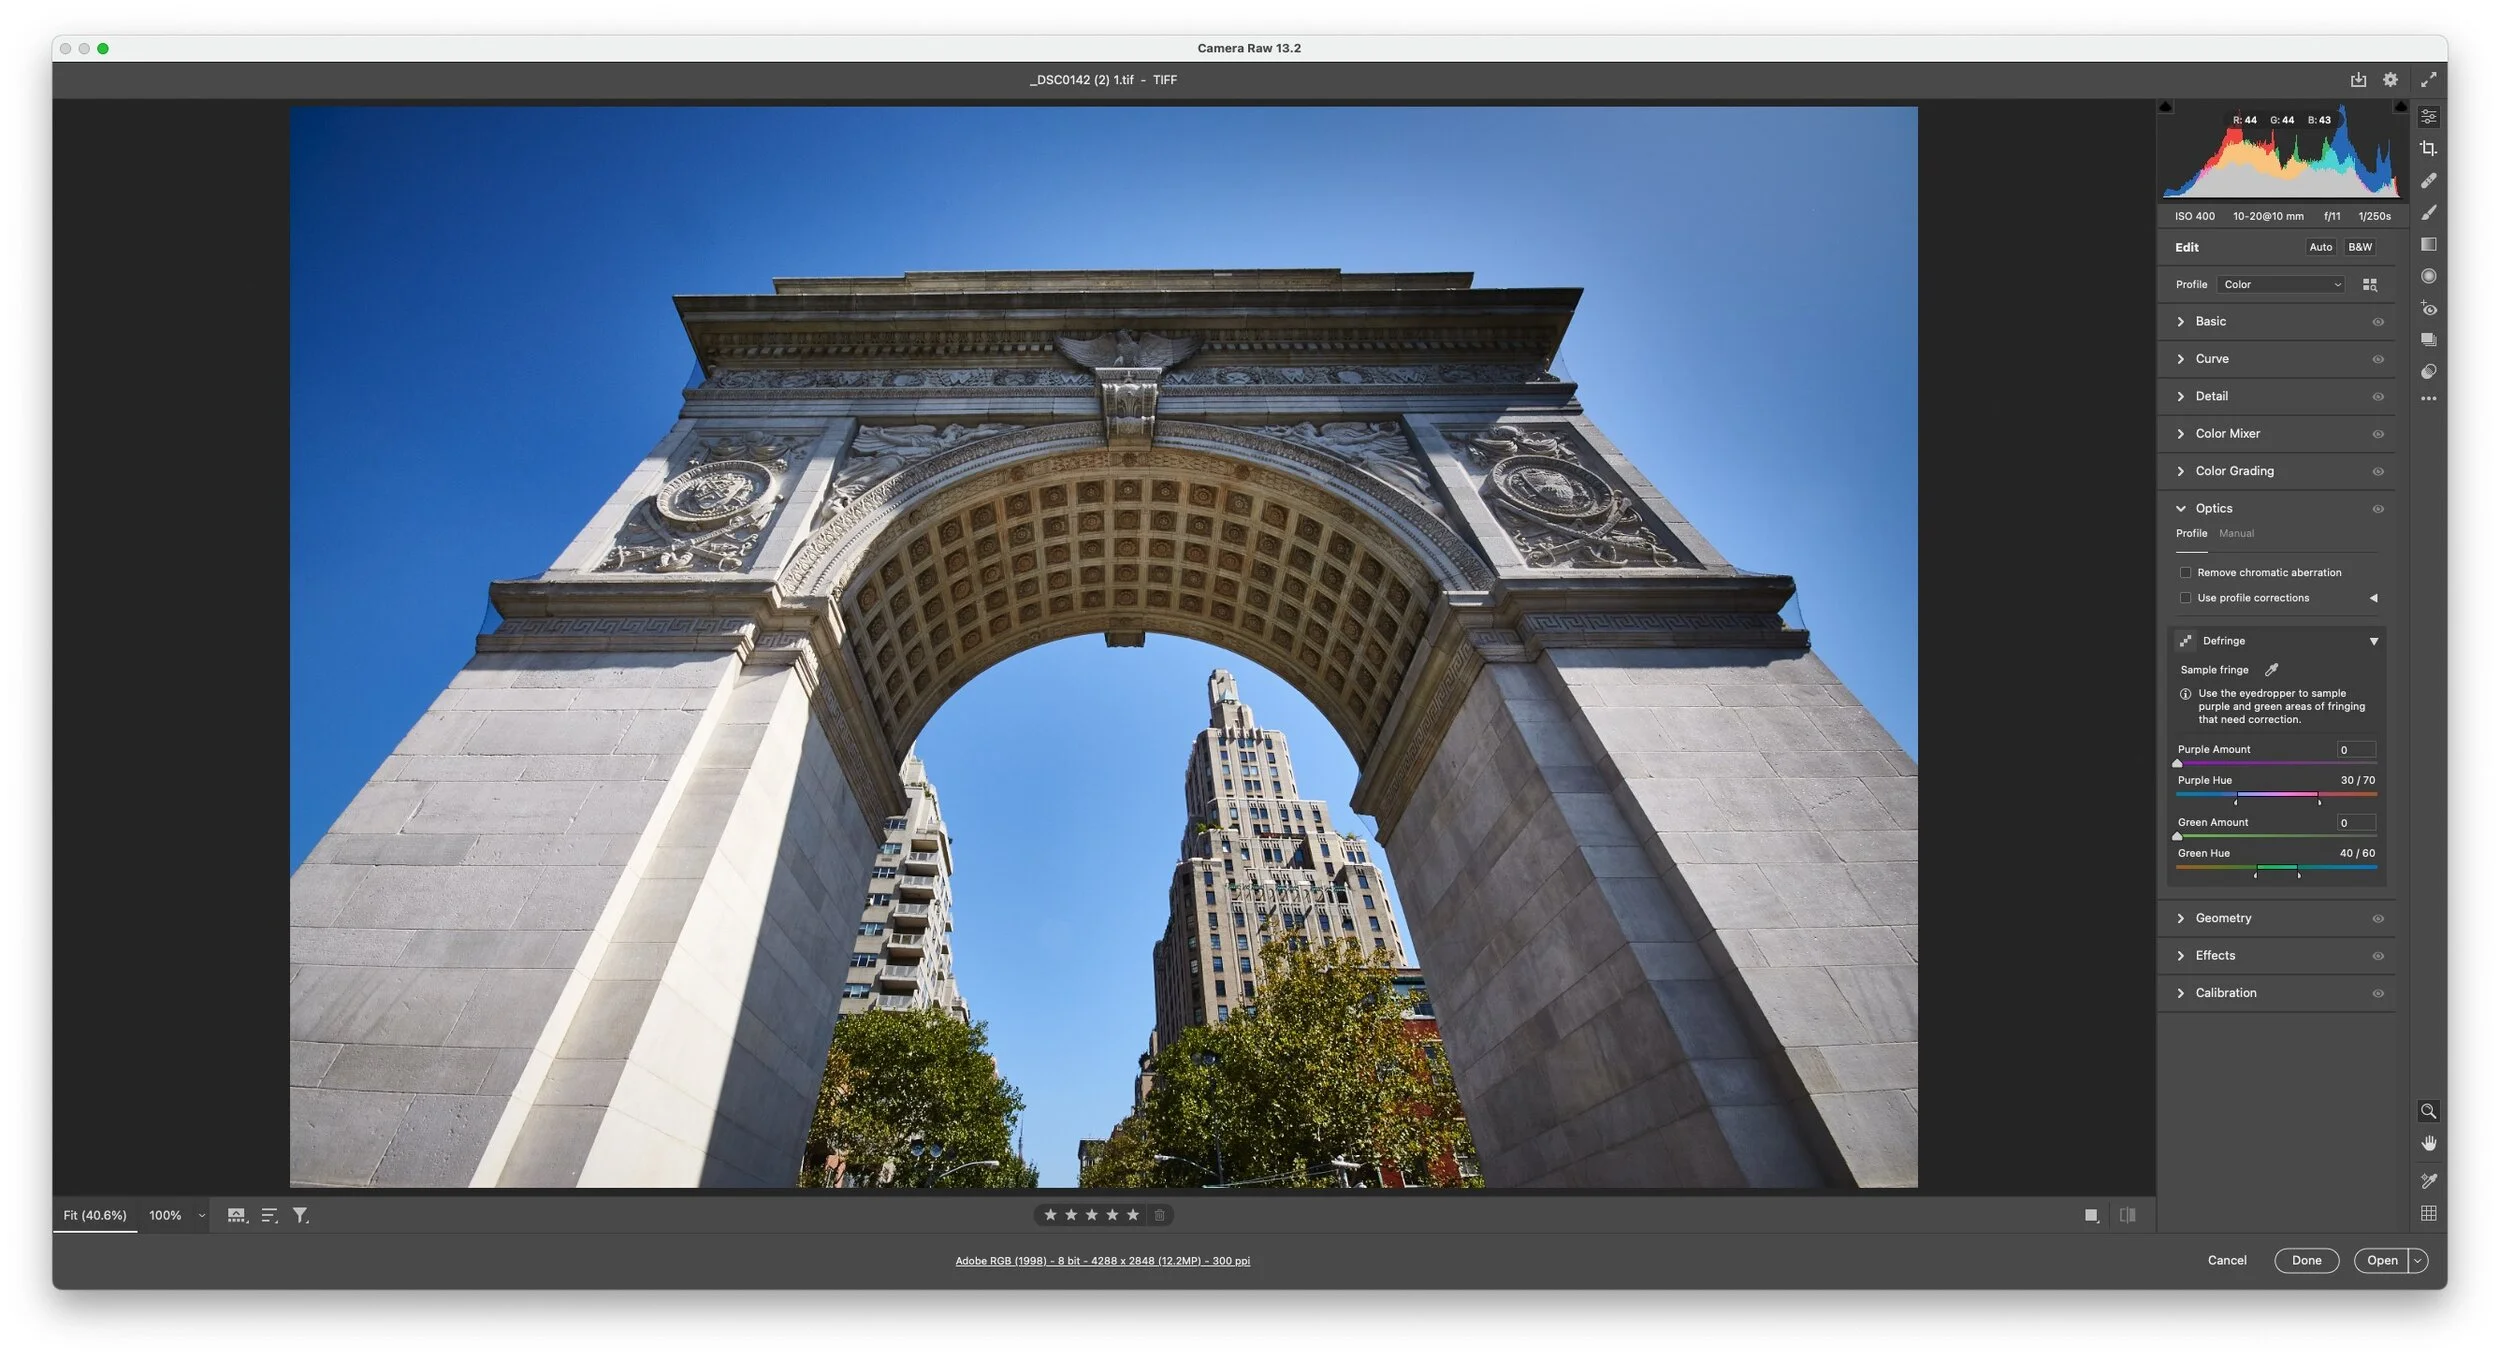
You can now send your images from Capture One to edit. Here’s what to do:
Step1: In Capture One select the image on which you want to use Super Resolution
Step 2: From the menu choose: Image > Edit With > Photoshop > Photoshop 2021
Step 3: Set your options in the dialog that pops up. Make sure to use Tiff (not PSD) and I recommend 16bit.
Step 4: Choose Edit Variants
Step 5: This should open the file in Camera RAW inside of Photoshop
Step 6: Right click on the image and choose Enhance
Step 7: This should bring up the enhance preview. The only option you will have here is Super Resolution
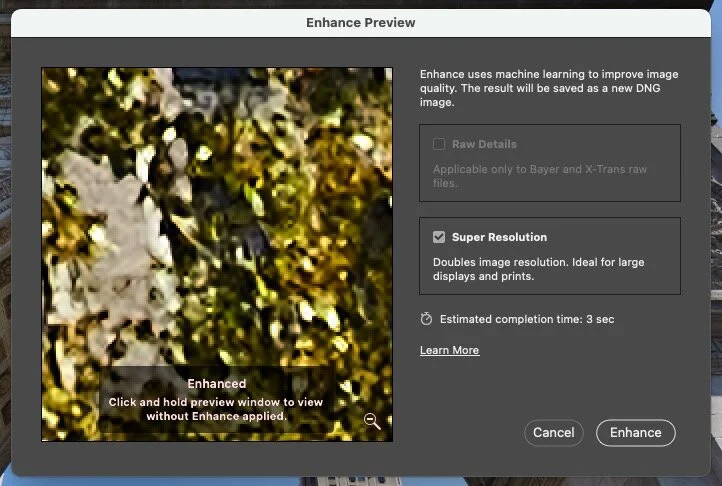
Step 8: Click enhance
Step 9: Make sure the thumbnail browser is open in Camera Raw
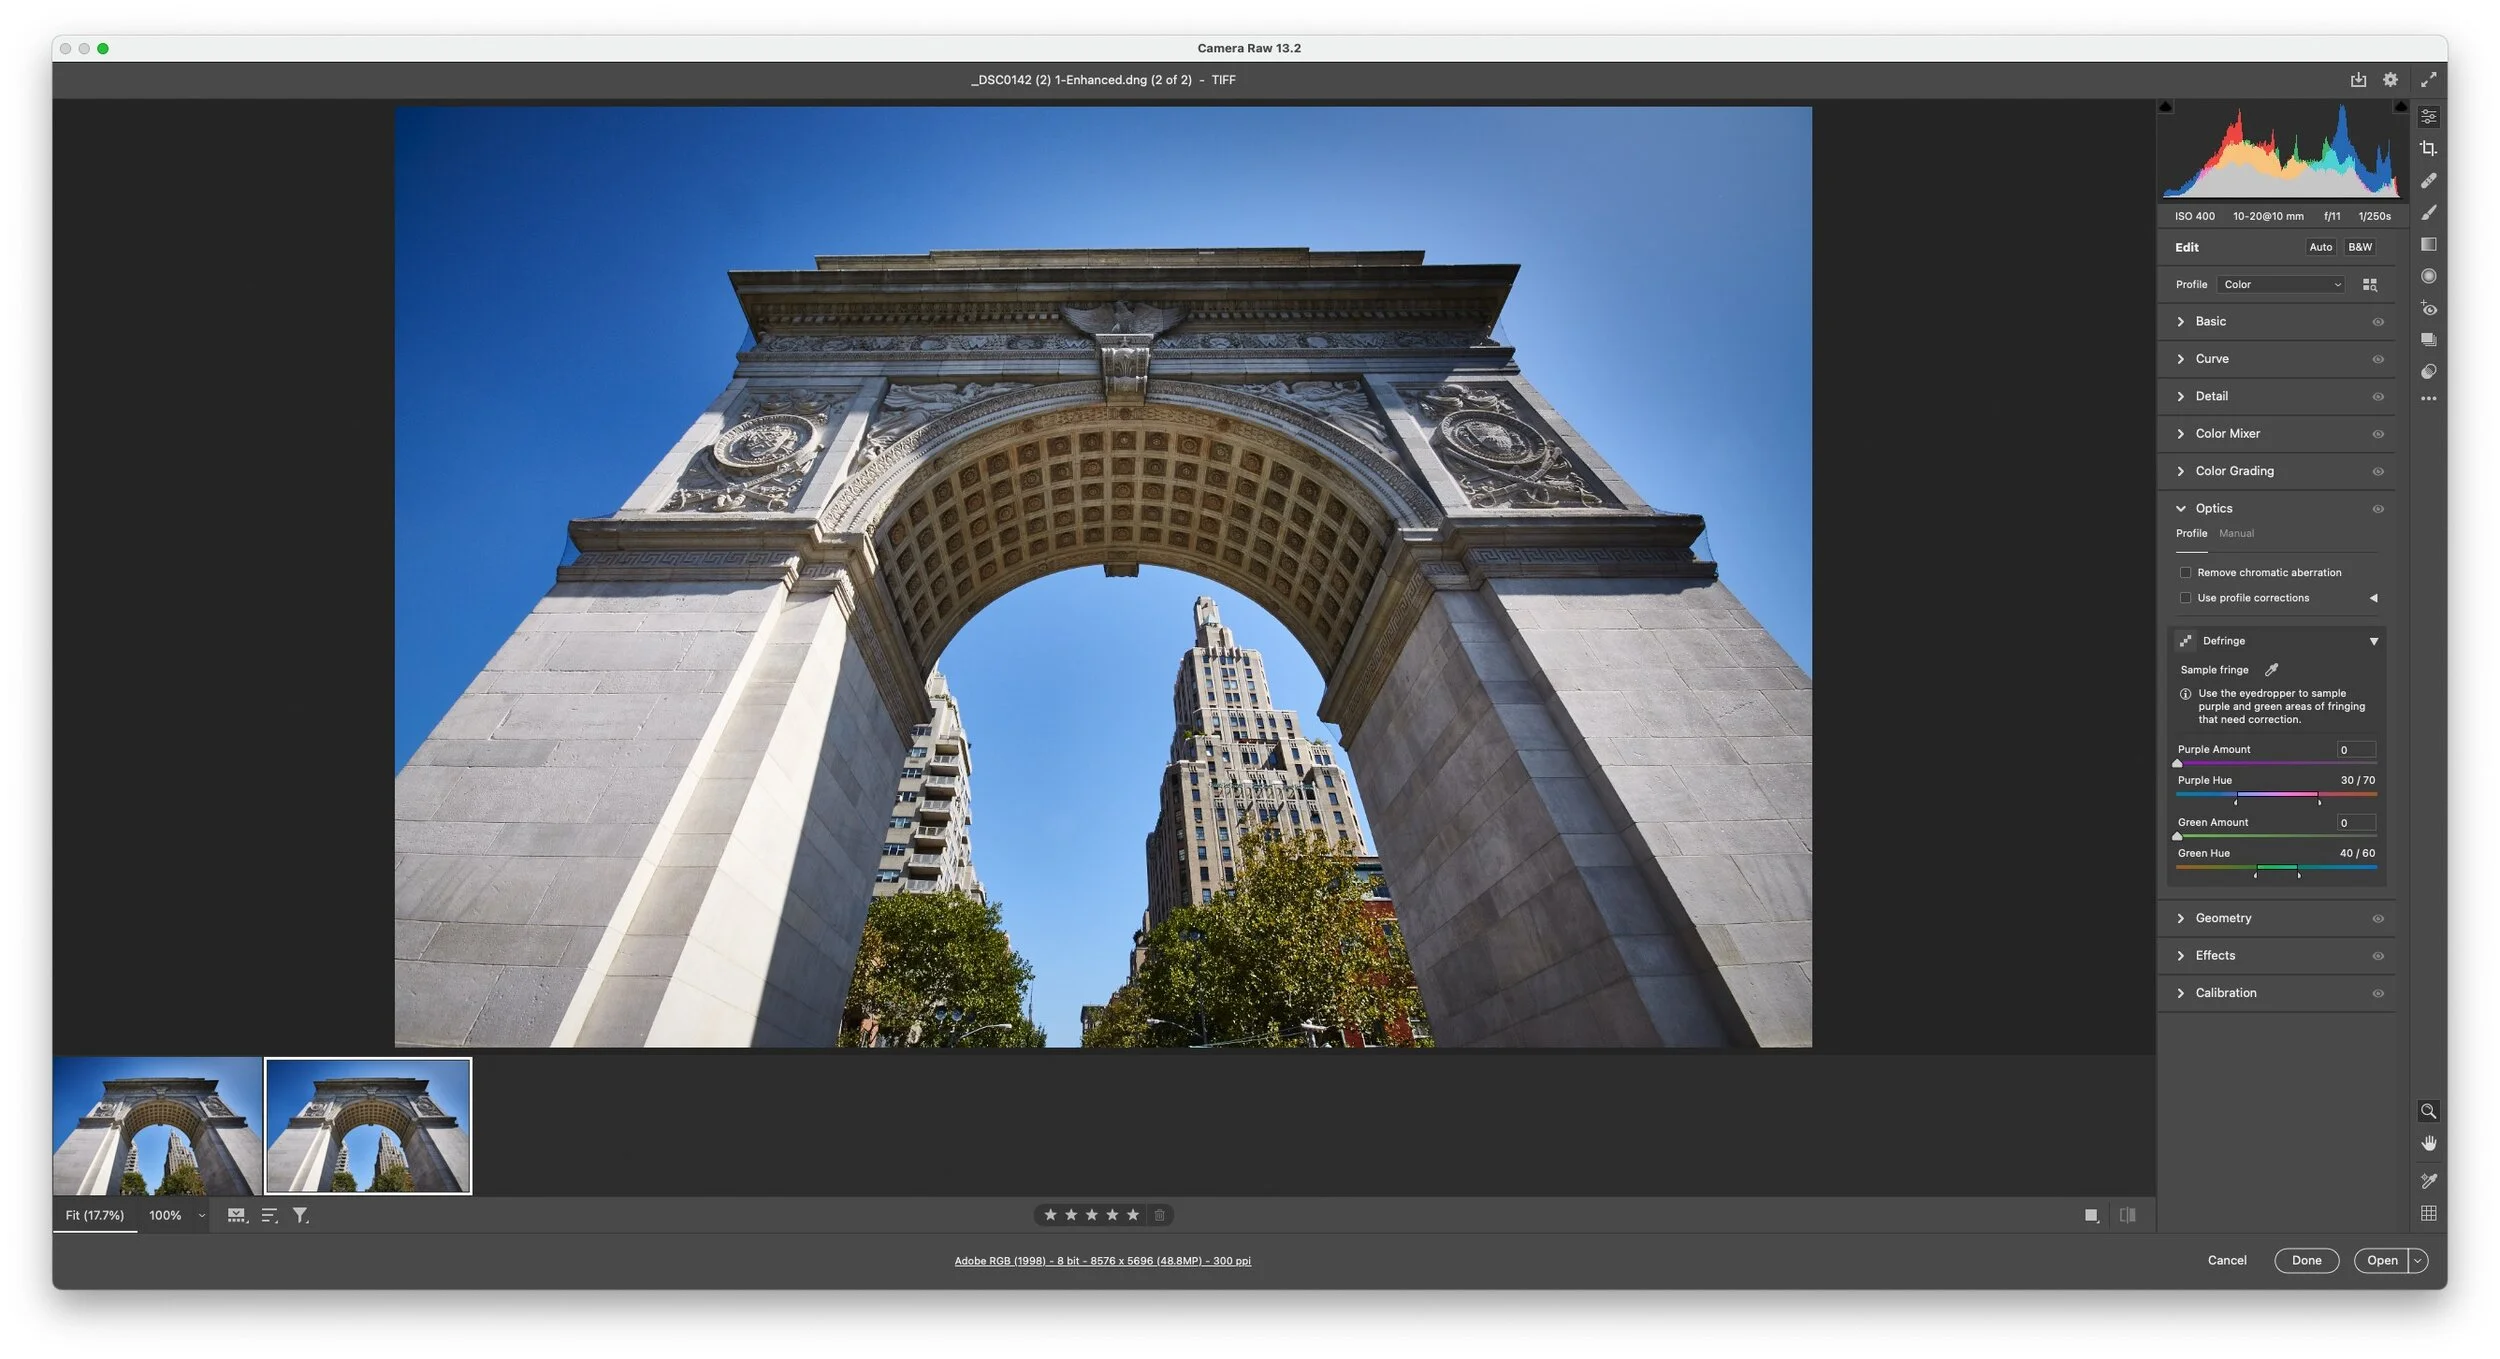
Step 10: Select the newly created DNG file (it won’t be selected automatically)
Step 11: Click open to open it in Photoshop
Note that using super resolution on non-RAW files doesn’t seem to produce as clean a result as it does working with RAW files, but it does still work.
To send the file back, you need to save it from photoshop as a Tiff file. The easiest way to do this is to save it over the Tiff that Capture One created when sending the image to Photoshop in the first place. Here’s what to do:
From the file menu choose Save As…
Navigate to the folder the original file is located in
To make it easy to find, change the folder sorting to date modified, with most recent first
The Tiff file should be the second from the top (the top should be a DNG file). Click on this image to load the name in the save as field in the dialog box.
Make sure to select Tiff form the format pop-up
Photoshop should ask you if you want to overwrite the file. Say yes
Switch back to Capture One
It may take a few seconds before the edited image loads and replaces the existing Tiff file.
Obviously, I don’t think that this is the ideal workflow. I don’t know why the DNGs don’t work directly, but it is obviously something Adobe is doing, as DNG is supposed to be a standard.
One tip I would suggest, is make sure the image isn’t over processed in Capture One to begin with, and especially make sure the sharpening isn’t too hight. In fact, you could turn it down to get a better result, then add sharpening to the returned Tiff if necessary.
The alternative option is to send the raw file and do your Raw Processing in Camera RAW rather than using your edited image in Capture One. To do this, simply choose “Open With” instead of “Edit With” to send the image to Photoshop. This will send the RAW file instead of an edited Tiff. When the RAW file opens in Camera Raw it will loose any edits you may have done, and it will look different to how it did in Capture One. This is normal, as it will be using he ACR engine to decode the RAW file. The rest of the workflow should be more or less the same, except you will have to save it as a stand alone image (there will be no tiff to overwrite) and then sync the folder in Capture One to get the resulting image to load.
Conclusion
So there you have it, a little convoluted but workable workflow for using Super Resolution with Camera RAW in Photoshop. Hopefully, the compatibility issue with the DNGs will get solved in the future, and you will be able to load the DNG files for editing, but for now this workflow should let you use the feature at least. By the way, if you haven’t seen it already, check out my previous post on Super Resolution where I looked at the feature in detail and when and why you might want to use it (and more importantly why you shouldn’t).
Help Support the Blog
Try or Buy Capture One
If you don’t already have Capture One, you can download a 30 day trial now from the company’s website. If you do go to buy it, Capture One Pro is available in both subscription and perpetual licences available, in versions for all cameras, Fuji specific , Sony specific or Nikon specific. The Fuji, Sony and Nikon versions only open raw files from cameras of the respective manufacturers, but other than that, they are identical to the full version.
If you buy through the above links, we get a small commission, which helps run this site.
Check out my Capture One Style Packs
If you’re looking for some Film Effect, or black and White style packs for Capture One, check out my Capture One styles on my Gum Road Store.
Patreon
If you like what you see here and you find this useful, then you can help support this blog and help me keep making great content like this by supporting me on Patreon for as little as $1 a month. There are a number of options available with different rewards, such as behind the scenes content, special Patreon only videos and more. Check out my Patreon Page for more details, and a big thanks to everyone already supporting this blog on Patreon.
Buy me a coffee!
If you’d rather not use Patreon, but still want to say thanks or help, then you can feed my caffeine habit and buy me a coffee via PayPal with a one off donation to my PayPal tip jar.
Join our Facebook Group
If you want to discuss anything you’ve read here on my website, or saw on my youtube channel, or if you want to share images you’ve created using any of my techniques or presets, then I’ve started a new Facebook Group just for that.
Note that this post contains paid affiliate links. We get a small commission for purchases made through these links, which helps run this site.