Thomas is a professional fine art photographer and writer specialising in photography related instructional books as well as travel writing and street photography.
As an experiment, I asked Chat GPT to write a complete blog post. I asked for ideas on street photography and it suggested street photography ethics, which I then asked it to write a full blog post on. I'm sharing the unedited post as it was written by Chat GPT, along with some thoughts on the result. It's fascinating to see what an AI language model can create, and I invite you to read the post and discover what Chat GPT came up with!
I recently set about testing my new(ish) Sony 16-70 mm lens out for street photography, and I decided to film it for another episode of Street Photo Diary. I was also trying out a new GoPro to film the POV shots. I had previously used an old GoPro Hero Session to do these, but the quality wasn’t great and the battery, which can’t be replaced, would only last about a half an hour (after a few years of use).
I first visited Cambridge a couple of years ago and I absolutely loved it. This was my third visit since then and my first visit post lockdowns. There is something really nice about the city. It’s small, like a big town, and it has a combination of history and grandeur as well as the peaceful parks and riverside. It also has great cafes and great food.
Some people prefer posting their photos to instagram using a frame, with white borders surrounding the image, n order to preserve the original aspect ratio. People are quite divided as to whether or not this is a good thing to do or not, but if you want to do it, there are lots of ways to go about it. If you use Lightroom, there’s actually a pretty easy way to get the white border effect inside of Lightroom, without having to use plug-ins or go to Photoshop.
Lightroom Classic used to have a terrible reputation for performance. Certainly, older versions of the software had some serious speed issues, but over the past few years, Adobe has worked to improve the responsiveness of the application. It’s now it’s a far cry from the way it used to be. However, If you have a modern computer, and you’re still experiencing a slowdown with Lightroom, there are a handful of common issues that could be causing it.
The Enhance function in Lightroom has been around for a while now. It was originally called “Enhance Details” but changed its name to just “Enhance” when the super resolution feature was added. For Fuji shooters, Enhance offers a way to get improved demosiacing inside of Lightroom without having to use third-party software. Using it on Fuji RAF files can provide significantly better rendering of detail in Fuji files, but it does come with some downsides.
When I closed my old digital download store a few years ago, I stopped selling most of my Lightroom presets. I figured that the market for these was pretty much saturated and that there wasn’t really any point. However, recently I’ve been receiving some requests for some of my older packs, and after using m T-Pan set on the most recent episode of Street Photo Diary, I’ve decided to make T-Pan available again.
My most popular series of videos on YouTube by far was “street photo diary”. It’s a series that I loved creating, but it has been on hiatus since 2019 and the pandemic hit. Well, I’m delighted to say that I’ve finally created a new episode, and it’s up on YouTube now. In this video I take my new Fujifilm XE-4 on a photo walk around Dublin City to see how well the camera works for Street Photography, and to see how it will fare as a replacement for my ageing Sony A6000
The topic of how best to process Fuji raw files has been a long-running topic on this website. I’ve covered it extensively in the past, including a previous version of this article. However, over the past two years since the last time I updated this, there have been a few changes to the landscape, and so it’s time to write an updated version. So, what are the best options for Fujifilm raw processing in 2022? (In my opinion)
One of my most popular Capture One posts on this website is the post entitled “Capture One vs Lightroom from someone who uses both”. I last updated this earlier this year, but since then, a lot has changed. With the release of Lightroom 11 which brings the new masking architecture, and Capture One 22 which adds Panorama stitching and HDR merging. This changes the dynamics of my previous arguments for each, and so I wanted to offer an addendum.
Capture One has released a new beta version of the software, that adds a much requested feature. The new release adds AI noise reduction to the photo editing application, and while currently only in Beta, it looks promising.
I’ve had my Fujifilm X-E4 for a long time now, and for the most part it’s a great little camera. I’ve used it as my main “lightweight” travel and walk-around camera for years now. Any time I want to bring a camera with me and I don’t want to lug my Canon R6II, I throw the Fujifilm in the bag. I had originally bought it to replace my ageing Sony a6000 for street photography, but that never really panned out. Mainly because I didn’t do street photography as much any more, but also, an annoying bug in the camera made it difficult to use with my style of street photography. But I finally found a solution.
This is one of those things that you might only ever come across once in the blue moon, but when you do, it’s useful to know how to fix it. If you’re shooting with a wide-angle lens, something like a 24mm or wider, and you have people at the edge of the frame, they can be distorted. This is especially true when shooting in portrait orientation and looking up. Like I said, this is a very specific situation, and it’s only by chance that I knew how to fix this.
Capture One and Canva have recently announced that Capture One will now support native Affinity files in the photo editing application. In conjunction with an update to Affinity, you can now open and save native Affinity format files in Capture One. I can’t emphasise enough how important a step this is. If you wanted to use Affinity with Capture One before this, you would have had to use the TIFF or Photoshop format, but that was an absolute pain for round-tripping because you can’t save directly in Affinity to TIFF or Photoshop; you had to export from Affinity and overwrite the file from Capture One or manually re-import. Now, round-tripping is basically as seamless as working with Photoshop.
Last week, Blackmagic Design announced the release of the beta version of DaVinci Resolve 21. One of the new features of that release took everyone by surprise: the software would now support photo editing. Resolve 21 now has a photo page which lets you work with RAW and non-RAW photos, with RAW support from a variety of manufacturers. Not only that, but you can use the full (almost) colour and Fusion pages with your still photos for complex colour grading and image editing. It’s a pretty big deal, although there are still quite a few limitations in the current version.
DXO has just released the latest version of their venerable photography plug-in suite. Nik Collection 9 adds a whole host of new features, including some across-the-suite changes and some new filters within the individual applications. There are some very useful new changes, including AI and depth masking, as well as blend modes in some of the applications. I had access to the beta version for a few days, and here is my first look at the new suite. There is actually quite a lot going on in this, so I’ll do my best to cover everything, but I may have missed a few things.
Adobe’s latest Lightroom Classic update makes AI tools like Denoise and Super Resolution far less disruptive by moving their processing into the background, so they no longer take over the app, which is especially helpful when working through large batches. The update also includes a handful of performance improvements, better assisted culling detection, PSB sync support, and other smaller additions.
It’s long been rumoured, threatened, and fantasised about, but Apple has finally put the Mac Pro out to pasture. While many people will either be unmoved by this or actually think that this is a good thing, personally I am a little sad by the retirement. As someone who has used Mac Pros, and their predecessor, the Power Mac, for decades, it really does feel like the end of an era. And, while I still think Apple could have done much more with the high-end Mac, I also understand that its time had come. It’s still sad, though.
The most recent version of Capture One added a rather interesting new toolset: the ability to work with film negatives. The software now includes the ability to work directly with scanned negatives and handles the conversion process directly in Capture One. This is specifically designed for camera scanning, and is similar to “Negative Lab Pro” for Lightroom, although there are some differences.
I wrote a blog post a long time ago about one of my biggest regrets, photographically speaking. This was the fact that I sold my Canon 5D Mark II and 24-105f4L lens. I always loved that lens, and I really regretted selling it. As I had moved on from Canon at the time, I never went and re-purchased it. But, for the past two years now, my main camera has been a Canon R6II and for the most part, I’ve been loving it. However, I had only been using the kit lens that came with it, the 24-105 F4-7.1. Which is a fine lens in its own right. But still, I longed for my old friend, or at least the updated version. Finally, a couple of months ago, in a sale, I was finally able to get the RF24-105 f/4 L. Unfortunately my reunion wasn’t as happy as I had hoped. In the end, I was quite disappointed, but there is a twist in the tale here.
Hot on the heels of the recent PureRAW version 6 release, DXO has also updated PhotoLab to version 9.6. This update includes the DeepPrime improvements that were seen with PureRAW and also a new feature for working with masks.
The latest beta version of Photoshop 27.5 has introduced an impressive new tool that lets you rotate photos of 2D objects in 3D space using AI. You can literally take a photographed object and rotate it on any axis. It’s like something out of a SciFi movie! I made a video to demonstrate it in action…
Even though it was long rumoured, Apple still took the world by surprise last week when it announced the MacBook Neo. Apple’s new entry-level MacBook shatters the price floor for an Apple laptop, marking a previously unheard-of entry point for a new Apple computer. The resounding reaction has been mostly surprise at the price and enthusiasm for what this could do for the Mac market. I would say it’s the most important Apple product since the move to Apple Silicon. In fact, it could be one of the most impactful Apple Products since the iPod.
DXO have launched the latest upgrade to their RAW pre-processing software, DXO Pure RAW 6. If you’re unfamiliar with the application, it basically lets you convert Raw files to DNG using DXO’s technology, including the companies excellent noise reduction software, Deep Prime. It does so in a way that maintains edit-ability and so you can use it to work with software such as Lightroom or Capture One, but bypass their raw conversion engine to use DXO’s instead. The latest version adds a new version of DeepPrime for Beyer sensors, adds a feature people have been wanting since version one, and another new tool that was quite unexpected but works surprisingly well. Read on for the details…
I was recently in Edinburgh, Scotland for a week, and while I was there I had been planning to spend quite a bit of time out taking photos around the city. Unfortunately, the weather had other plans. It was pretty much raining and cold the whole time. And when I say cold, I do mean cold. But more than that, it was really dark. Like, twilight dark the entire time. So eventually, I forced myself to get out and shoot, regardless of the result, and said result wasn’t great. However, when I got back to my computer, with a little editing I was able to get a pretty decent image of the castle. As there was such a difference between the result I got and where I started from, It thought It would make a good tutorial video, and so here you go!
Adobe has just released new versions of its photography software suite, including Lightroom Classic and Lightroom Desktop. While mostly an under-the-hood release, there are a few new features, including the ability to you send your images directly to Adobe Firefly to create video from your photos using AI. You can also edit your images in firefly using AI. Other new features include improved Assisted Culling and Topaz Gigapixel support directly in Lightroom Desktop.
Following on from last week’s Lightroom video, where I showed you a feature of the software that not many people know about, I’ve done another collection of lesser known tips and tricks. This time, I’ve collected 5 tips that people may know some of, but may not fully know.
When you’ve been using software for a long time you often pick up tricks and techniques and they become habits and you forget how you heard about them in the first place. I was recently editing an image for a friend in Lightroom as they watched, and when I did the technique in this video, they were surprised as they had no idea you could do that. I then realised that perhaps there is quite a few people out there who don’t know that you can do this either. That technique is editing by dragging the histogram.
On Sale Now - 50% off
For more information about future plans for my Fuji Guides see this post
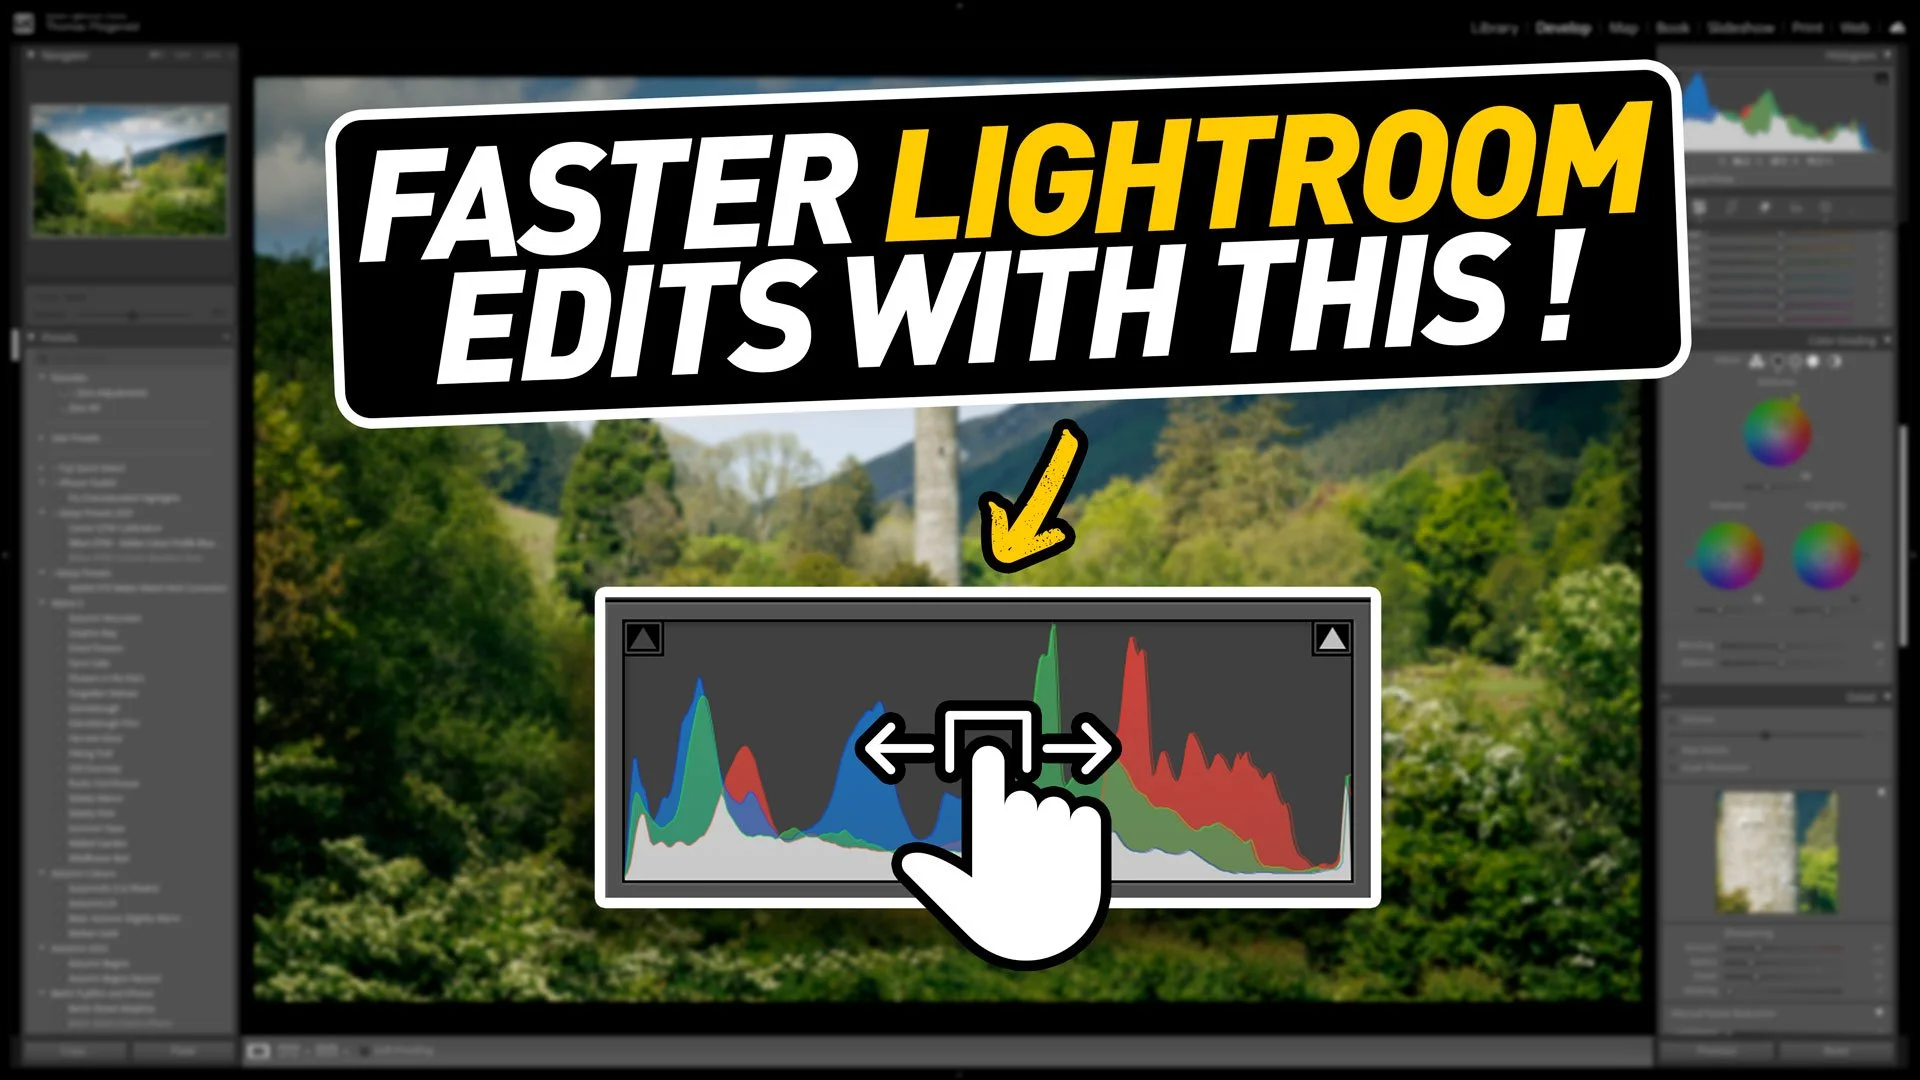
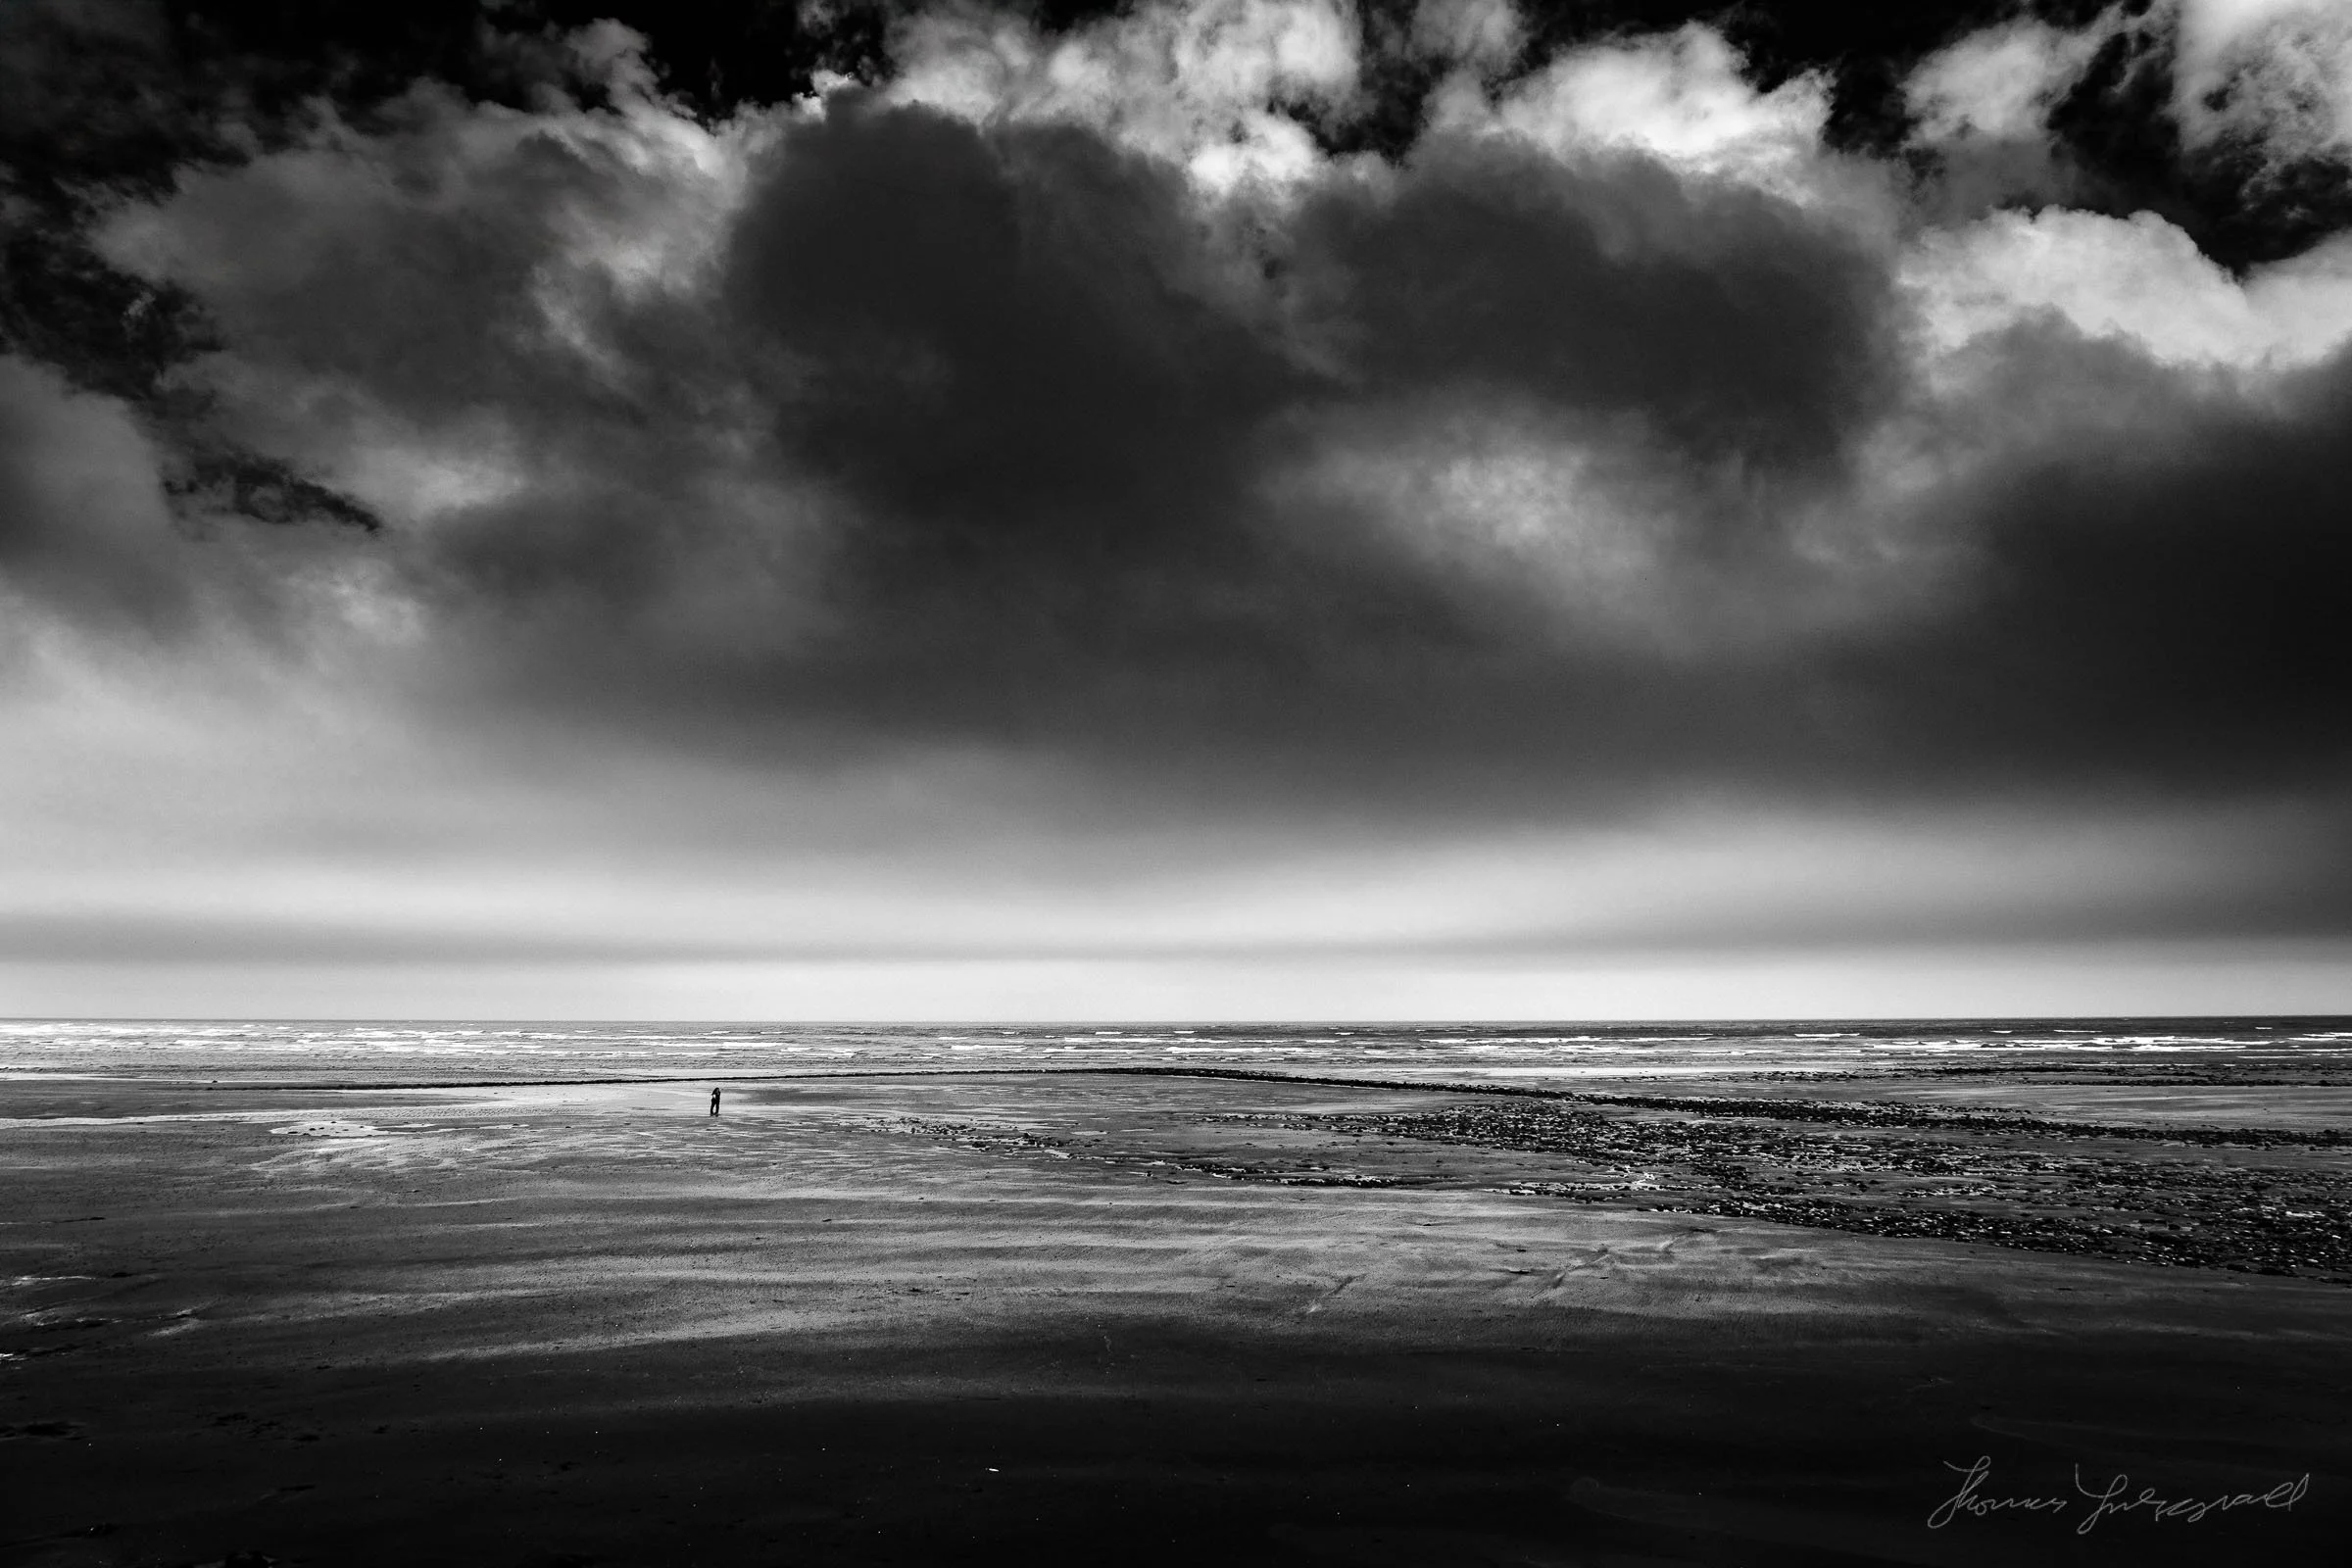
In this video I walk you through how I edited this image from start to finish in Lightroom and Photoshop to add drama to an otherwise flat photo.
(View on YouTube)
If you want to support the content here on the blog but don't want to sign up for Patreon, you can buy me a coffee via PayPal (or whatever you want)
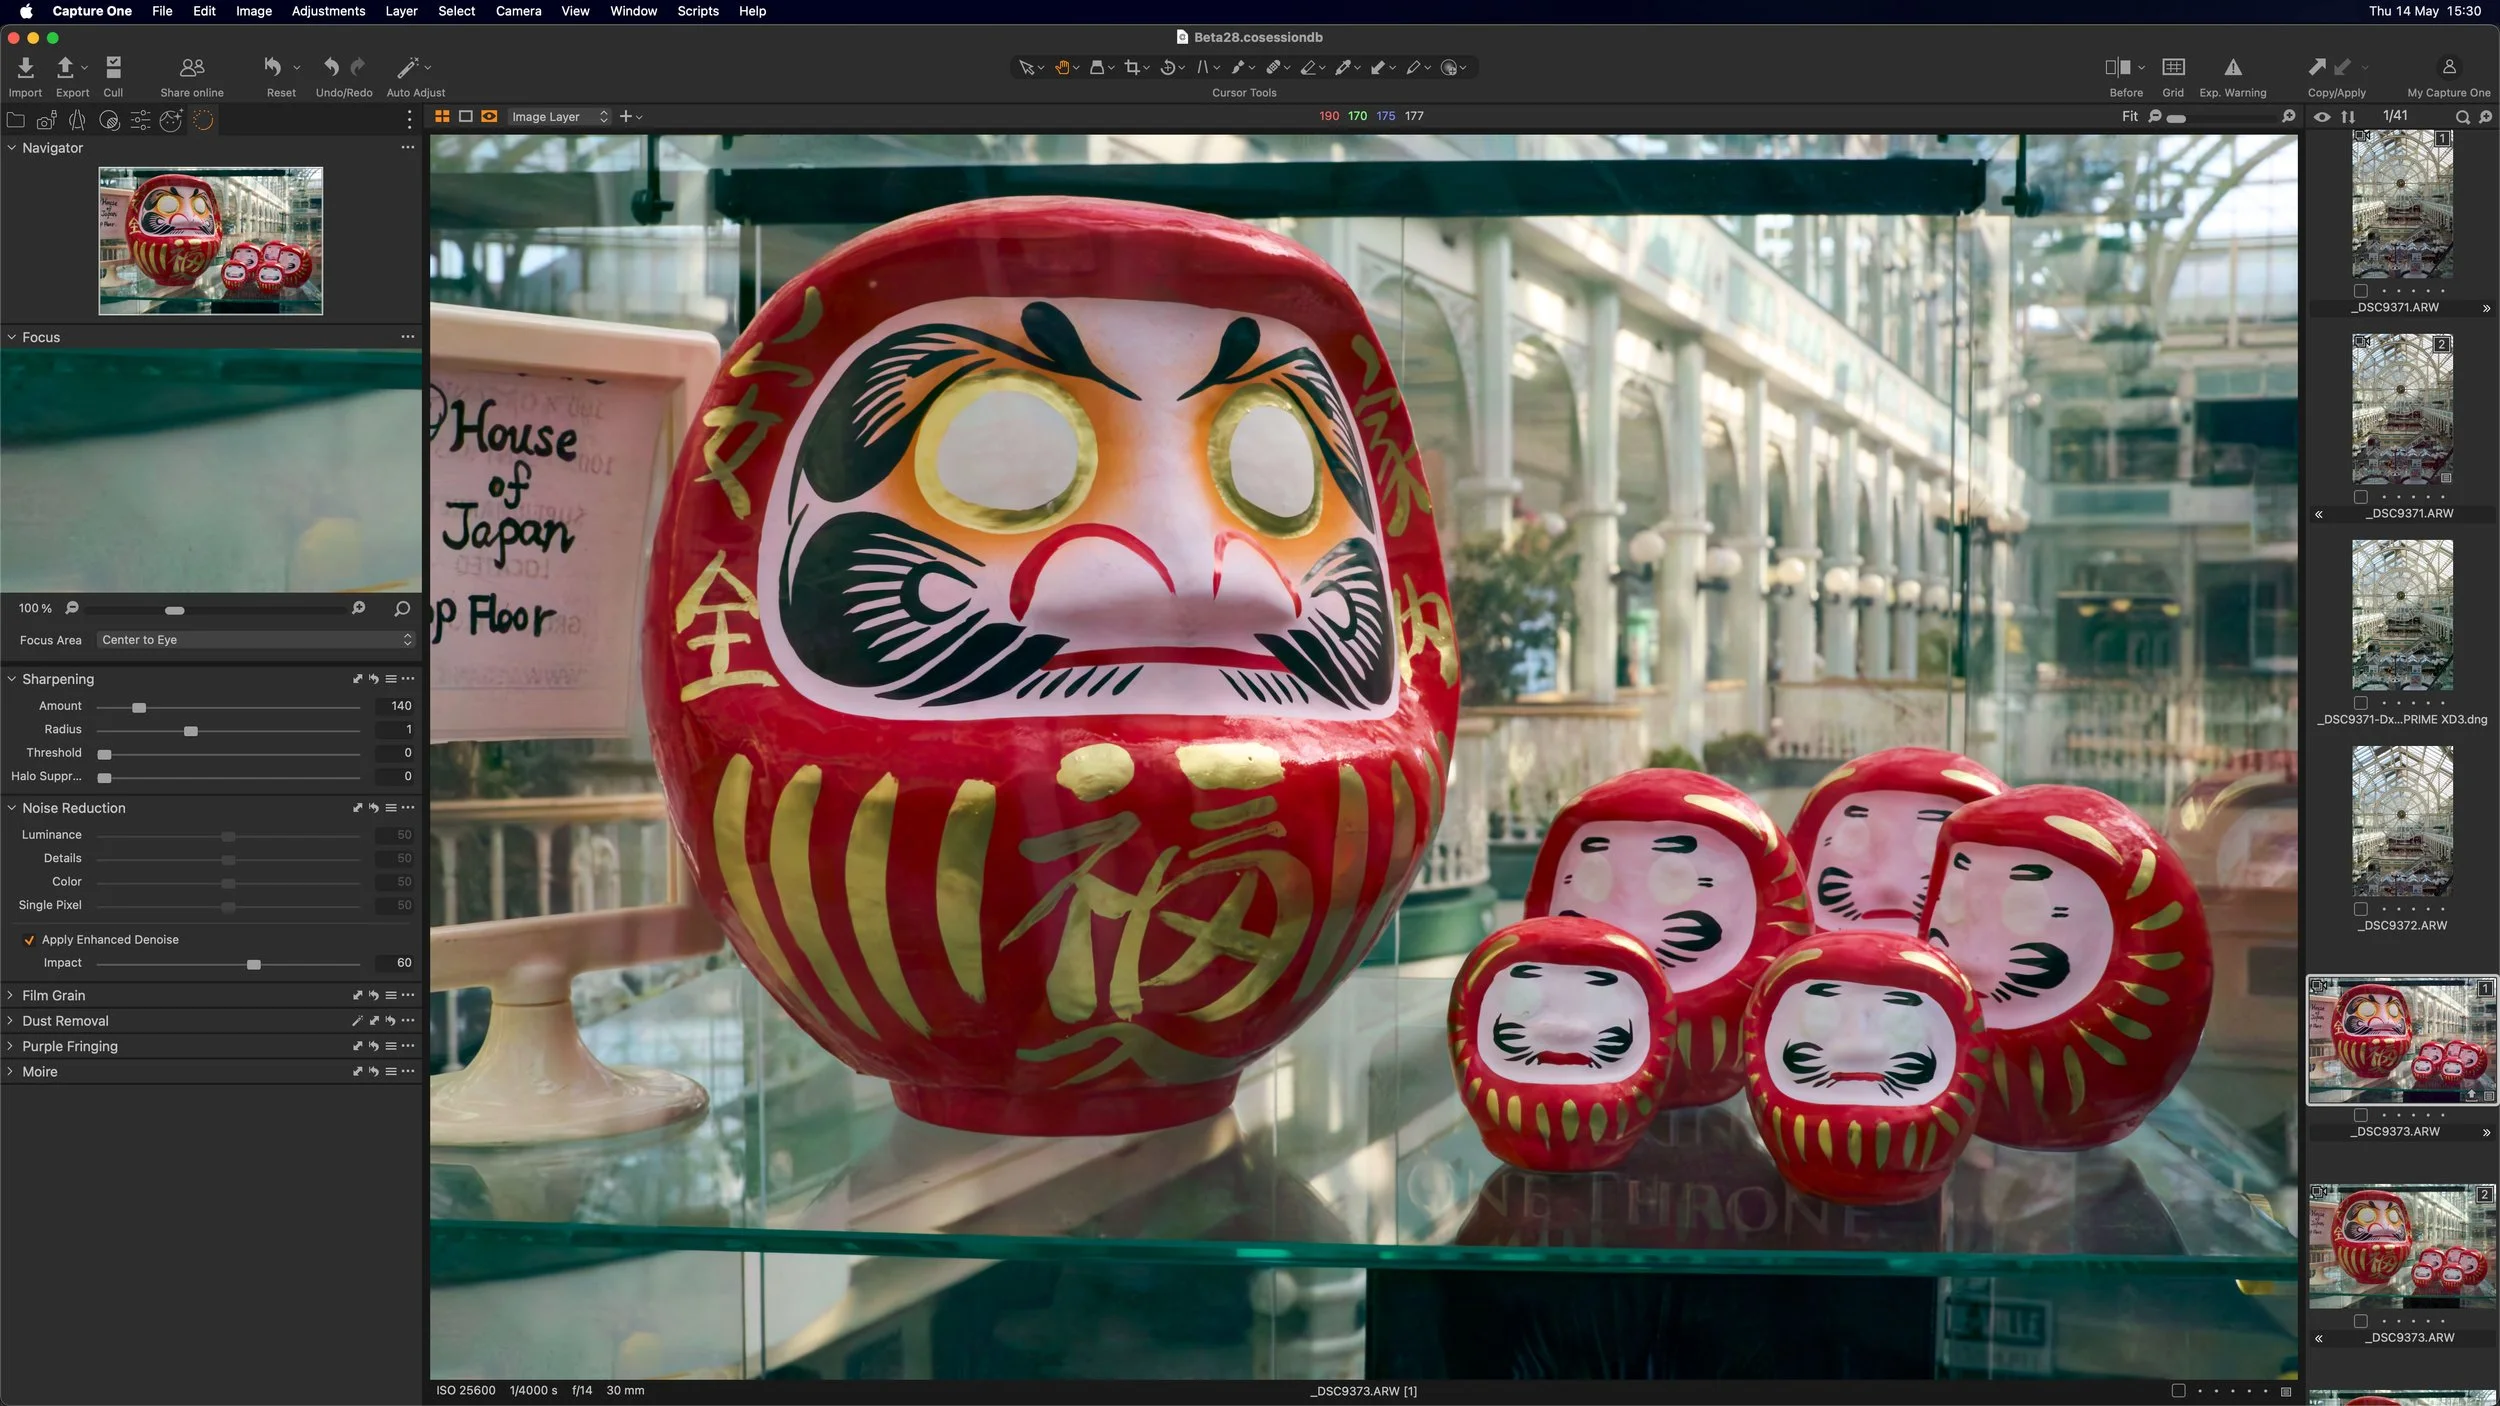